If use the AdvancedCopy Manager Copy Control Module included in the ETERNUS SF Manager
Refer to "6.1.2 Performing the upgrade (for Windows)" to perform the upgrade.
After the upgrade has completed, refer to the following manual for this version and set up the AdvancedCopy Manager Copy Control Module.
"Setup of AdvancedCopy Manager CCM" in the ETERNUS SF Installation and Setup Guide
If install and use the AdvancedCopy Manager Copy Control Module
There are two methods of performing the upgrade, as follows.
Default installation
The following configuration is used without the need to input any values.
Installation destination
The "systemDrive:\ETERNUS_SF" directory is used as the root location for the Program Directory, Environment Directory and Work Directory.
Custom installation
The upgrade is performed by manually entering the configuration information into the interface (installation destination).
The upgrade is performed as follows:
Log on to the server using Administrator privileges.
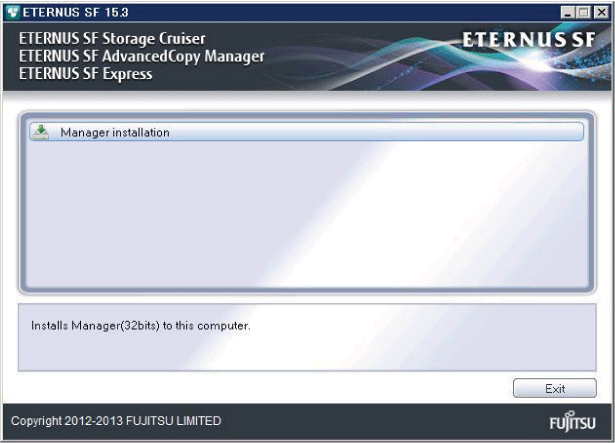
Insert the DVD-ROM "ETERNUS SF SC/ACM/Express Mediapack for Windows (Manager Program) (1/2)" for this version into the DVD-ROM drive.
Refer to "DVD-ROM contents" in the ETERNUS SF Installation and Setup Guide for this version for information on the DVD-ROM structure and detailed contents.
The following window will be displayed. Click Manager installation.
To cancel the upgrade at this point, click Exit.
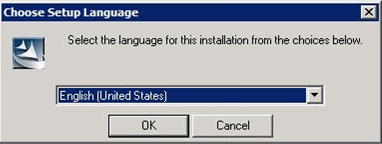
The Choose Setup Language dialog box will be displayed. Select the appropriate language and click OK.
The language selected in this dialog box will be used during installation and uninstallation.
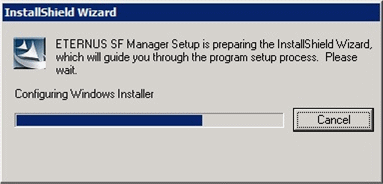
The following progress bar will be displayed. To cancel the upgrade, click Cancel.
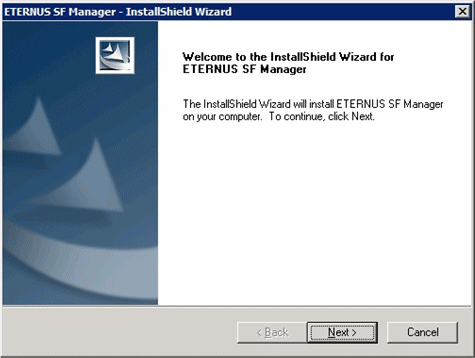
The installation wizard page will be displayed. Click Next.
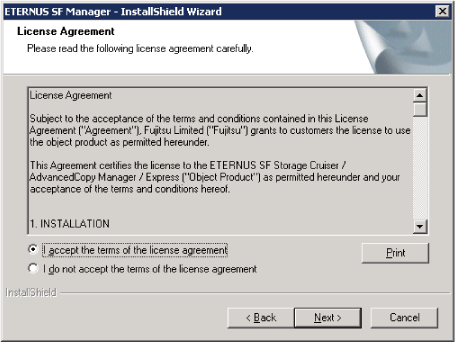
Read the terms and conditions of the License Agreement page.
If the conditions are agreeable, select [I accept the terms of the license agreement] and then click Next.
Select the features and options to install from the Install option page.
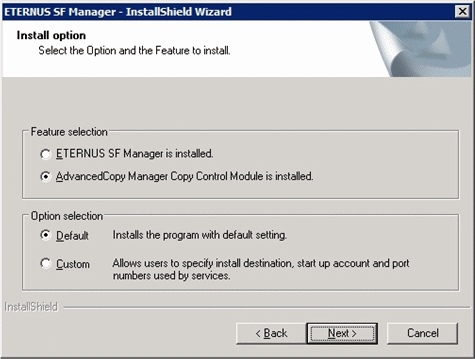
Select [AdvancedCopy Manager Copy Control Module is installed.].
Select the desired options according to the following information.
Install option | Explanation |
|---|---|
Default | Changing values in the Installation Destination page is optional. In this case, step 9 can be skipped. For this installation method, the following checks are automatically performed relating to the information provided by default:
If an error is detected at this stage, a warning dialog box will be displayed. |
Custom | The installation information must be manually entered in the pages of step 9. |
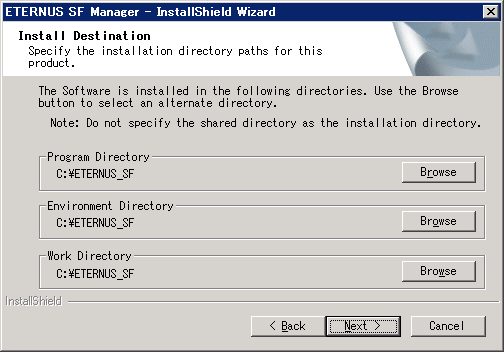
Specify the installation directory in the Installation Destination page.
If installing to a directory other than the default directory, click Browse and change the install destination. After designating all of the directories, click Next.
Note
Spaces and the characters " | : * ? / . < > , % & ^ = ! ; are not supported for file names.
The number of characters in a directory name must be between 4 and 70.
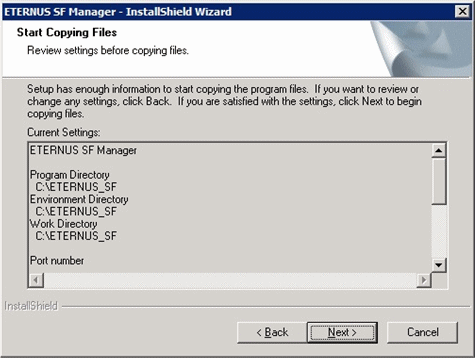
Check the settings information in the Start Copying Files page.
If the settings are correct, click Next.
To change a setting, click Back.
The following dialog box will be displayed. To proceed with the uninstallation, click Yes.
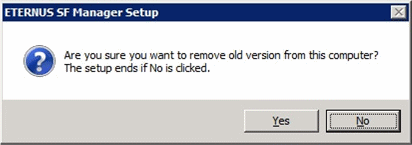
The uninstallation is started.
The uninstallation is executed.
Answer any questions to proceed as the uninstallation executes.
Point
When requested to restart the computer, click No.
If Yes is clicked, the upgrade will be interrupted. When re-executing the installation after a restart of the computer, the installation will be treated as new one.
Do not delete files and folders that are output after uninstallation completes successfully.
When the uninstallation is completed, the copying of the files for the new version will be started.
During this process, the file copy completion status will be displayed in the Setup Status page.
When the copying process is completed, the system configuration will be updated. Wait for the configuration update process to complete.

The following installation wizard page will be displayed. The upgrade process is completed. Click Finish.
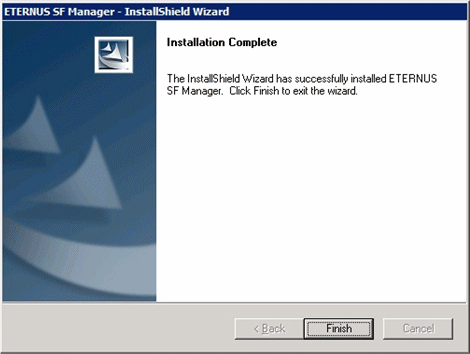
Eject the DVD-ROM.
The upgrade for the AdvancedCopy Manager Copy Control Module is complete. Perform "6.3.4 Tasks to be performed after the upgrade" afterwards.