There are two methods of performing the installation of ETERNUS SF Manager for Windows.
Default installation
The following configuration is used without the need to input any values.
Installation destination
The "systemDrive:\ETERNUS_SF" directory is used as the base location for the Program Directory, Environment Directory, and Work Directory.
Port numbers for the various communication services
11 port numbers are used, as follows:
Service | Display name on the [Port Registration] screen | Used port number |
|---|---|---|
Web Console service | ETERNUS SF Manager Apache service | 9855 |
Communication service 1 | Communications service 1 | 1226 |
Communication service 2 | Communications service 2 | 4917 |
Repository service 1 | Repository service 1 | 2004 |
Repository service 2 | Repository service 2 | 15432 |
Remote access service | Remote access service | 9851 |
Exclusive control service | Exclusive control service | 9852 |
Internal use | Internal Port 1 | 28005 |
Custom installation
Installation is done by entering the configuration information on the screen (installation destination, communication service port numbers).
Note
When the user who belongs to Administrators of the domain installs the ETERNUS SF Manager in Windows Server 2008 or later, the Windows "Computer Browser service" must be started.
Using the following services for carrying out installation requires particular caution.
Terminal service (via a remote desktop connection)
If the server is running on Windows Server 2003, the Terminal Service must connect to the console session (ID 0).
Refer to the following links for information on how to make console session connections:
http://support.microsoft.com/kb/947723/en
http://support.microsoft.com/kb/278845/en
Use DVD-ROM to install ETERNUS SF Manager.
Do not copy DVD-ROM contents to a local directory for installing ETERNUS SF Manager.
Do not rename, change, and delete the install directory after the installation.
In the process of the installation, a user account "esfpostgres" is created on the operating system. This account is internally used by the ETERNUS SF system.
Do not change and delete this account because it is necessary to operate the ETERNUS SF system.
When reinstall on Windows Server 2012, if you change the port number of the following services of ETERNUS SF Manager, delete the following service names that are defined in the %SystemRoot%\system32\drivers\etc\services file, and then reinstall.
stgxfws
rmiswstf
semswstf
rdaswstf
The installation is performed as follows:
Log on to the server using Administrator privileges.
Insert the DVD-ROM "ETERNUS SF SC/ACM/Express Mediapack for Windows (Manager Program) (1/2)" for this version into the DVD-ROM drive.
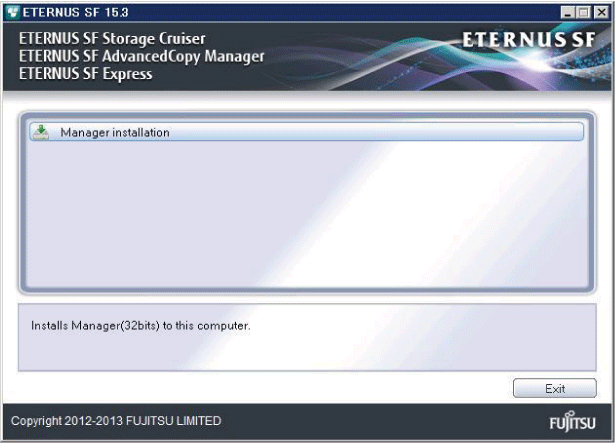
The following window will be displayed. Click Manager installation.
To cancel the installation at this point, click Exit.
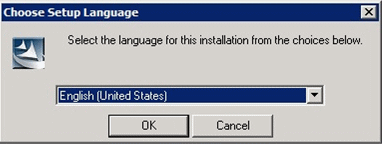
The Choose Setup Language dialog box will be displayed. Select the appropriate language and click OK.
The language selected in this dialog box will be used during the installation and uninstallation.
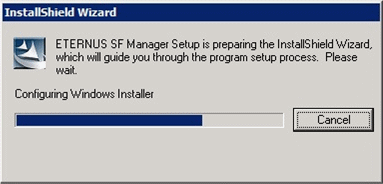
The following progress bar will be displayed. To cancel the installation, click Cancel.
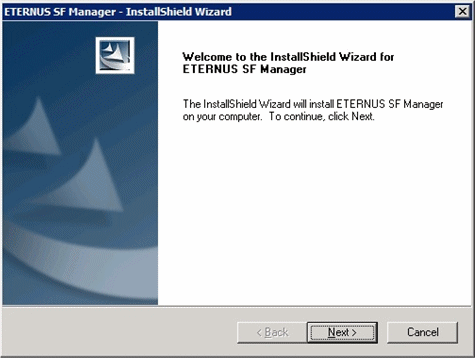
The installation wizard page will be displayed. Click Next.
Read the terms and conditions of the License Agreement page.
If the conditions are agreeable, select [I accept the terms of the license agreement] and then click Next.

Select the features and options to install from the Install option page.
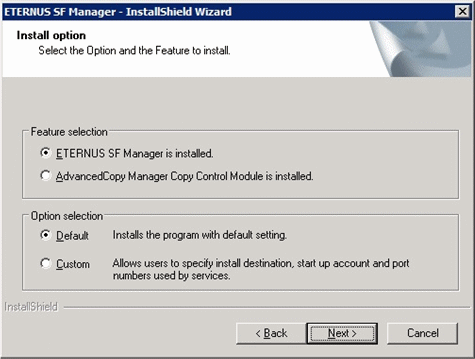
Select [ETERNUS SF Manager is installed.].
Select the desired options according to the following information.
Install option | Explanation |
|---|---|
Default | Changing values in the Installation Destination page and Port Registration page is optional. In this case, steps 9 and 10 can be skipped. For this installation method, the following checks are automatically performed relating to the information provided by default:
If an error is detected at this stage, a warning dialog box will be displayed. |
Custom | The installation information must be manually entered in the pages for step 9 and later. |
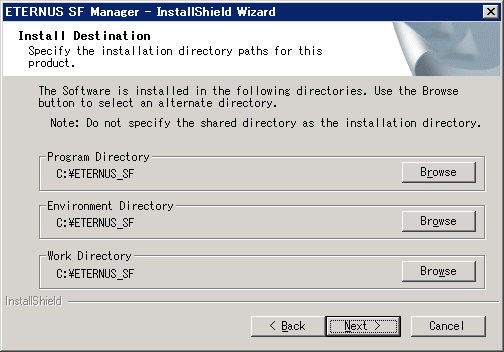
Specify the installation directory in the Install Destination page.
If installing to a directory other than the default directory, click Browse and change the install location. After designating all of the directories, click Next.
Note
Spaces and the characters " | : * ? / . < > , % & ^ = ! ; are not supported for file name.
The number of characters in a directory name must be between 4 and 70.
Specify the port number for the services in the Port Registration page.
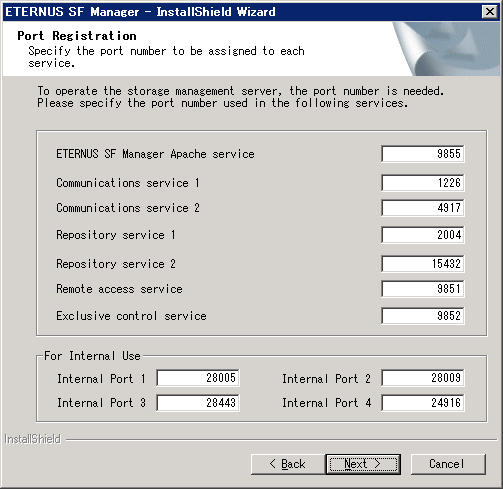
The default values are displayed. If necessary, enter alternative port numbers suitable for your environment. Values between 5001 and 32767 are valid.
Then, click Next. If an entered value is already being used, the page will be displayed again.
Check the settings information in the Start Copying Files page.
If the settings are correct, click Next.
To change a setting, click Back.
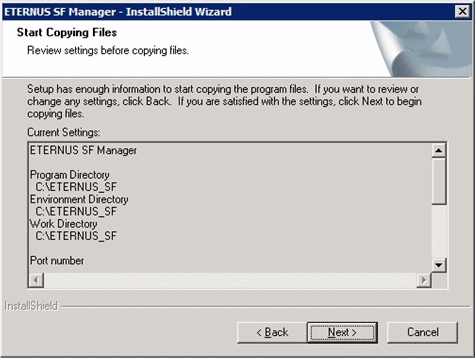
Copying the program will be started.
During this process, the file copy completion status will be displayed in the Setup Status page.
When the copying process is completed, the system configuration will be updated. Wait for the configuration update process to complete.


Enter the requested information for the repository database creation in the following page.
Then, click Continue.
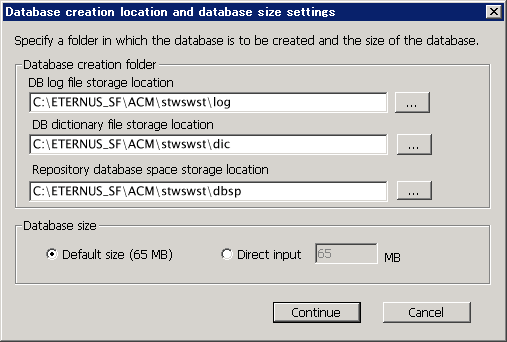
This is the folder where the database will be created.
Enter the full path for each of the database directories shown below. The specified folders must be new NTFS folders. Only specify NTFS folders using unique folder names.
The default repository database will be displayed in each field. Change as necessary.
DB log file storage location
Specify the folder for storing the RDB log file.
DB dictionary file storage location
Specify the folder for storing the RDB dictionary file.
Repository database space storage location
Specify the folder for storing the repository database space.
Note
Do not specify a shared folder in which to create the database.
The number of characters in a folder name must be between 4 and 80. Spaces and the characters " | : * ? / . < > , % & ^ = ! ; # ' @ are not supported for file names.
Do not select the option [Compress drive to save disk space] in the General tab for any of these drives.
Overhead is greater to a compressed drive than a non compressed drive. Depending on the amount of I/O, access errors may occur in low OS resource conditions.
Do not check the [Compress or Encrypt Attributes] in the Advanced Attributes section of the Properties or Advanced part of the General tab.
Load is increased for a compressed and/or encrypted drive. Access errors may occur in an OS with insufficient resources.
If the encryption property is selected, access errors may occur when decryption cannot be performed.
The database size is entered in megabyte units.
The size to enter is the result of the calculation performed before installation as described in "3.1.4 Estimation of database size". To use the default value, select the Default size (65 MB) checkbox.
Select the Default size (65 MB) checkbox.
The following page will be displayed. The default values will be displayed in the page. Change as necessary.
Enter the IP address and the database user settings. Then, click Settings.
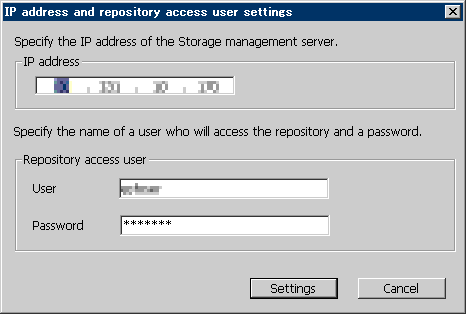
Enter the IP address of the Management Server (local system).
Specify the IPv4 address confirmed with "3.1.9 IP address confirmation".
Enter user name and password for the repository access user.
The user name entered here must have local login or domain login permissions at the OS level.
The following conditions apply for the user names and passwords:
The user name and password must be compatible with the base operating system.
The user name and password can be up to 18 characters (bytes).
Refer to "Installation procedure" in the Software Release Guide for the default user name and password. However, use other than default value because of security reasons.
Note
When Management Server has two or more IP addresses, specify IP address that can communicate to Management Server from all AdvancedCopy Manager's agents.
Specify IPv4 for the IP address if both IPv4 and IPv6 are used for Management Server operation or when only IPv6 is used for Management Server operation. Add and make changes to the IPv6 address once installation is complete, referring to "4.4.5 Updating Management Server IP address information".
When the user who belongs to Administrators of the domain installs the ETERNUS SF Manager in Windows Server 2008 or Windows Server 2008 R2, the Computer Browser service of Windows operating system must be started. If the installation is performed when the Computer Browser service is not started, the database setup processing might fail and the "Machine information cannot be obtained" message will be displayed.
See
If the user name specified here has not been registered to the system, perform the registration, and add either local login or domain login permissions. Refer to the table below and specify a user that corresponds to the server type being used.
Server type | User to be specified |
|---|---|
Domain Controller | Domain user |
Machine that belongs to the domain | Local user |
WORKGROUP (does not belong to the domain) |
When specifying a user name that has been registered to the system, use identical characters (e.g. uppercase and lowercase letters) that were used for the registered user name.
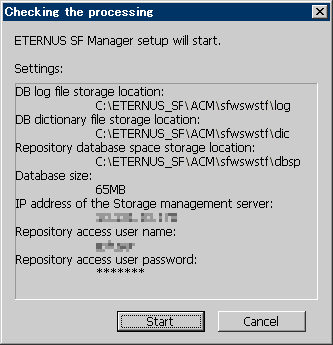
The following page will be displayed. Check the contents and click Start.
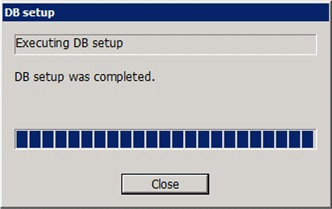
The database setup process starts. The following progress bar will be displayed, when the process is completed, click Close.
The following installation wizard page will be displayed. The installation process is completed. Click Finish.

Eject the DVD-ROM.
The ETERNUS SF Manager (for Windows) installation is completed.