In Systemwalker Runbook Automation Studio, you can create User Defined Attributes (UDAs) of type XML to enhance the flexibility of the system.
XML data types allow you to invent as many different elements and attributes as you need. In addition, UDAs of type XML are easy to use, unlimited and self-defining.
To specify a UDA of type XML:
Click the empty space in the Process Definition Editor or select a node, to display the Properties view for the process definition or the selected node respectively.
Select the User Defined Attributes tab.
Click Add, and select XML as type for the UDA.
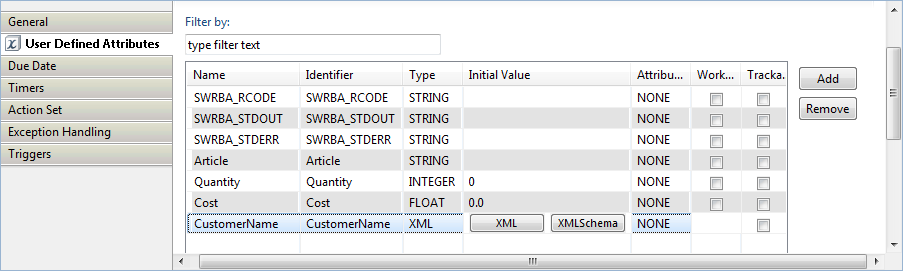
In the Properties view, the Initial Value column displays the XML and XML Schema buttons. If you select a non-XML UDA type, these buttons are not available.
Figure 6.19 Displaying UDAs
Note
UDAs of type XML cannot be Worklist UDAs. Hence, if you select a UDA of type XML, the Worklist column will be disabled.
In the Name and Identifier fields, specify the general parameters for the UDA of type XML. Refer to section 6.18 Specifying User Defined Attributes for a detailed description of these parameters.
In the Initial Value column, select the XML button. The UDA Value Editor dialog box is displayed.
Type in a value for the UDA, or browse for an XML file.
Type in a UDA value: In the UDA Value field, type in a value for the UDA.
Browse for a file: Click the Browse button to select a file from the local file system. The UDA Value Editor dialog displays the content of the file. Select a value from the content of this file, and click OK.
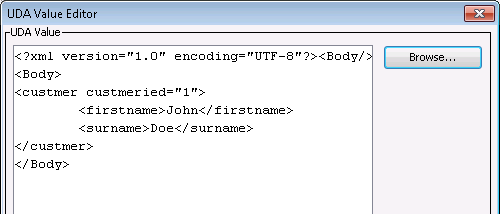
The following example shows how to specify an XML value in the UDA Value Editor dialog:
Figure 6.20 Specifying a UDA value
Optional: In the Initial Value column, select the XML Schema button.
The XML Schema Editor dialog is displayed. You can use this dialog to type in an XML Schema for the UDA, or browse for a schema file (.xsd) in the local file system.
Type in an XML Schema for the UDA, or browse for an XML file.
Type in an XML Schema: In the XML Schema field, type in the XML Schema for the UDA.
Browse for a file: Click the Browse button to select a file from the local file system. The XML Schema Editor dialog displays the content of the file. Select a value from the content of this file, and click OK.
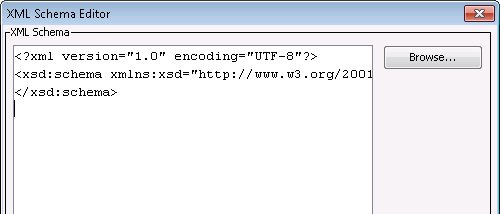
The following example shows how to specify an XML Schema in the XML Schema Editor dialog:
Figure 6.21 Specifying an XML Schema
Repeat the last step for all UDAs of type XML that you want to specify.
Similarly to all other UDA types, you can do the following:
Display the UDA identifier: If you want to display or change the UDA identifier, select the Show Identifier check box. The identifiers are then displayed in a separate Identifier column.
Rename the UDA: If you want to rename the UDA, double-click its name and type in a new name.
Remove a UDA: If you want to remove a UDA, select it and click Remove.