This section explains the procedure for importing folders or files from a file system
Prerequisite:
You have created a Workflow Application project where you can import folders and files.
Note
Existing folders and files can only be imported into the default web folder or the dms folder and their subfolders.
In the Navigator view, right click the Workflow Application project folder where you want to import the files. Select Import from the popup menu. In the following example, two QuickForms are to be imported to your workspace:
Figure 3.5 Importing Folders and Files
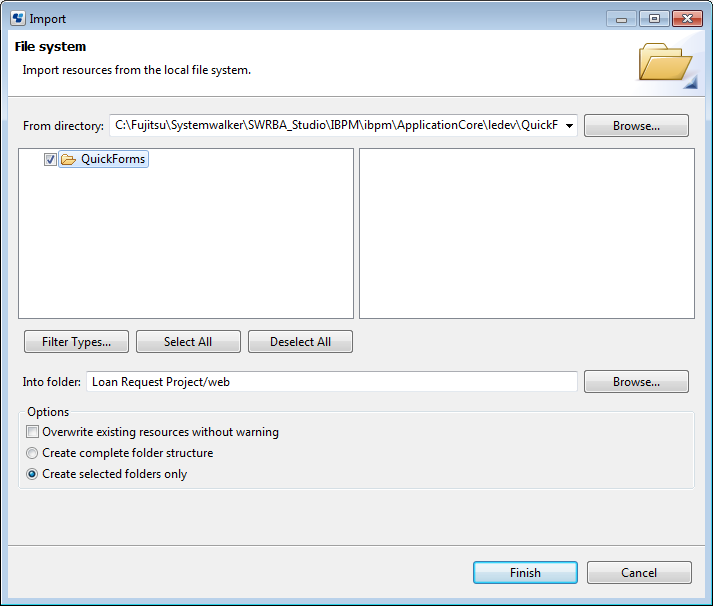
Click Browse and navigate to the directory where the folders and files are stored that you want to import in your Workflow Application project. Select an existing folder and click OK.
Select the folders and files to be imported.
The Into folder field shows the path of the folder you selected when starting the import function. You can change this path if you want to import the folders and files into a different project or folder of your Workflow Application project.
Decide whether you want to overwrite existing folders and files without warning, and whether your Workflow Application project is to contain the complete folder structure or the selected folder or file only.
Click Finish.
The selected files (QuickForms, in the example above) contained in the local directory will be imported into your Workflow Application project.
Note
If the Create Complete folder structure option has been selected, confirmation messages for overwriting files will not be displayed, regardless of whether the Overwrite existing resources without warning option is selected.
Note
In addition to importing folders and files from the local file system, you can also import entire Workflow Application projects to your workspace. For more information, refer to section 3.1.12 Importing Workflow Application Projects.