After the Report Output Tool has been installed, the environment for using the Report Output Tool should be constructed. This section describes the procedure for environment setup and the contents of setting required for report output.
Items to be set are as follows:
Set the Log Analyzer Server connected when report is generated.
Set the user ID and password of the administrator for executing the report output batch command in the Log Analyzer Server.
Specify the detail level of logs to be output by the Report Output Tool.
Note
Environment setup must be performed after the installation of Report Output Tool
After the installation of the Report Output Tool, only [Trace Level] will be set. (for information of Log Analyzer Server, only the setting at installation is disabled.)
Before executing the Report Output Tool, please perform the settings in sequence of [Server] setting and [Batch User] setting according to the following operation procedure.
In addition, it is not necessary to change the setting of [Trace Level].
The operation procedure is as follows:
On the PC with Report Output Tool installed, log on to Windows with a user that belongs to the Administrators group or a user that belongs to the Domain Admins group.
Note
Do not forget the logon account
The user name and the password logged on to Windows here are required at the logon to Windows when the report output schedule is set. Please write a note, and do not forget the password.
Select [All Programs] - [Systemwalker Desktop Keeper] - [Log Analyzer] - [Report Output Environment Setup] from the [Start] menu.
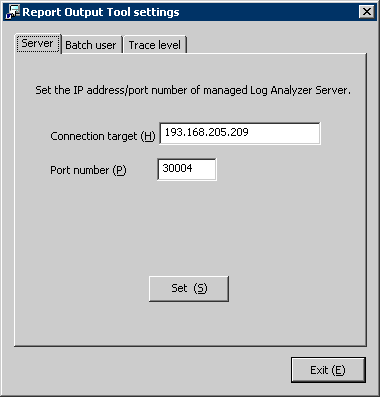
Select the [Server] tab to set server information.

Item Name | Description |
|---|---|
[Connection target] | The IP address of Log Analyzer Server to be connected set at installation will be displayed. Please modify if necessary. The size of characters that can be set is 18 bytes. |
[Port number] | Port number of Log Analyzer Server to be connected set at installation will be displayed. Please modify if necessary.. The size of characters that can be set is 5 bytes. |
Click the [Set] button. The setting confirmation window will be displayed. Please click the [Yes] button to continue. In addition, the value after setting will become the default value at next startup.
Note
When window related with Data Execution Prevention is displayed
When the relevant window of Data Execution Prevention is displayed in the process of setting, please refer to the note of “When Window Related with Data Execution Prevention is Displayed” in Step 7 of “2.8.1 Install Report Output Tool ” to exclude the “F3CWDELA.EXE” program from the target of Data Execution Prevention (DEP) function and reset.
After the sever setting has been perform normally, the completion message will be displayed. Click the [OK] button.
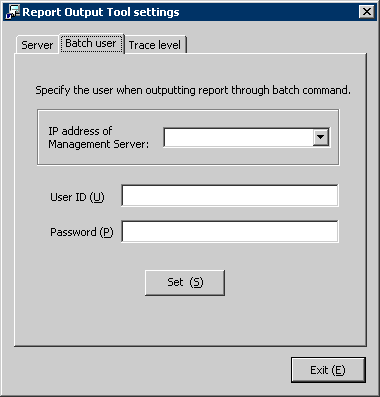
Select the [Batch User] tab and set the information of batch users. 
Item Name | Description |
|---|---|
[IP address of Management Server] | Specify the IP address of Systemwalker Desktop Keeper Master Management Server or Management Server that registers batch users. Enter the string within 15 bytes in the IP address format. |
[User ID] | Specify the user ID. The user ID of the administrator that already existed in the Sever Setting Tool can be specified. |
[Password] | Specify the password of the user ID to be entered in [User ID]. |
Click the [Set] button. The setting confirmation window will be displayed. Click the [Yes] button to continue.
After the setting of batch user has been performed normally, the completion message will be displayed. Click the [OK] button.
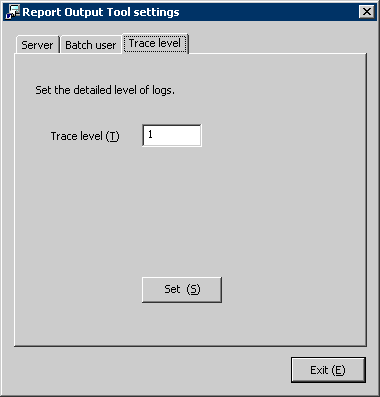
Select the [Trace Level] tab to set the detail level of log. 
Item Name | Description |
|---|---|
[Trace Level] | Specify the detail level of log. Values can be specified are as follows: 1: Output startup/completion and error; 2: Output detailed trace information. The initial value is 1. |
Click the [Set] button. The setting confirmation window will be displayed. Click the [Yes] button to continue.
After the setting of trace level setting has been performed normally, the completion message will be displayed. Click the [OK] button.
After all the settings have been completed, click [Exit] to close the “Report Output Tool settings” window.