This section describes how to newly construct a database of Systemwalker Desktop Keeper Log Analyzer Server.
Note
When constructing database, be aware of the following restrictions and notes
When migrating from Systemwalker Desktop Log Analyzer to Systemwalker Desktop Keeper V14.2.0, data shall be transferred again. Before constructing database, please refer to “Chapter 4 Version Upgrade”.
Please do not set compression or encryption settings for the drive and folder for constructing the database.
Please exclude the folder for constructing the database from the targets of virus scan software.
Please do not delete the Windows logon user (Log Analyzer user) who has constructed the database environment constructed. When deleting the database environment, migrating database environment and restoring management information and log data, the Windows logon user used when the database environment was constructed is required.
Please confirm the maximum log size of the event viewer (application log) and the operation settings when the maximum is reached in advance, and confirm that the event logs can be recorded properly. Construction of the database will be interrupted if no event log is recorded.
Items to be confirmed before database construction
In the Log Analyzer Server, the following ports will be used for access to database:
No. 30003
No. 30004
If the above port numbers have been used, please refer to “Port Number List” of “Systemwalker Desktop Keeper Reference Manual” before constructing the database, and change the environment of Systemwalker Desktop Keeper.
Standard of database construction time
The amount of time needed to construct the database will depend on the capacity of the database. The standard of creation time is as follows:
When database capacity is about 50GB, (Xeon 3.16GHz, memory 4GB and RAID1 structure)
Measured conditions
Number of clients: 250 sets
Number of file operation logs: 500 pieces
Number of non-file operation logs: 500 pieces
Number of months to save: 4 months
DB construction time: around 30 minutes
* Processing time is a reference value because changes will occur due to reasons such as the operation status of CPU, memory, disk performance and other applications of PC.
The steps to construct Systemwalker Desktop Keeper Log Analyzer Server database are as follows:
Log on as a Log Analyzer user (Windows account set at installation of Log Analyzer Server).
Select [All Programs] - [Systemwalker Desktop Keeper] - [Log Analyzer] - [Operating Environment Maintenance Wizard] from the [Start] menu.
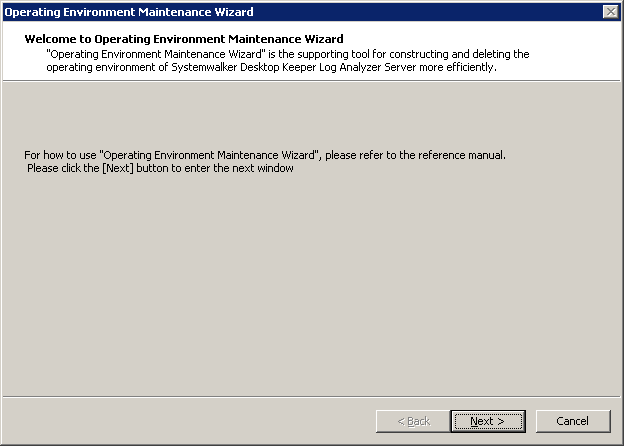
The “Welcome to Operating Environment Maintenance Wizard” window is displayed. Please click the [Next] button.

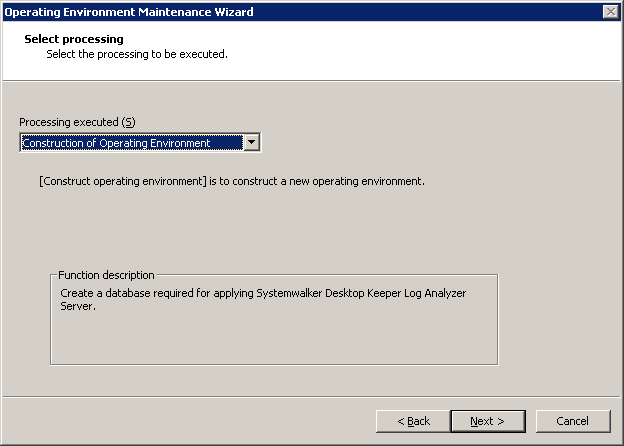
“Select processing” window is displayed. Please set “Processing executed” and click the [Next] button.

Item Name | Description |
|---|---|
[Processing executed] | Select the processing to be executed. Please select “Construction of Operating Environment” here.
|
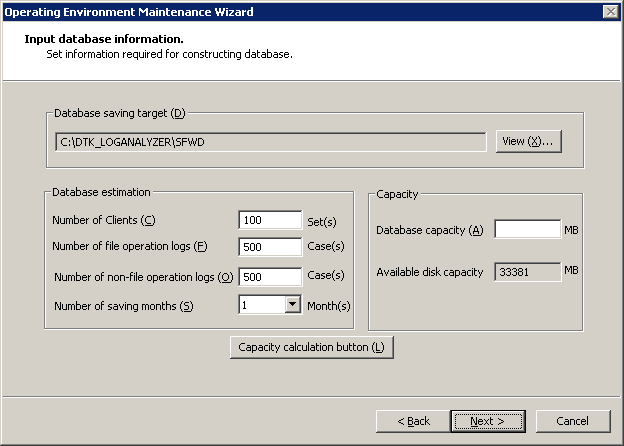
The “Input database information” window will be displayed.
Please set [Database saving target] and [Database estimation], and click [Capacity calculation button].
Please confirm [Database capacity] and [Available disk capacity] displayed in [Capacity], and change [Database saving target] when [Available disk capacity] is insufficient. In addition, [Database capacity] can be added according to the needs. Please set [Database capacity] directly.
After confirming [Database saving target] and [Database estimation], click the [Next] button.

Item Name | Description | |
|---|---|---|
[Database saving target] | Enter the creation target of database. The initial value is “C:\DTK_LOGANALYZER\SFWD”. When changing the creation target to be displayed, please click the [Browse] button to change the folder. Up to 32 bytes of characters can be specified in the database creation target file name. Multi-byte characters such as space, Hiragana, Katakana and Chinese characters cannot be specified. In addition, the following drives cannot be specified:
| |
[Database estimation] | [Number of Clients] (required) | Enter the number of CTs managed in this server within the range of 1-99999. |
[Number of file operation logs] (required) | Enter the number of file operation logs within the range of 1-99999. | |
[Number of non-file operation logs] (required) | Enter the number of non-file operation logs within the range of 1-99999. | |
[Number of saving months] (required) | Select the number of months to save between 1-12. | |
[Capacity] | [Database capacity] (required) | Set the items in [Database estimate] and display the estimated value when the [Capacity calculation button] button is clicked. When disk capacity available for the database creation target is sufficient, and creation is made with the capacity expected to be larger than the estimated capacity, please reset this item within the range of disk capacity available. |
[Available disk capacity] | The capacity available of the target disk of creation is displayed. | |
Note
About [Number of Months to Save]
The partition of the database is the specified number of months to save x 31 log saving spaces.
For example, if the number of months to save is 3, it is divided into 3×31=93 saving spaces.
Every time when data transfer command is started, data will be saved to saving space 1, saving space 2 and saving space 3, etc. However, after the saving space 93, it will return to saving space 1 and overwrite. Therefore, the old data of correspondent space will be deleted.
In addition, when the data saved by overwriting cannot be written into the existing saving space, several saving spaces after that might be deleted.
As mentioned above, in spite of circulated use of the saving space corresponding to [Number of Months to Save], please be aware that not only the oldest data in operation time, but the old data that has been transferred in the earliest will also be overwritten.
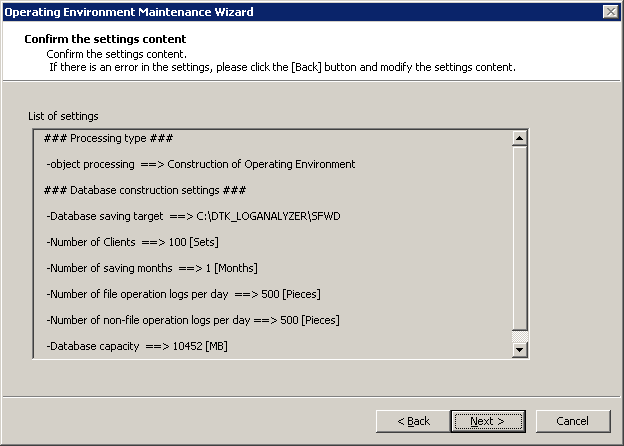
The “Confirm the settings content” window is displayed. Please confirm if the content displayed in the window has mistakes, and click the [Next] button.
The [Processing] window is displayed, and database creation is started.

After the processing has completed normally, the [Processing Completed] window will be displayed. Please click the [Finish].