In Systemwalker Desktop Keeper, use Web viewer to perform log viewing and analysis. In order to perform management with IIS, it is necessary to install and set IIS before installing a Management Server/Master Management Server.
■ Under Windows Server® 2003(IIS 6.0) environment
Steps to newly install IIS are as follows.
Select [Administrative Tools] - [Manage Your Server] from the [Start] menu.
After [Manage Your Server] window is displayed, please click [Add or remove a role]. 
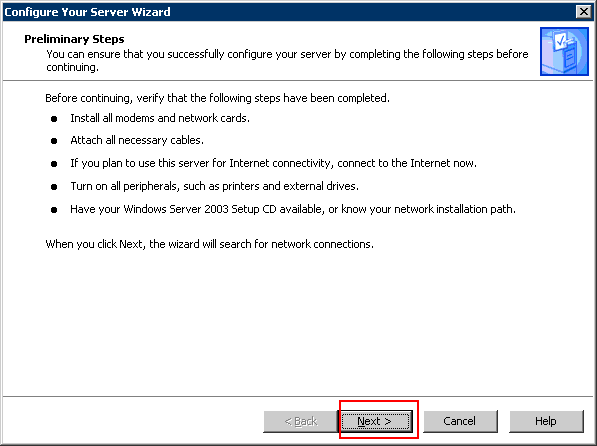
After [Preliminary Steps] window is displayed, please click the [Next] button.
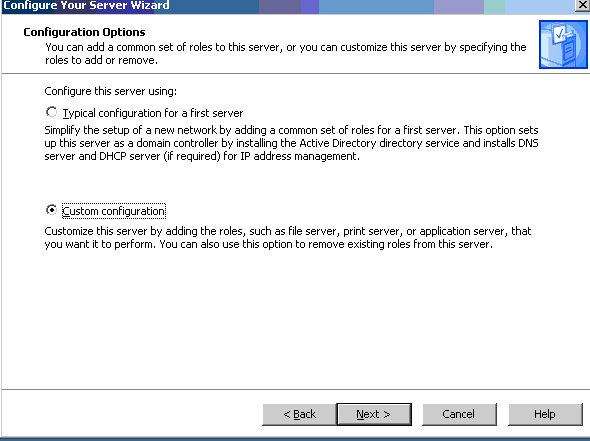
After the [Configuration Options] window is displayed, please select [Custom Configuration] and click the [Next] button.
After the [Server Role] window is displayed, please select [Application server (IIS, ASP.NET)] and click the [Next] button.

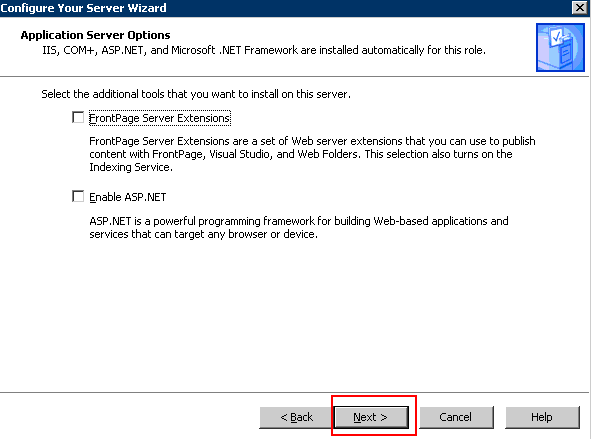
After the [Application Server Options] window is displayed, please click the [Next] button.
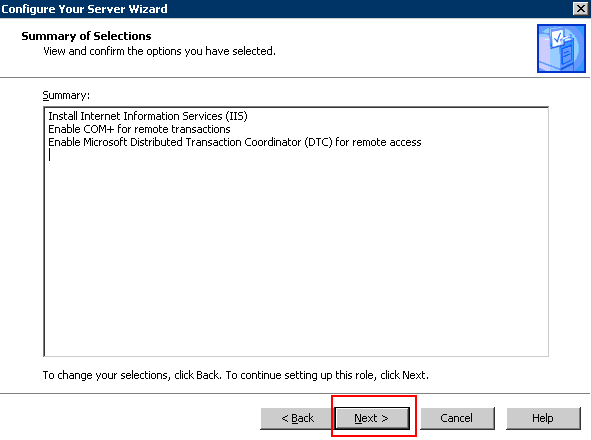
The [Summary of Selections] window will be displayed. Confirm the content and click the [Next] button.
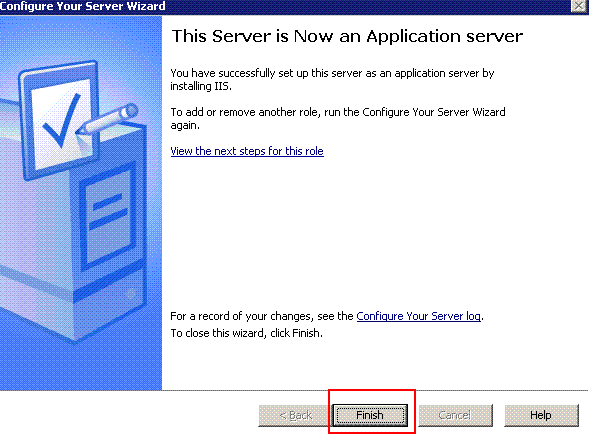
After installation has completed, please click the [Finish] button.
■ Under Windows Server® 2008/Windows Server® 2008 R2 (IIS 7.0/IIS 7.5) environment
Under Windows Server® 2008, ISAPI extensions should be installed in advance.
Installation steps of ISAPI extensions are as follows:
Select [Administrative Tools]-[Server Manager] from the [Start] menu.
The “Server Manager” window is displayed. Please click [Add Roles].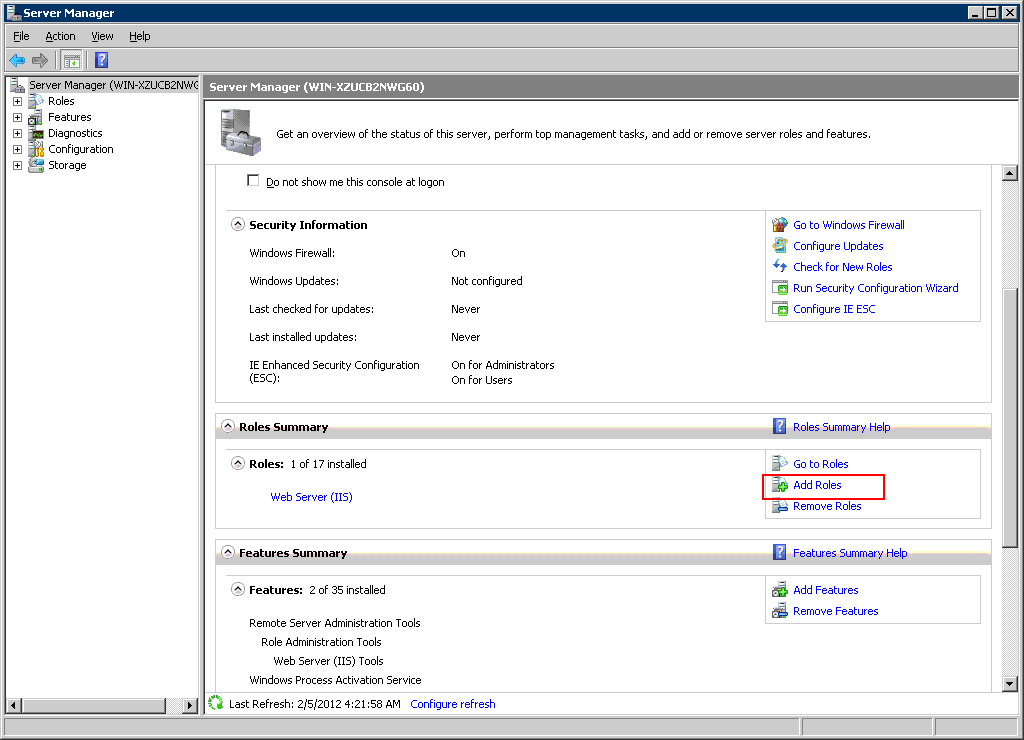
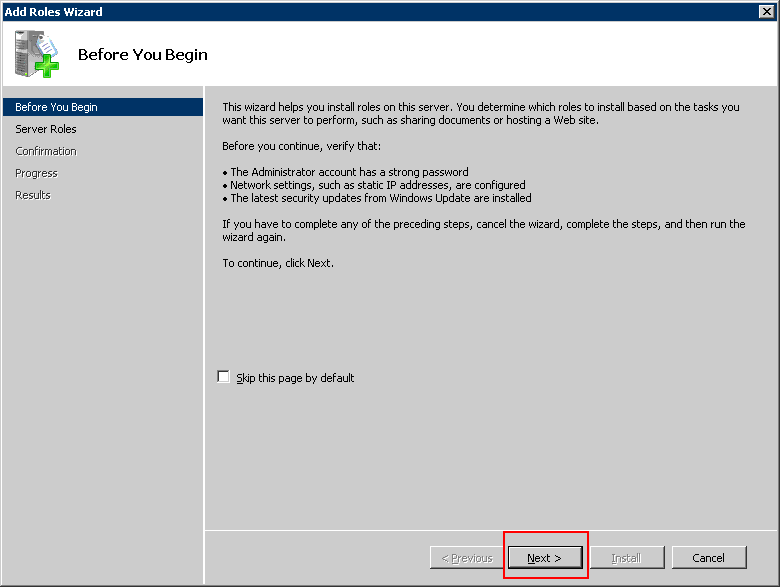
After the window “Before You Begin” of “Add Roles Wizard” is displayed, please click [Next].
The “Select Server Roles” of “Add Roles Wizard” window is displayed. Please select [Web Server (IIS)] and click [Next].

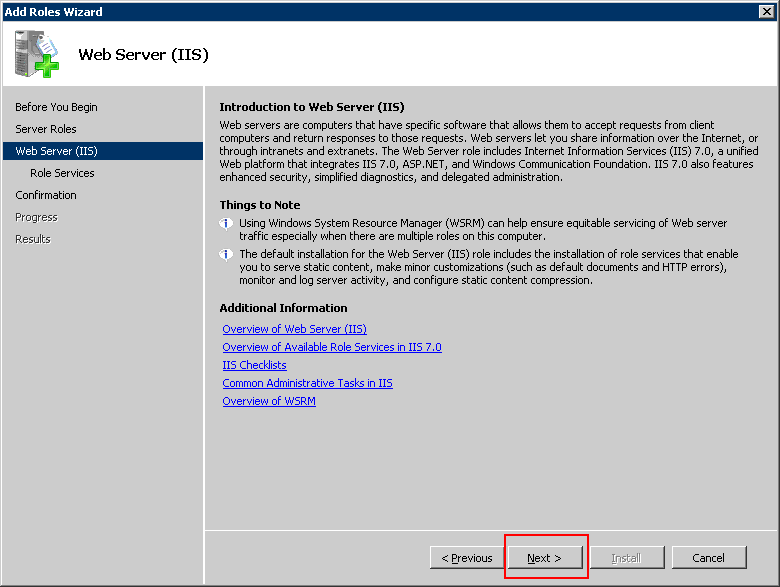
The “Web Server (IIS)” of “Add Roles Wizard” window is displayed. Please click [Next].
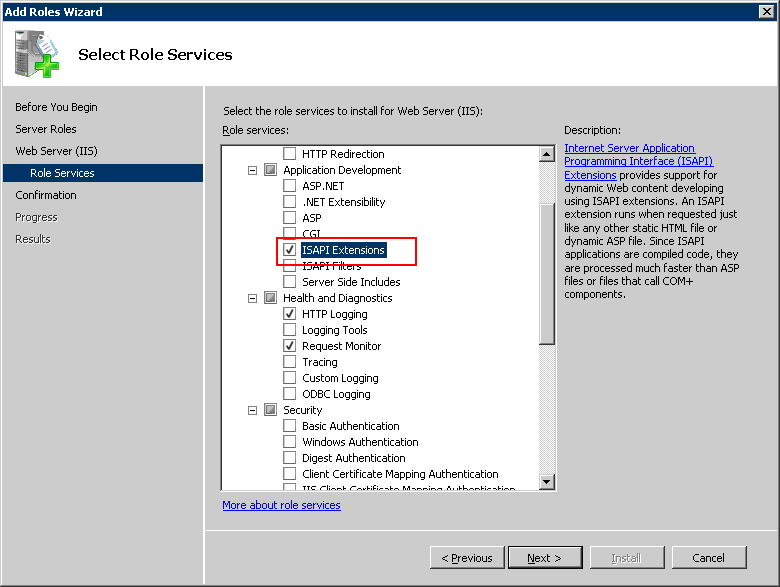
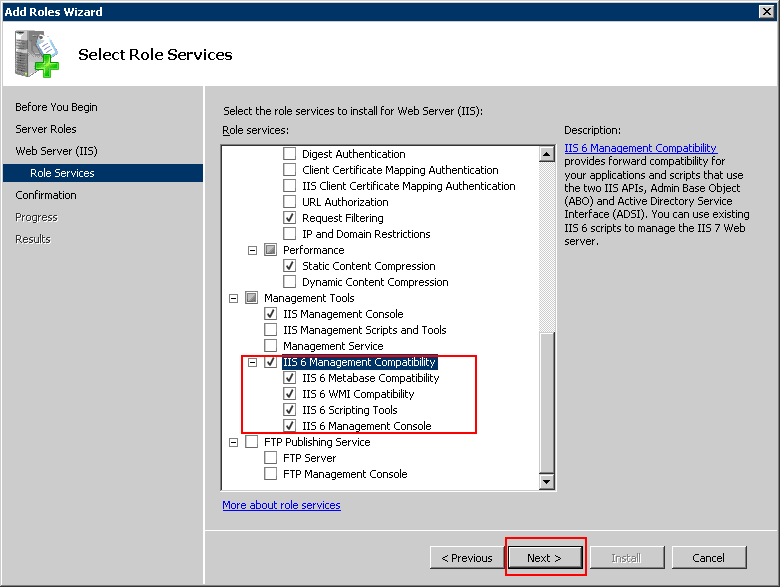
The “Select Role Services” of “Add Roles Wizard” window is displayed. Select the following items and click [Next]:
[Application Development]-[ISAPI Extensions]
[Management Tools]-[IIS 6 Management Compatibility]
In addition, please select the following items if they are not selected:
[Common HTTP Features]-[Static Content]
[Common HTTP Features]-[Default Document]
[Common HTTP Features]-[Directory Browsing]
[Common HTTP Features]-[HTTP Errors]
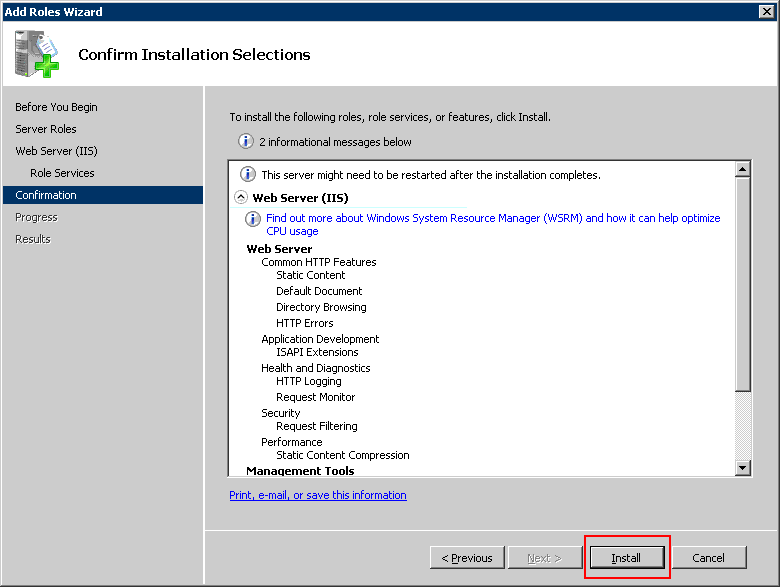
“Add Roles Wizard” of the [Confirm Installation Selections] window is displayed. Please click [Install].
After the installation has completed, please click [Close].
Select [Administrative Tools]-[Server Manager] from the [Start] menu.
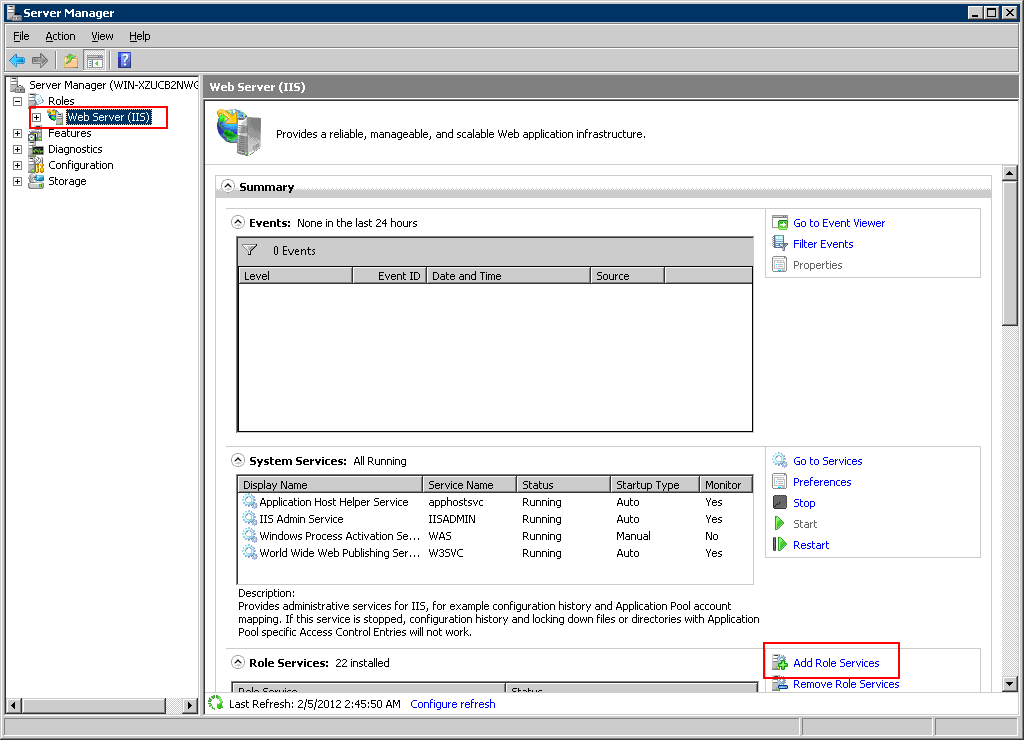
The “Server Manager” window is displayed. Select [Roles] - [Web Server (IIS)] in the tree view.
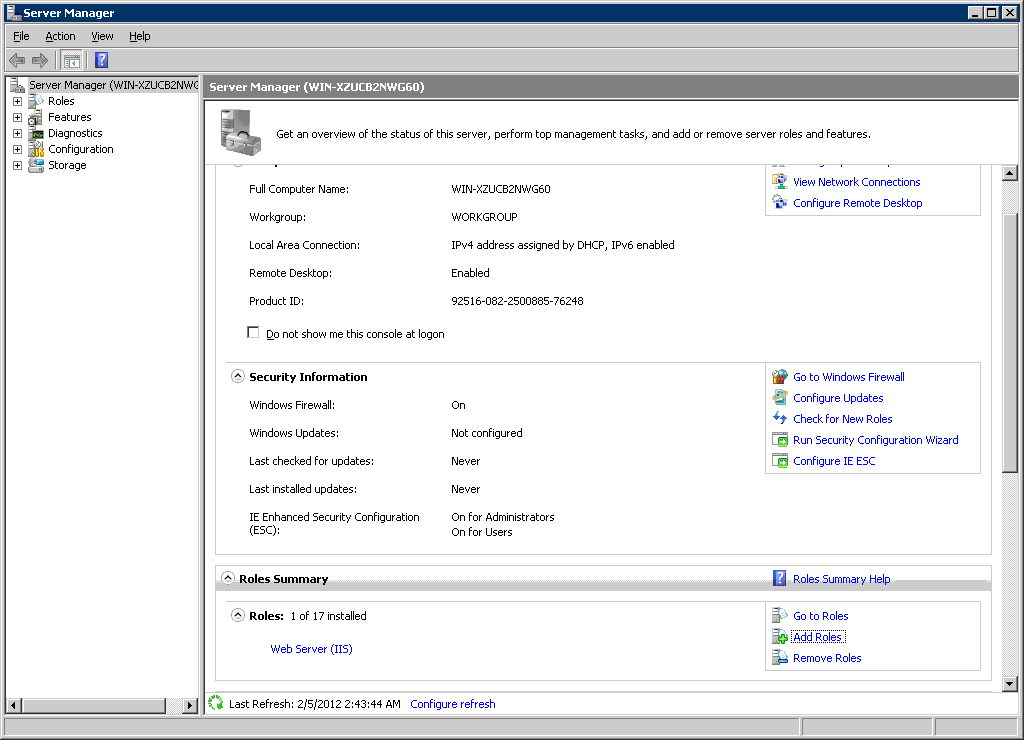
After the “Web server (IIS)” window is displayed, please click [Add Role Services].
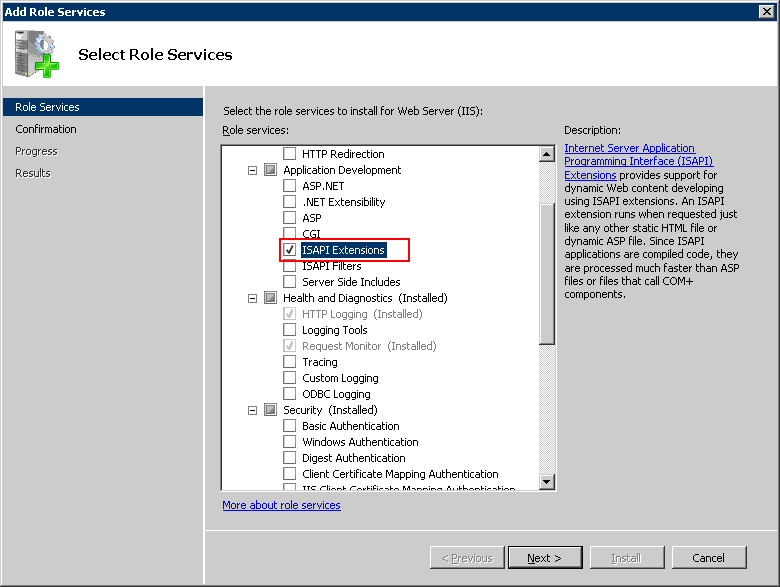
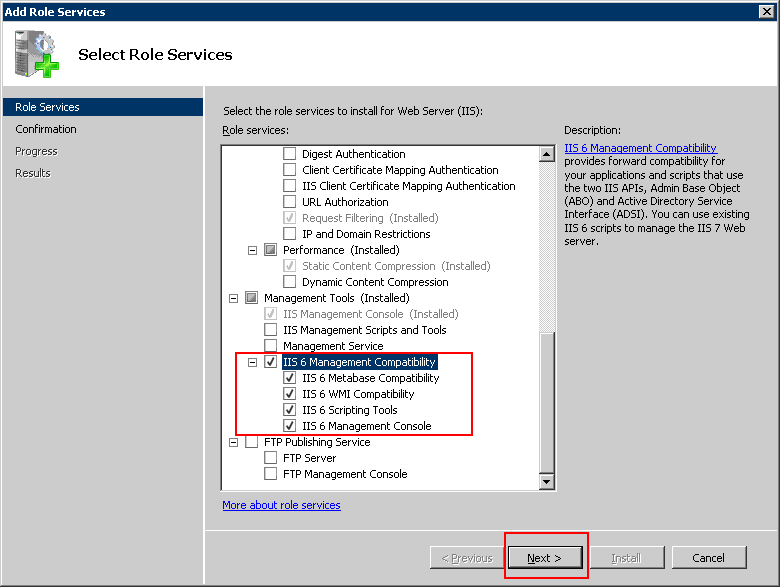
The “Select Role Services” of “Add Role Services” window is displayed. Select the following items when they are not selected and click [Next]:
[Application Development]-[ISAPI Extensions]
[Administrative Tools]-[IIS6 Management Compatibility]
In addition, please select the following items if they are not selected:
[Common HTTP Features]-[Static Content]
[Common HTTP Features]-[Default Document]
[Common HTTP Features]-[Directory Browsing]
[Common HTTP Features]-[HTTP Errors]
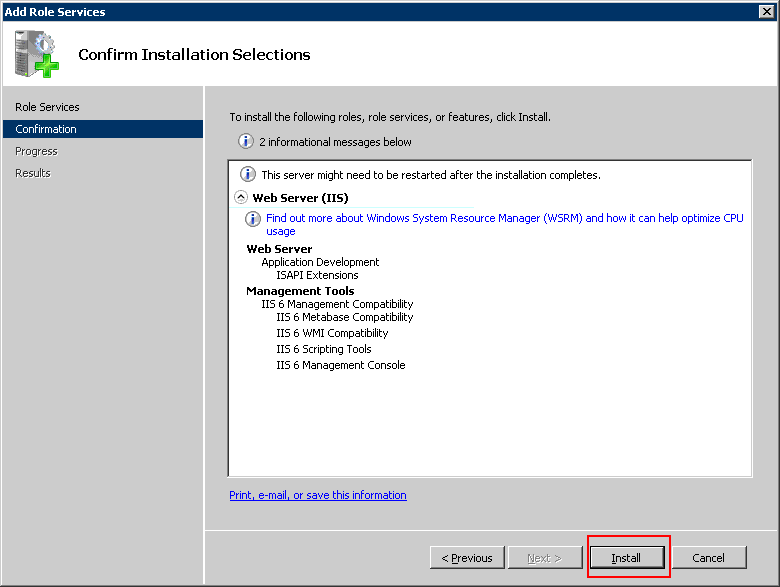
After “Confirm Installation Selections” window is displayed, please click [Install].
After the installation has completed, please click [Close].