This section explains the steps for installing and setting up Configuration Management DataBase.
This sub-section explains the steps for installing Configuration Management DataBase.
[Windows]
Start the installer.
Insert following CD-ROM in the CD-ROM drive of the computer.
- Systemwalker Service Quality Coordinator Enterprise Edition V13.5.0 Server Disc No.3/4
Point
Depending on the machine's settings, the installation may not start automatically. If it does not start automatically, perform the following procedure to manually start the installation:
From the Start menu, select Run.
In the Run dialog, click the Browse button, select the following file, and then click the OK button.
CD-ROM drive: \swSetup.exe
In the screen that appears, select Setup >> CMDB Manager.

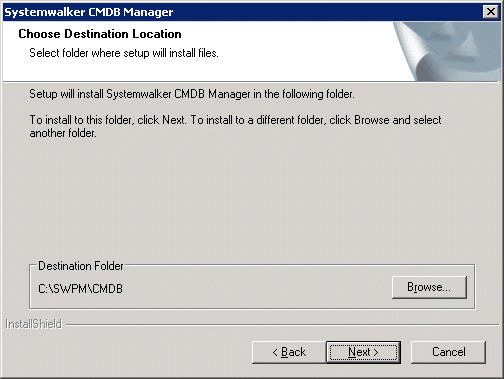
You will be asked where you want to install the CMDB, click the Browse and specify the destination.
(For example: C:\SWPM\CMDB)

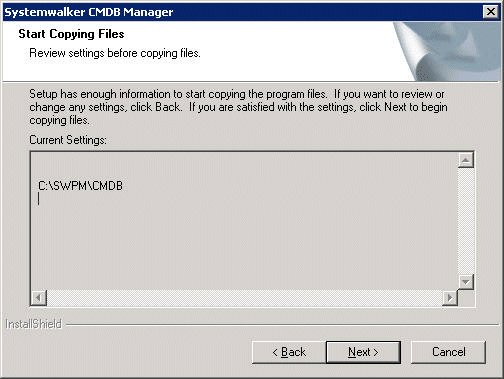
A dialog confirming the installation information appears so click the Next.

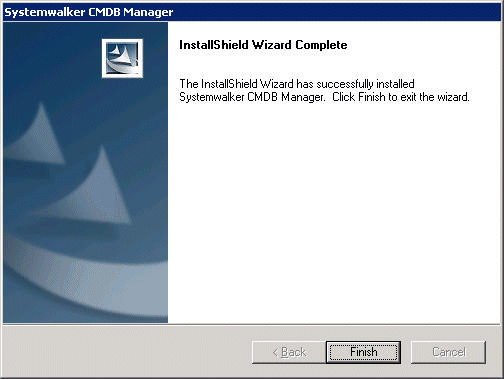
The installation completion screen will be displayed, click the Finish to end.

[Solaris]
Put the CD-ROM in CD-ROM drive.
Insert the "Systemwalker Service Quality Coordinator Enterprise Edition V13.5.0 Server Disc No.5/6" CD-ROM into the CD-ROM drive. If the volume management daemon does not run automatically, mount the CD.
# mkdir -p /cdrom/cdrom0 (*1)
# /usr/sbin/mount  -F hsfs  -o ro /dev/dsk/cntndnsn /cdrom/cdrom0 (*2)
*1: Necessary only when there is no /cdrom/cdrom0.
*2: Match n to the CD-ROM drive of each installation machine.
Start the installer.
The procedure for starting the installer (when the mount point of the CD-ROM is/cdrom/cdrom0) is as follows:
# /cdrom/cdrom0/cmdb/cmdbmanagerinstall.sh
[Linux]
Put the CD-ROM in CD-ROM drive.
Insert the "Systemwalker Service Quality Coordinator Enterprise Edition V13.5.0 Server Disc No.6/7" CD-ROM into the CD-ROM drive. If the volume management daemon does not run automatically, mount the CD.
# mount -r -t iso9660 /dev/cdrom /mnt/cdrom (*1)
*1: Match mount point/mnt/cdrom of the CD-ROM drive to each system environment.
Start the installer.
The procedure for starting the installer (when the mount point of the CD-ROM is /mnt/cdrom) is as follows:
Red Hat Enterprise Linux 5
# /mnt/cdrom/cmdb/RHEL5/cmdbmanagerinstall.sh
Red Hat Enterprise Linux 6
# /mnt/cdrom/cmdb/RHEL6/cmdbmanagerinstall.sh
Note
If the CD-ROM mounted automatically, the following message may appear due to permission being denied:
-bash: ./install.sh: /bin/sh: bad interpreter: Permission denied
If this occurs, unmount the CD-ROM, then start again at step 1 to remount it.
Set up the Configuration Management DataBase.
[Windows]
Edit mdrdb.properties, and set the connection destination for the Systemwalker Service Quality Coordinator Manager.
File to be edited:
<Destination Folder of CMDB Manager>\FJSVcmdba\service\mdr_sqc\mdrdb.properties
Place to be edited:
mdbad.sqc.server.name=<IP address for Systemwalker Service Quality Coordinator Manager>
Point
The connection destination for the Systemwalker Service Quality Coordinator Manager is set as "localhost" by default. Therefore, there is no need to edit mdrdb.properties if the Dashboard Server is installed on the same machine as the Systemwalker Service Quality Coordinator Manager.
Edit mdrdb.properties if the Dashboard Server connects to the Systemwalker Service Quality Coordinator Manager remotely.
Note
Be sure to edit the mdrdb.properties file under "FJSVcmdba", not the mdrdb.properties file under "FJSVcmdbm".
Execute the following commands in turn and make sure "Command Successful!" is displayed for both:
<Destination Folder of CMDB Manager>\FJSVcmdbm\bin\cmdbsetupenv -k MGR
<Destination Folder of CMDB Manager>\FJSVcmdbm\bin\cmdbstop
<Destination Folder of CMDB Manager>\FJSVcmdbm\bin\cmdbsetupenv -k AGT_SQC
Start CMDB Manager.
<Destination Folder of CMDB Manager>\FJSVcmdbm\bin\cmdbstart
Next, execute the following command, and collect configuration information from the Manager:
<Destination Folder of CMDB Manager>\FJSVcmdbm\bin\cmdbrefresh -q epr=http://localhost:80/axis2/services/MdrAdministrationService_SQC
If the configuration information is successfully collected, the following file is created. Be sure to confirm its creation:
<Destination Folder of CMDB>\FJSVcmdba\var\mdr_sqc\cache\ <number>\<number>.xml
Note
If the cmdbrefresh command fails, check whether the Manager specified during installation is running.
Even if the prompt tells you that the command was successful, it may take some time for the command to actually have an effect.
The number of XML files created depends on the environment.
[UNIX]
Edit mdrdb.properties, and set the connection destination for the Systemwalker Service Quality Coordinator Manager.
File to be edited:
/opt/FJSVcmdba/service/mdr_sqc/mdrdb.properties
Place to be edited:
mdbad.sqc.server.name=<IP address for Systemwalker Service Quality Coordinator Manager>
Point
The connection destination for the Systemwalker Service Quality Coordinator Manager is set as "localhost" by default. Therefore, there is no need to edit mdrdb.properties if the Dashboard Server is installed on the same machine as the Systemwalker Service Quality Coordinator Manager.
Edit mdrdb.properties if the Dashboard Server connects to the Systemwalker Service Quality Coordinator Manager remotely.
Note
Be sure to edit the mdrdb.properties file under "FJSVcmdba", not the mdrdb.properties file under "FJSVcmdbm".
Execute the following commands in sequence and make sure "Command Successful!" is displayed for each one:
/opt/FJSVcmdbm/bin/cmdbsetupenv.sh -k MGR
/opt/FJSVcmdbm/bin/cmdbstop.sh
/opt/FJSVcmdbm/bin/cmdbsetupenv.sh -k AGT_SQC
Start CMDB Manager.
/opt/FJSVcmdbm/bin/cmdbstart.sh
Next, execute the following command, and collect configuration information from the Manager:
/opt/FJSVcmdbm/bin/cmdbrefresh.sh -q epr=http://localhost:80/axis2/services/MdrAdministrationService_SQC
If the configuration information is successfully collected, the following file is created. Be sure to confirm its creation:
/opt/FJSVcmdba/var/mdr_sqc/cache/<number>/<number>.xml