The procedure for installing Agents is described below.
The CD-ROM "ETERNUS SF Storage Cruiser 14.1 Manager/Agent (Windows)" is used in the installation of Agents.
Open the window that can add or remove programs, and check that ETERNUS SF Storage Cruiser Manager is not displayed.
The name of window that can add or remove programs and the method to open its window are as follows.
OS | Name of window | Method to open window |
|---|---|---|
Windows 2000 | Add/Remove Programs | [Start] - [Settings] - [Control Panel] - [Add/Remove Programs] |
Windows Server 2003 | Add or Remove Programs |
|
Windows Server 2008 | Programs and Features |
|
The following is "Add or Remove Programs" window.
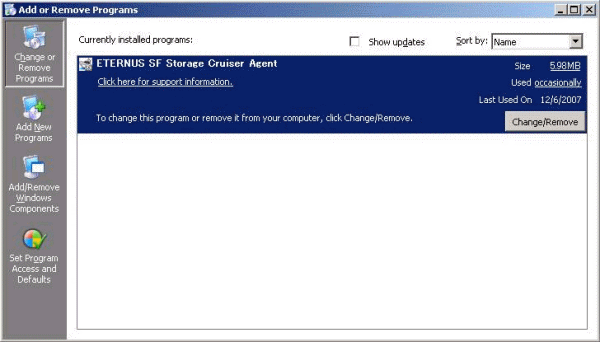
If "ETERNUS SF Storage Cruiser Agent" is displayed as above, please refer to "7.3.1 Stopping agent", and after stopping the agent please uninstall and reinstall it.
Installation time for this software is around 5 minutes.
Log on to the Agent installation target system.
Please log on as the OS administrator (Administrator) of the terminal.
Insert the CD-ROM "ETERNUS SF Storage Cruiser 14.1 Manager/Agent (Windows)" into the CD-ROM drive, open the directory described as below, using Explorer or another tool, and execute setup.exe.
OS | Directory |
|---|---|
Windows Server 2003, Enterprise Edition for Itanium-based Systems | CD-ROM_drive:\agent\Windows\IPF |
The other products | CD-ROM_drive:\agent\Windows\I32_x64 |
Information
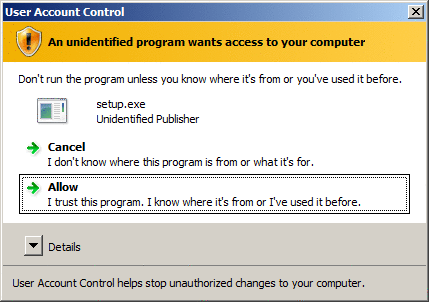
For using Windows Server 2008:
The following warning dialog may be displayed when the setup.exe is executed. In this case, click "Allow".
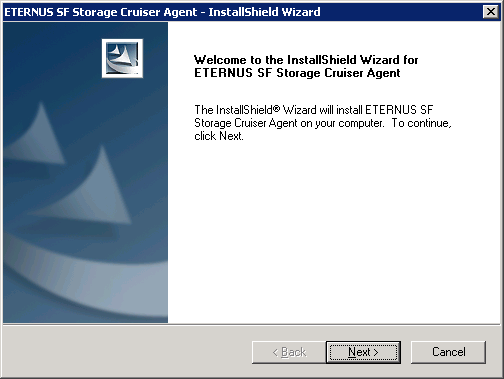
When the InstallShield window appears, check the displayed information and then click <Next> button.
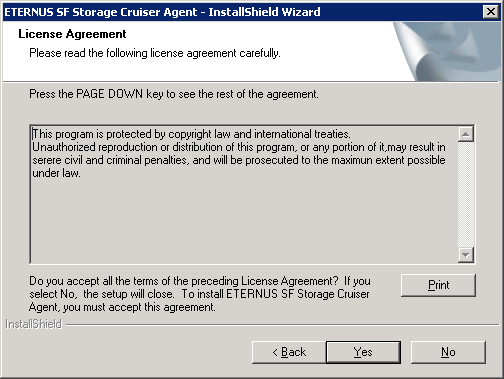
On the "License Agreement" window, accept the agreement.
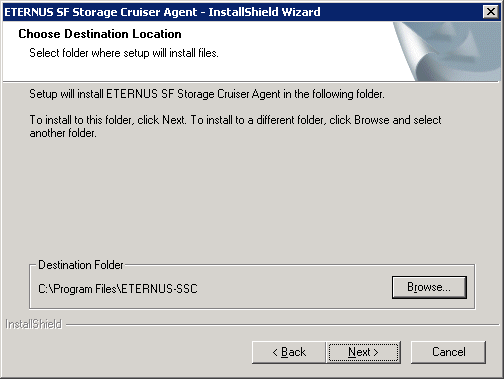
Specify the installation directory.
In the event that installation is to be performed to a directory other than the default, click <Browse> button and select the directory to install to. When directory specification is completed, click <Next> button.
Note
You can specify installation directory names using any printable ASCII characters other than the following symbols.
" | : * ? / . < > , % & ^ = ! ;
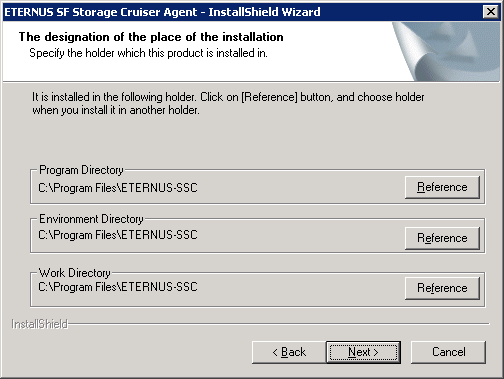
Specify the installation directory.
To install in a directory other than the default given in step 5, change the default directory by clicking <Browse> button, and select another directory.
When all directory specifications are completed, if there are no errors in the configuration details, click <Next> button. To change the configuration details, click <Back> button.
Note
You can specify installation directory names using any printable ASCII characters other than the following symbols.
" | : * ? / . < > , % & ^ = ! ;
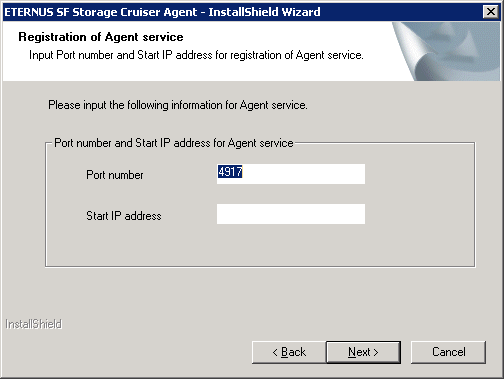
Enter the port number, admin LAN IP address used by agent services on the following window.
The explanation of each tab is as follows:
This port number is used for transmission between the agent and the admin server. Enter the same number as specified in the admin server configuration. The default value is 4917, and there is usually no need to change this value. However, if the system is already using this port number, please allocate a vacant port number.
If the managed server node has a single IP address, enter this IP address as the agent admin LAN IP address,
If the managed server node has more than one IP address, enter the start IP address of the server node based on the administrative server LAN IP address.
For example:
Manager IP: 10.10.10.xx
Agent has more than 1 IP like this:
10.10.10.yy
192.168.1.zz
In this case, please input "10.10.10.yy".
If the managed server node is under firewall or IP of the managed server node is converted by NAT, enter the IP address used for communication between ETERNUS SF Storage Cruiser's manager and the managed server node.
Information
Please confirm the current service file that the port number described above is vacant.
The services file is located in %SystemRoot%\system32\drivers\etc directory. The %SystemRoot% is the directory where the Windows operating system is installed.
OS | Full path name of services file (default) |
|---|---|
Windows 2000 | C:\WINNT\system32\drivers\etc\services |
Windows Server 2003 | C:\Windows\system32\drivers\etc\services |
Confirm the settings in the start copying files window.
If there are no errors in the configuration details, click <Next> button. To change the configuration details, click <Back> button.
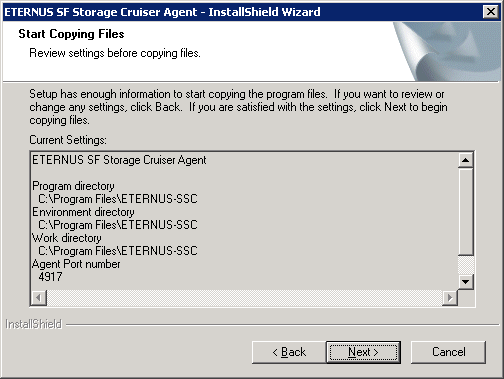
Copy processing will begin.
After the copy process is complete, Resource Coordinator Agent installation will finish.
After completing installation, click <Finish> button.
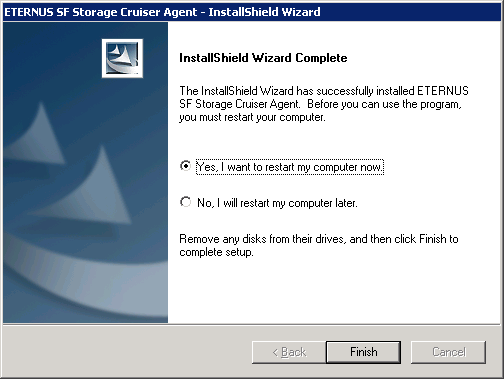
The installation is completed. Continuously, execute the post-installation setup by referring to "6.3.4 Post-installation setup".