This section describes how to set the level at which trace information is collected on a virtualization switch.
Note
You cannot set a trace level when the virtualization switch is in "stop" status or "error" status.
In the Maintenance window, select either of the listed virtualization switches and click the <TraceLevel> button. Alternatively, select a virtualization switch and select [Operation] - [TraceLevel].
The "TraceLevel" dialog box then appears.
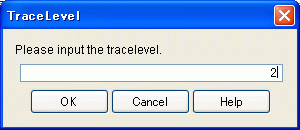
In the "TraceLevel" dialog box, enter one of the following trace levels:
Enter numeric characters.
Trace level | Information to collect |
|---|---|
0 | Error information |
1 | Error, warning, and notification information |
2 | Error, warning, notification, and program information |
Point
You should set to "0" during normal operation because it takes time to collect level-1 or level-2 information on a virtualization switch.
Information
Note that the maximum trace level is assumed specified when a value greater than the valid value is entered to specify the trace level.
Click <OK>.
In the confirmation dialog box, click <OK>.
In the "TraceLevel" message dialog box, click <Close>.
In the Maintenance window, make sure that the "trace level" has been changed to the specified value.