

| ETERNUS SF AdvancedCopy Manager Operator's Guide for cluster environment 13.0 -Microsoft(R) Windows(R) 2000/Microsoft(R) Windows Sever(TM) 2003-, -Solaris-, -HP-UX-, -Linux-, -AIX- |
|
Contents
Index
|
This appendix explains how to create AdvancedCopy Manager resources and userApplications with PRIMECLUSTER.
For details, see the "Building Cluster Applications" chapter in the "PRIMECLUSTER Installation and Administration Guide."
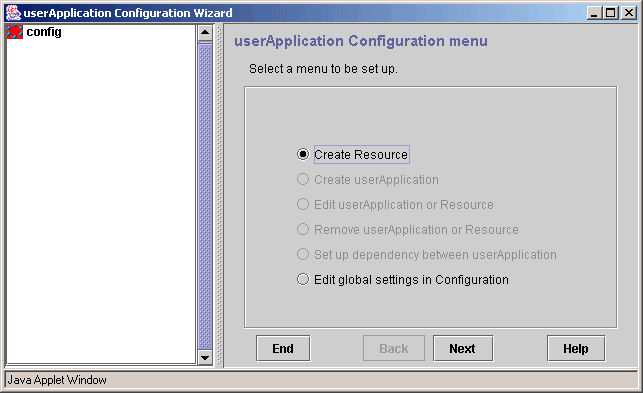
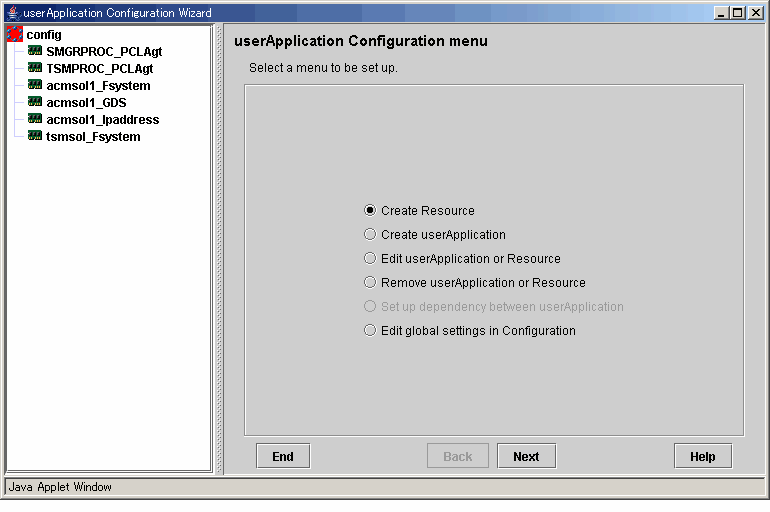
Create resources by using the userApplication Configuration Wizard of PRIMECLUSTER.
Select [Create Resource] from the top menu of the userApplication Configuration Wizard.
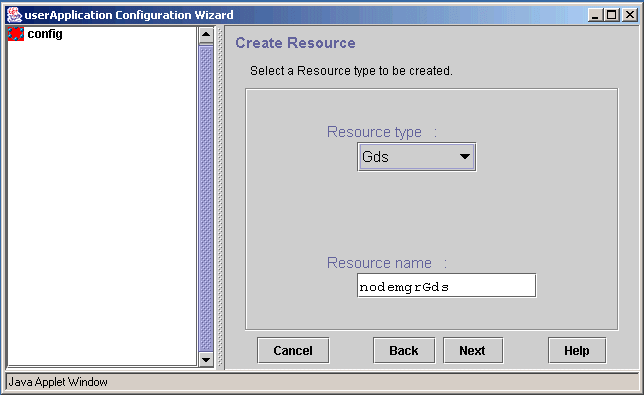
Select "Gds" for the resource type.
"nodemgrGds" is specified as the resource name in the following example.
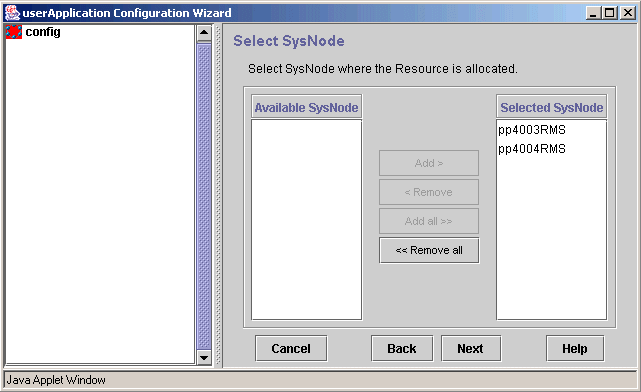
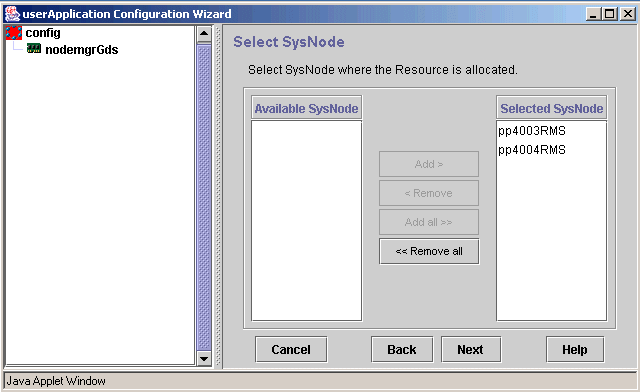
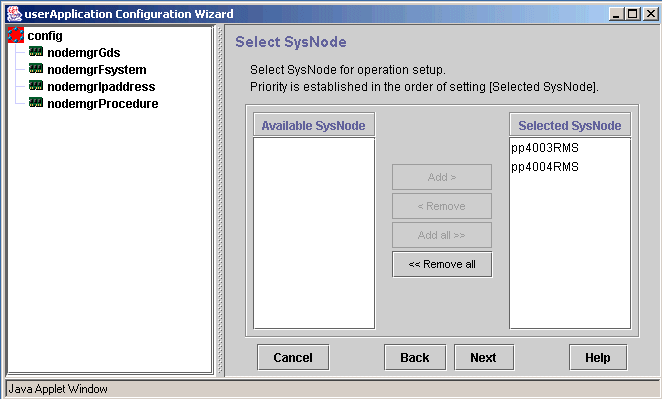
Select SysNode to set the resource in it.
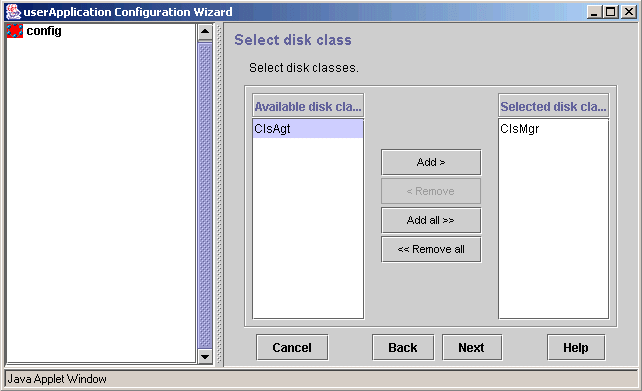
Select a disk class.
Register the class of the GDS to which the shared disk for AdvancedCopy Manager shared data belongs.
For a Storage management server transaction, also register the class of the GDS to which the shared disk for the AdvancedCopy Manager repository belongs.
Disk class "ClsMgr" is specified in the following example.
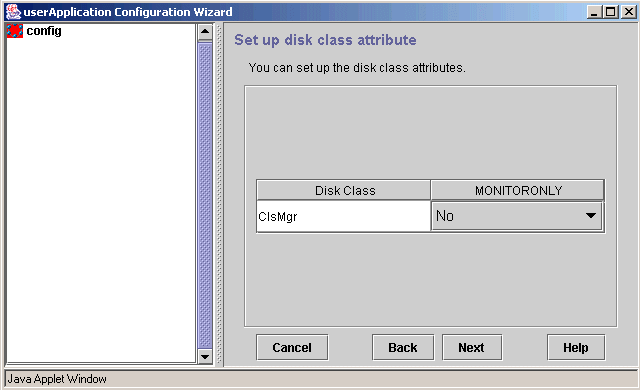
Specify the attributes of the disk class.
For details on disk class attributes, see the "Creating Gds Resources" section in the "PRIMECLUSTER Installation and Administration Guide."
"No" is specified for the MONITORONLY attribute in the following example.
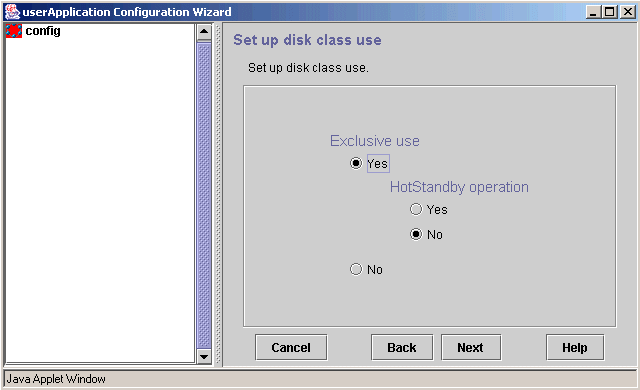
Specify the use of the disk class.
Register the shared disk for AdvancedCopy Manager shared data and the shared disk for the AdvancedCopy Manger repository as switching disks (exclusive use = "Yes", HotStandby operation = "No").
For the uses of the disk class, see the "Creating Gds Resources" section in the "PRIMECLUSTER Installation and Administration Guide."
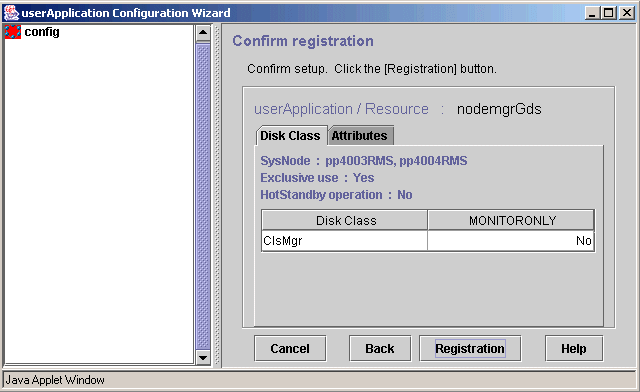
Confirm the information registered for the Gds resource.
For details on the resource attributes, see the "Creating Gds Resources" section in the "PRIMECLUSTER Installation and Administration Guide."
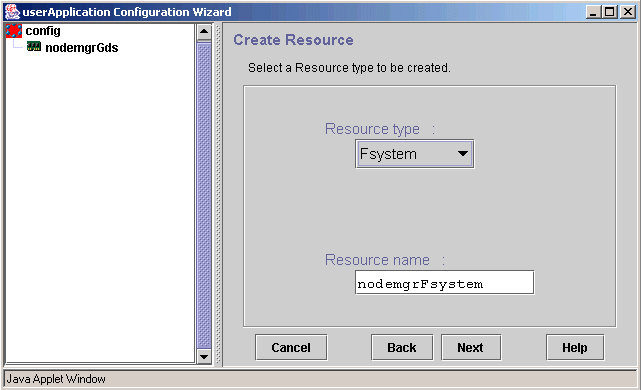
Select [Create Resource] from the top menu of the userApplication Configuration Wizard.
Select "Fsystem" for the resource type.
"nodemgrFsystem" is specified for the resource name in the following example.
Select SysNode to set the resource in it.
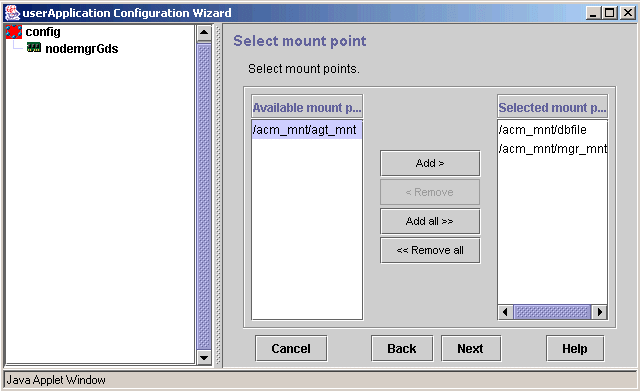
Select a mount point.
Register the mount point of the shared disk for AdvancedCopy Manager shared data.
For a Storage management server transaction, also register the mount point of the shared disk for the AdvancedCopy Manager repository.
The mount point "/acm_mnt/dbfile" and "/acm_mnt/mgr_mnt" is specified in the following example.
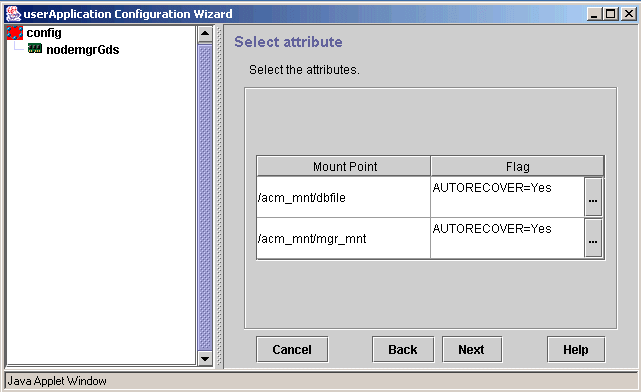
Specify the attributes of the mount point.
For details on mount point attributes, see the "Creating Fsystem Resources" section in the "PRIMECLUSTER Installation and Administration Guide."
"yes" is specified for the AUTORECOVER attribute in the following example.
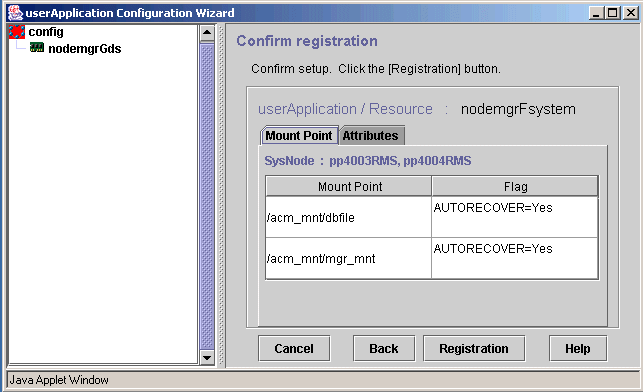
Confirm the information registered for Fsystem.
For details on the resource attributes, see the "Creating Fsystem Resources" section in the "PRIMECLUSTER Installation and Administration Guide."
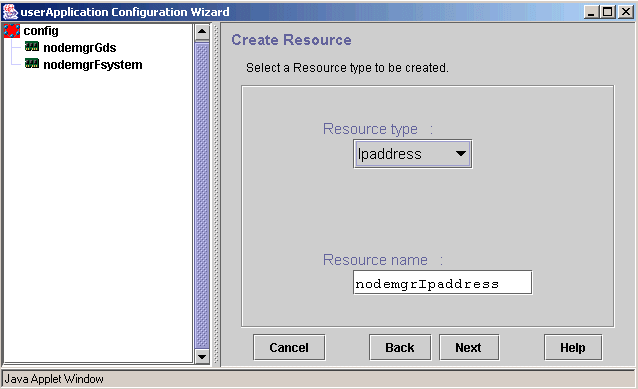
Select [Create Resource] from the top menu of the userApplication Configuration Wizard.
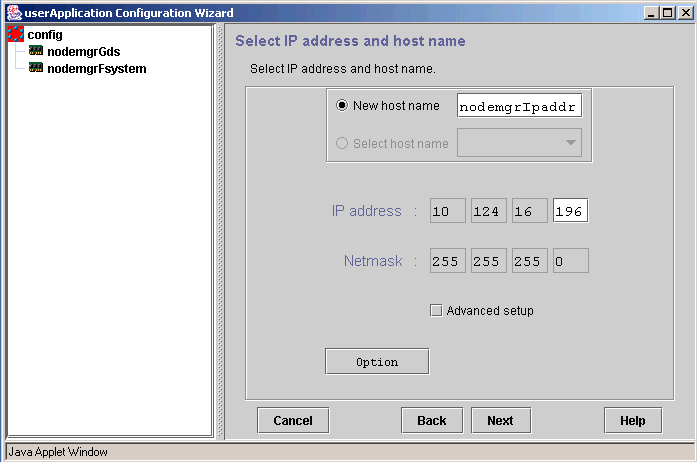
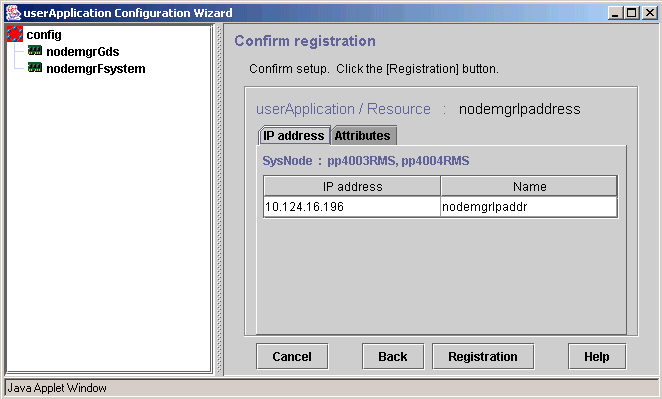
Select "Ipaddress" for the resource type.
"nodemgrIpaddress" is specified for the resource name in the following example.
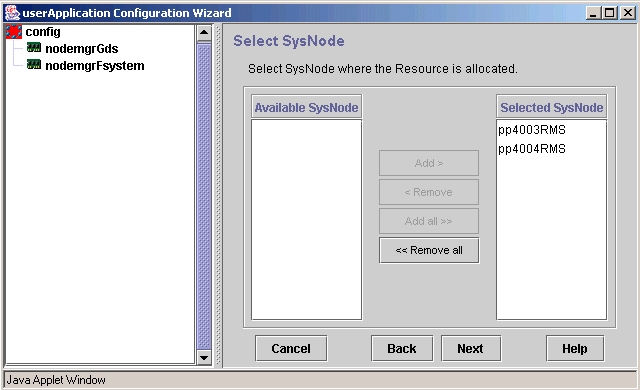
Select SysNode to set the resource in it.
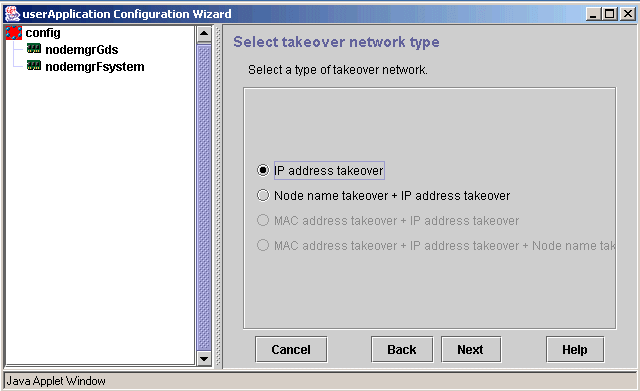
Select the type of takeover network.
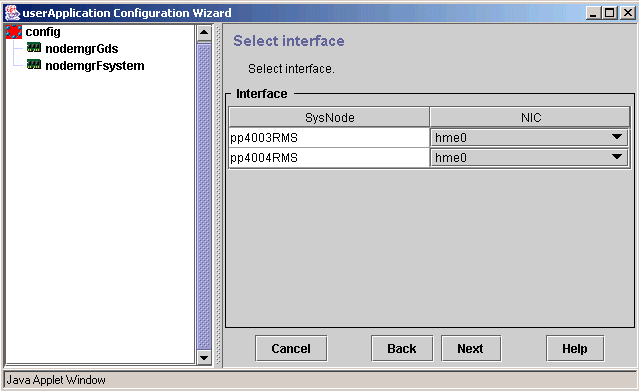
Select an interface.
Select a takeover IP address and host name, or specify a new address and name.
For information on how to select a takeover IP address and host name and how to specify a new address and name, see the "Creating Takeover Network Resources" section in the "PRIMECLUSTER Installation and Administration Guide."
Confirm the information registered for the takeover network.
For details on the resource attributes, see the "Creating Takeover Network Resources" section in the "PRIMECLUSTER Installation and Administration Guide."
Select [Create Resource] from the top menu of the userApplication Configuration Wizard.
Select "Procedure" for the resource type.
"nodemgrProcedure" is specified for the resource name in the following example.
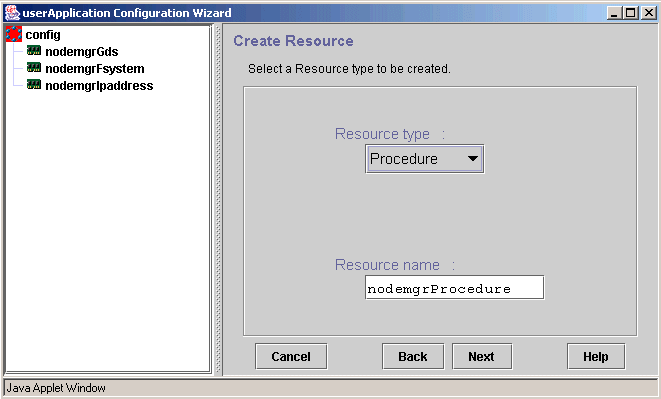
Select SysNode to set the resource in it.
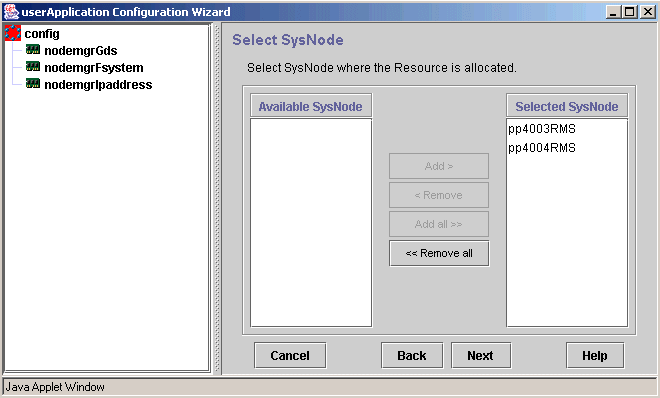
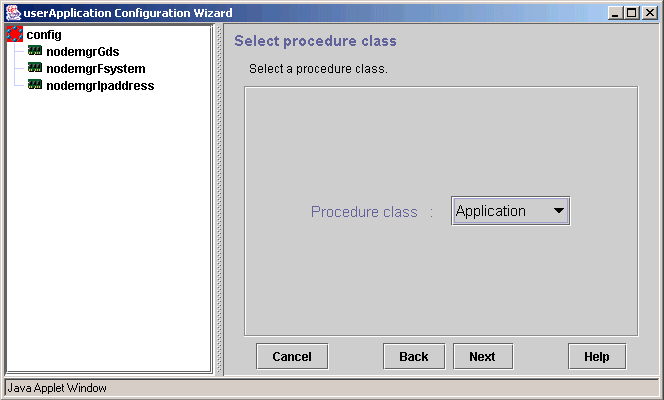
Select the class of the procedure to be created.
Register an AdvancedCopy Manager procedure resource in the Application class (procedure class = Application).
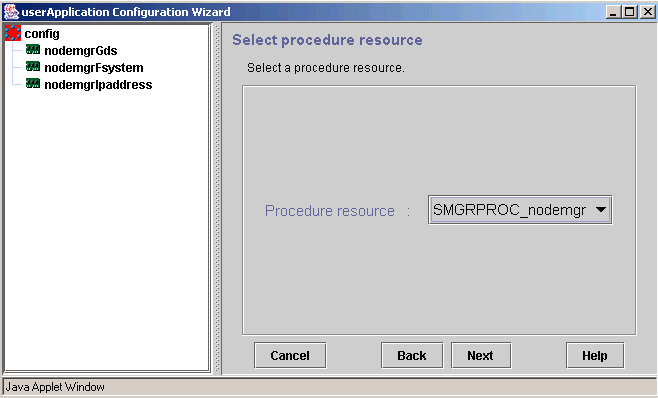
Select the procedure resource to be created.
An AdvancedCopy Manager procedure resource name is SMGRPROC_logical-node-name.
A procedure resource with the logical node name "nodemgr" (SMGRPROC_nodemgr) is specified in the following example.
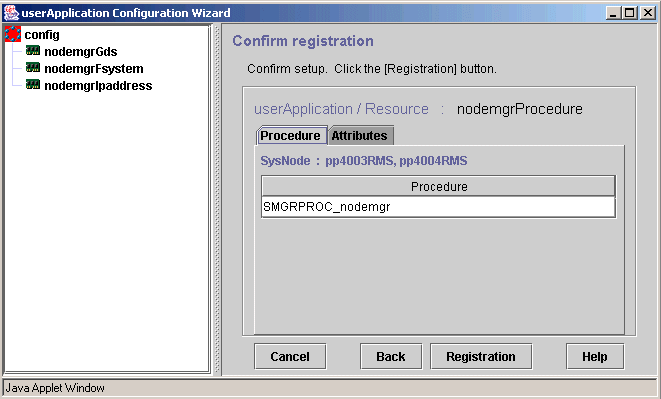
Confirm the information registered for the procedure resource.
For details on the resource attributes, see the "Creating Procedure Resources" section in the "PRIMECLUSTER Installation and Administration Guide."
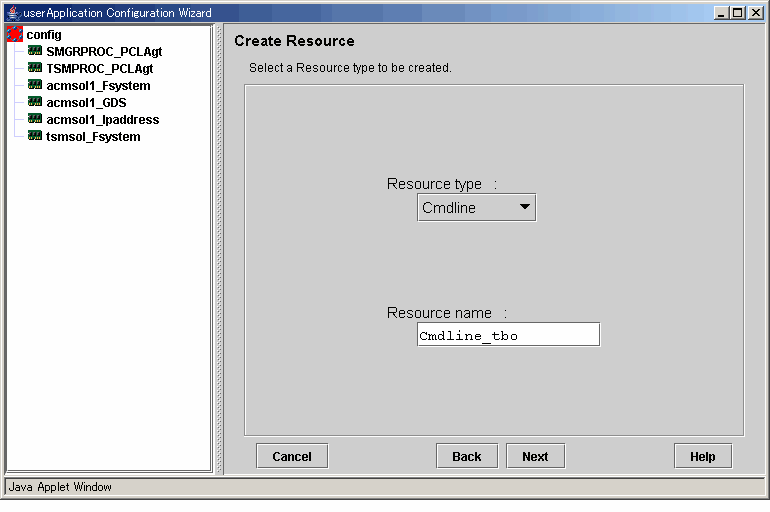
Select [Create Resource] from the top menu of the userApplication Configuration Wizard.
Select "Cmdline" for the resource type
"Cmdline_tbo" is specified as the resource name in the following example
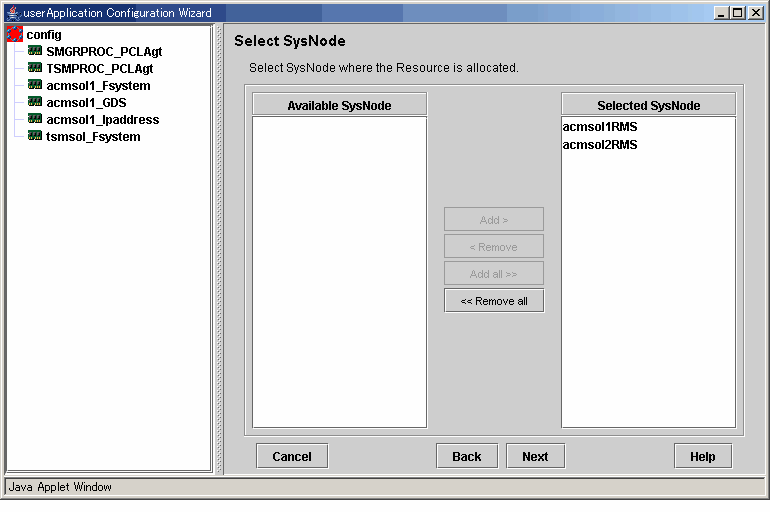
Select SysNode to set the resource in it
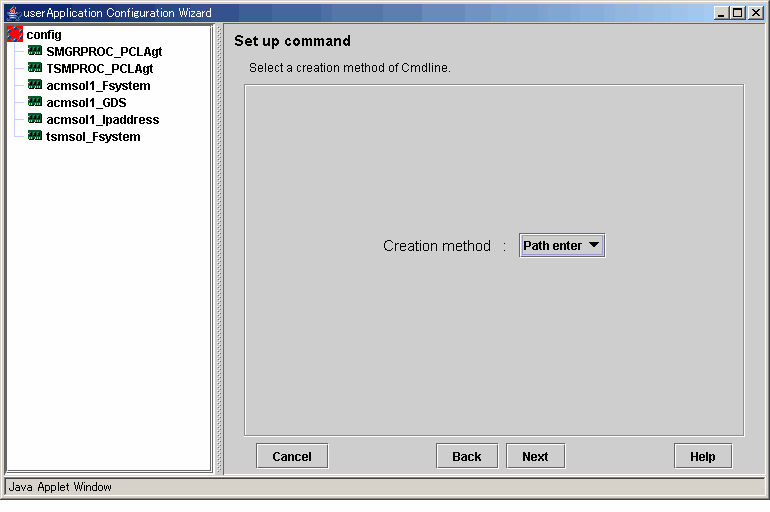
Select the method for creating the Cmdline
Select"Path input" for the creation method
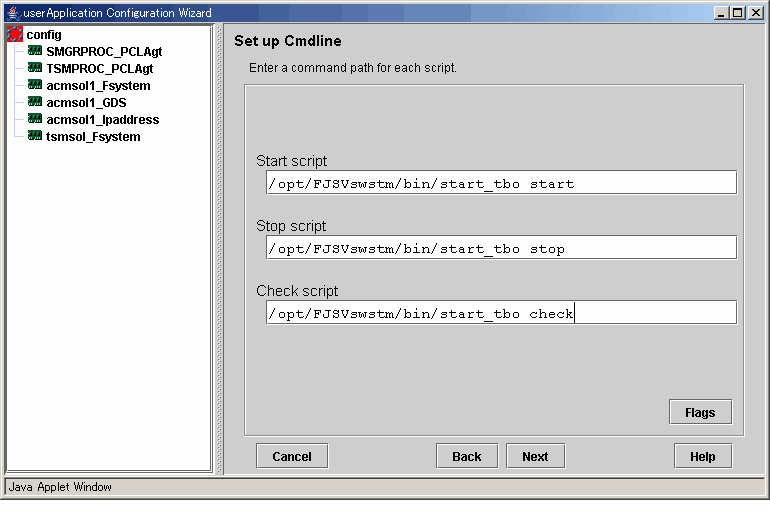
Enter the command paths that are used by each script
Enter the command paths that are used by the "Start", "Stop", and "Check" scripts
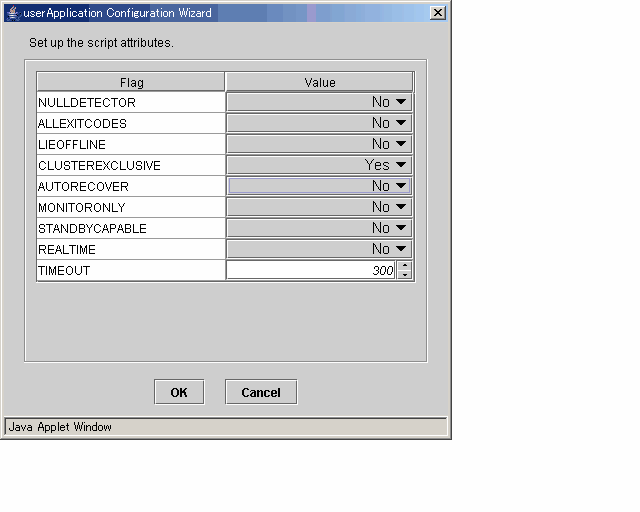
Set the script attributes
In the following example, AUTORECOVER is set to "No"
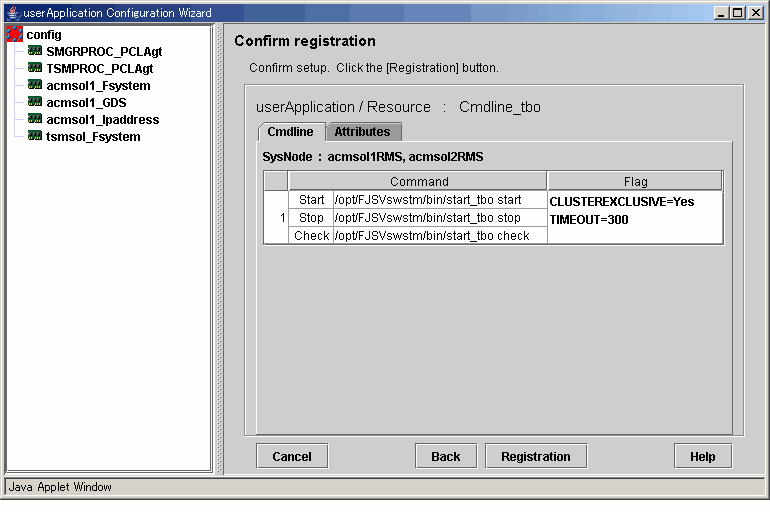
Confirm the information registered for the Cmdline resource
For details on resource attributes, refer to the "Creating Cmdline Resources" section in the PRIMECLUSTER Installation and Administration Guide
Create a userApplication by using the userApplication Configuration Wizard of PRIMECLUSTER.
Always specify the standby class for a userApplication.
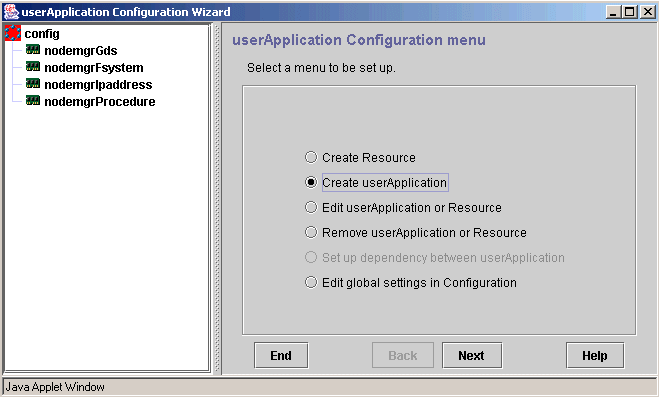
Select [Create userApplication] from the top menu of the userApplication Configuration Wizard.
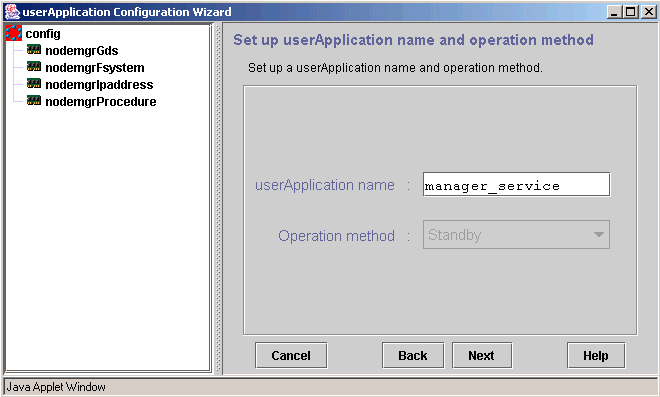
Specify a userApplication name and the operation type.
"manager_service " is specified for the userApplication name in the following example.
Select SysNode to set the cluster application in it.
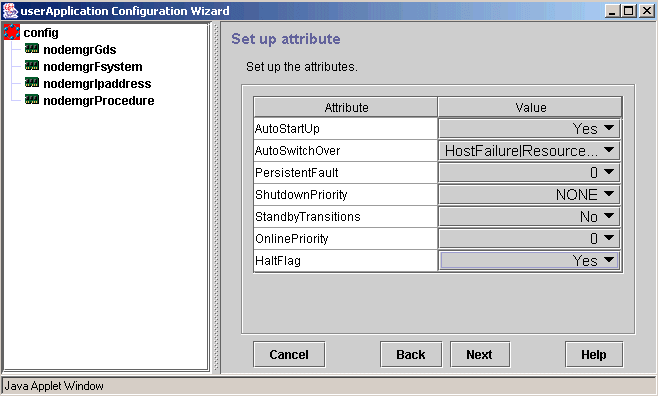
Specify the userApplication attributes.
Specify the userApplication attributes according to the operation type.
For details on userApplication attributes, see the "Creating Standby Cluster Applications" section in the "PRIMECLUSTER Installation and Administration Guide."
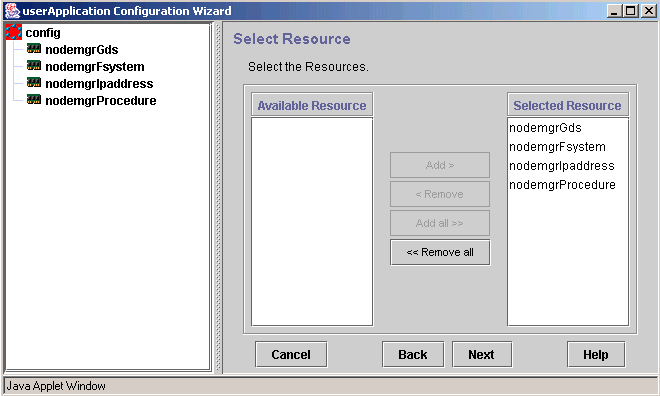
Specify the resources used by the userApplication.
Register resources created for AdvancedCopy Manager.
The resources created in Section A.1, "Creating Resources," are specified in the following example.
Confirm the information registered for the userApplication.
For details on the attributes, see the "Creating Standby Cluster Applications" section in the "PRIMECLUSTER Installation and Administration Guide."

|
Contents
Index
|