

| ETERNUS SF AdvancedCopy Manager User's Guide 13.0 -Microsoft(R) Windows(R) 2000/Microsoft(R) Windows Sever(TM) 2003-, -Solaris-, -HP-UX-, -Linux-, -AIX- |
Contents
Index
 
|
This chapter covers the client's window functions and how to operate its functions.
The purpose of the backup management is to reduce the load in backup operation and management work in distribution systems. It provides the following functions through the Web browser:
Backup policy management function
This function allows the user to set up and manage the number of backup preservation generations and backup interval days as the backup policy for volumes to be backed up. Regarding the interval days, delay is reported at information display.
Backup function
The backup function enables users to back up Transaction Volumes.
Restore function
The restore and recovery function enables users to recover Transaction Volumes.
Backup history information management function
This function allows the user to reference and delete backup history information.
Backup management setup function
This function allows the user to set up Storage information and device information from the backup management window.

Operations related to the tape backup function included in AdvancedCopy Manager Enterprise Edition are not available in the [Backup Management] window. To use the tape backup function, use the command described in the ETERNUS SF AdvancedCopy Manager Operator's Guide for Tape Backup Option.
When [Backup Management] is selected from the AdvancedCopy Manager initial window, the backup management server list is displayed.
The backup management tree view (Figure 3.1) shows the selection target items (1) to (7). Each item has its corresponding list view.
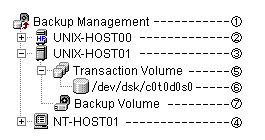
Table 3.1 shows the selection target items shown in Figure 3.1 and their corresponding list view.
|
No. |
Selection target item |
List view |
|---|---|---|
|
1 |
Backup management |
Server list view |
|
2 |
HP-UX server |
Transaction view |
|
3 |
Solaris server, Linux server, or AIX server |
Transaction view |
|
4 |
Windows server |
Transaction view |
|
5 |
Transaction Volume (folder) |
Transaction Volume list view |
|
6 |
Transaction Volume |
Backup history list view |
|
7 |
Backup Volume (folder) |
Backup Volume list view |

The backup management window collects information when it first displays the window. Collected information is held without being updated until the window is closed. Please choose [Refresh] from a [View] menu to update.
The server list is displayed when [Backup Management] is selected from the AdvancedCopy Manager initial window.
This view displays the list of servers that perform backup management and information about the servers. Displayed information includes the IP address, port number, OS type, and OS version.
This view is displayed when [Backup Management] is selected on the backup management tree view.
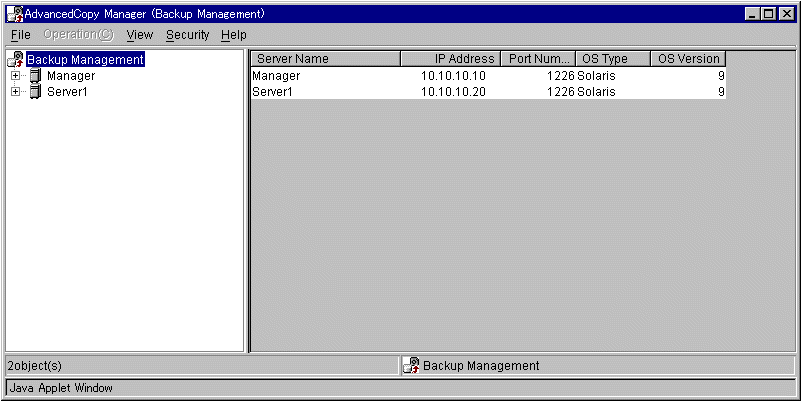
Table 3.2 shows the items displayed.
|
No. |
Display item |
Description |
|---|---|---|
|
1 |
Server name |
Name of the managed server |
|
2 |
IP address |
IP address of the managed server |
|
3 |
Port number |
Port number used to communicate with the managed server |
|
4 |
OS type |
Type of the installed OS |
|
5 |
OS version |
Version of the installed OS |
Selecting "Solaris OS server" "Windows server" "HP-UX server" or "Linux server" on the server list view enables execution of the following operations:
Setting up server information
Server information can be set.
Selecting [Set Server Information] from the [Operation] menu on the transaction view displays the set storage server configuration information window.
See the set storage server configuration information for details.
Setting up device information
Device information can be set.
Selecting [Set Device Information] from the [Operation] menu on the transaction view displays the Set Device Information window.
See the set device information window for details.
The transaction view displays the name of a folder such as a " Transaction Volume" and "Backup Volume."
This view is displayed when "Solaris OS server", "Windows server", "HP-UX server," or "Linux server" is selected as storage server on the tree view.
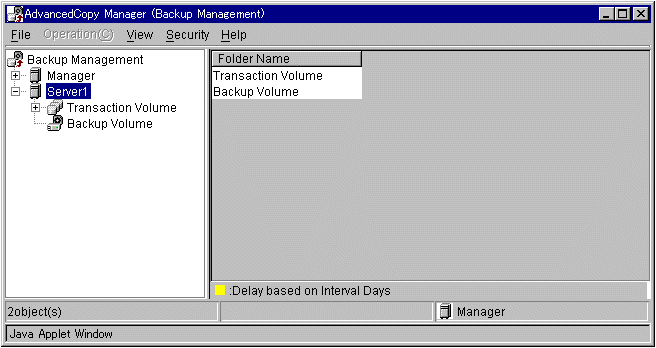
Table 3.3 shows the items displayed.
|
No. |
Display item |
Description |
|---|---|---|
|
1 |
Folder name |
The following volume types on the selected server:
|
The transaction view is used to execute the following operations:
Defining the backup policy
The backup policy can be defined.
To display the set backup policy window, select a " Transaction Volume" on the transaction view and click the right mouse button. From the popup menu select [Definition of Backup Policy].
Another way to display the set backup policy window is to selecting a "Transaction Volume" on the transaction view. Then click on the [Operation] menu and select [Definition of Backup Policy].
See the Set Backup Policy window for details.
The Transaction Volume List view displays the list of Transaction Volumes.
In the tree console view, you can display this view by selecting a "Transaction Volume" console among the Storage Server which you want to transaction with.
The display items in this view represent the " swstdevdisp -t", " swstbkpoldisp" and " swstexecstat " commands for AdvancedCopy Manager. To learn more details about these commands, refer to "Backup Management Commands" in "ETERNUS SF AdvancedCopy Manager Operator's Guide".
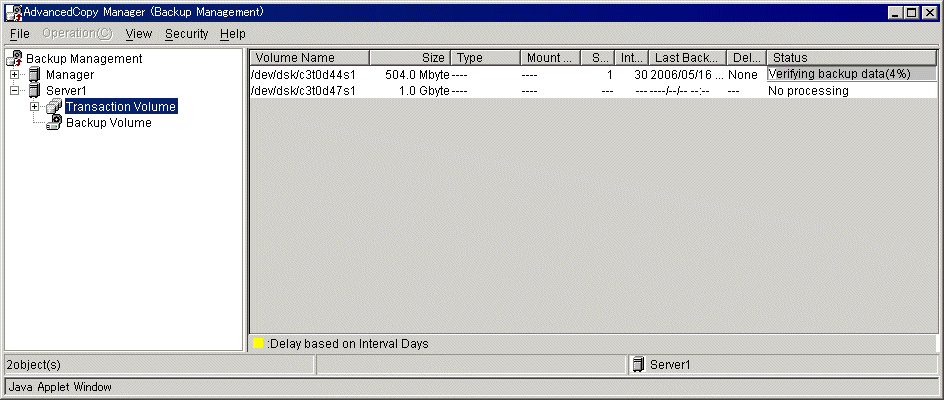
Table 3.4 shows the items displayed.
|
No. |
Display item |
Description |
|
|---|---|---|---|
|
1 |
Volume Name |
Displays the volume name. |
|
|
2 |
Size |
Displays the volume size. For a logical volume of VxVM, the size of the area that is actually used for copying is displayed. |
|
|
3 |
Type |
Displays the device file system type. |
|
|
4 |
Mount Point name |
Display the name of the mount point of the transaction volume (drive letter). |
|
|
5 |
Number of preservation generations |
Displays the number of preservation generations defined in the backup policy. |
|
|
6 |
Interval Days |
Displays the interval days defined in the backup policy. |
|
|
7 |
Most recent backup date |
Displays the date when the volume was backed up last. |
|
|
8 |
Delay |
When the number of days specified in [Interval days] has elapsed since the backup data was collected last, displays the number of days after that day. |
|
|
9 |
Status |
Displays the condition of currently ongoing process. |
|
|
Any processing is not being performed. |
||
|
The start command for backup synchronization is being executed. |
||
|
Percentage of completing |
||
|
The status means EC has failed. |
||
|
The status means EC has been halted. |
||
|
The status means EC is completed. |
||
|
The synchronous processing cancel command is being executed. |
||
|
The backup execution command is being executed. |
||
|
Percentage of completing backup by OPC function |
||
|
The status means backup by OPC function has failed. |
||
|
The status means backup by OPC function has been halted. |
||
|
The restore command is being executed. |
||
|
Percentage of completing restore by OPC function |
||
|
The status means restoration by OPC function has failed. |
||
|
The status means restoration by OPC function has been halted. |
||
|
The cancel restore command is being executed. |
||
|
The backup policy setup command is being executed. |
||
|
The backup policy delete command is being executed. |
||
|
The history information delete command is being executed. |
||
|
The tracking cancel command is being executed. |
||
|
GDS error occurred. |
||
When the information for a Transaction Volume is displayed in yellow, it means that the number of days specified in [Interval days] has elapsed since the last time backup data was collected
The Transaction Volume list view is used to start synchronous processing, backup, restore, deletion of history, cancel synchronization process, definition of backup policy, and deletion of backup policy for a Transaction Volume.
In the Transaction Volume List view, select a Transaction Volume which you want to manage, then click the right-button on your mouse. From the popup menu brought up, choose the item which you want to transaction with. And then each resulting view comes out.
Alternatively, after selecting a Transaction Volume which you want to manage in the Transaction Volume List view, you can choose the item from the [Operation] menu to display the view which you want to transaction with.
To learn more details to manage this window, refer to each operation window.
Table 3.5 shows the list of operations operation windows for a normal Transaction Volume.
|
Operation |
Description |
Operation window |
|---|---|---|
|
Start Synchronization Processing |
Start backup synchronization processing of the Transaction Volume. |
Start Synchronization Processing (by volume) window |
|
Backup |
Backs up the Transaction Volume. |
Backup window (normal work volume) |
|
Restore |
Restores the Transaction Volume according to the latest copy of backup history information. |
Restore window (Transaction Volume specified) |
|
Delete of history |
Deletes all backup historys of the Transaction Volume. |
History deletion window (by volume) |
|
Cancel Synchronization Processing |
Delete the entire backup history of the Transaction Volume. |
Delete History (by volume) window |
|
Definition of backup policy |
Defines the backup policy for the Transaction Volume. |
Set Backup Policy window (by volume) |
|
Delete backup policy |
Deletes the backup policy for the Transaction Volume. |
Delete Backup Policy window (by volume) |
The backup history view displays the list of backup histories of the Transaction Volume by generation. This view is displayed when a Transaction Volume is selected on the tree view.
The display items correspond to "swsthistdisp" of the AdvancedCopy Manager command. See "Backup Management Commands," in the ETERNUS SF AdvancedCopy Manager Operator's Guide for details of the command.
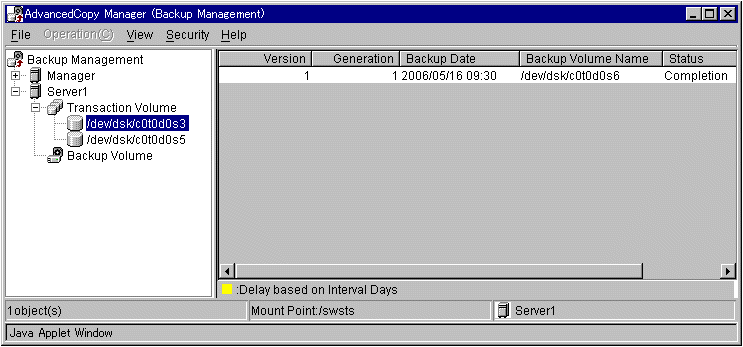
Table 3.6 shows the items displayed when a normal Transaction Volume is selected.
|
No. |
Display item |
Description |
|---|---|---|
|
1 |
Absolute generation number |
Displays the absolute generation number. Absolute generation numbers increase sequentially when the data that was backed up first is assumed to be 1. |
|
2 |
Relative generation number |
Displays the relative generation number. Relative generation numbers increase sequentially in the descending order when the latest data is assumed to be 1. |
|
3 |
Backup date |
Displays the date when backup was started. |
|
4 |
Backup volume name |
Displays the name of the volume that was backed up. |
|
5 |
Status |
Displays the copy status of the backup data.
|
You can delete restoration/backup histories.
In the Backup History List view, choose the backup history which you want to manage, then click the right button on your mouse. From the popup menu brought up, choose the item which you want to transaction with. And then each resulting view comes out.
Alternatively, after selecting a backup history which you want to manage in the Backup History List view, you can choose the item from the [Operation] menu to display the window which you want to transaction with
To learn more details to manage this window, refer to each operation window.
Table 3.7 shows the list of operations that can be executed when a backup history for a normal Transaction Volume selected.
|
Operation |
Description |
Operation window |
|---|---|---|
|
Restore |
Restores the selected backup history according to the backup history information. |
Restore window |
|
Delete of history |
Deletes the selected backup history. |
History deletion window (by volume) |
This view is displayed when a "Backup Volume" on the "Solaris OS server", "Windows server", "HP server" or "Linux server" to be displayed is selected on the tree view.
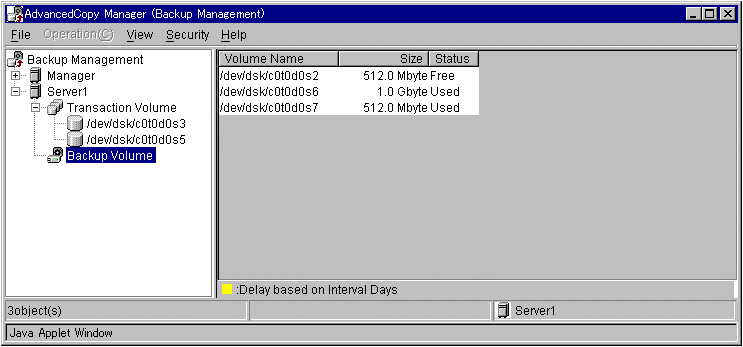
The display items on this view correspond to "swstdevdisp -b" of the AdvancedCopy Manager command. See "Backup Management Commands," in the ETERNUS SF AdvancedCopy Manager Operator's Guide for details of the command.
Table 3.8 shows the items displayed on the Backup Volume list view.
|
No. |
Display item |
Description |
|---|---|---|
|
1 |
Volume name |
Displays the Backup Volume name. |
|
2 |
Size |
Displays the volume size. |
|
3 |
Status |
Displays whether the Backup Volume state is "Unused" or "In use." Free: Idle Used: Generation managed |
You cannot perform any operation in the Backup Volume List view.
Whether or not to display items on each list view can be specified. By default, all items are displayed. When the title line of an item displayed on each list view is right-clicked, the popup menu appears. Selecting [Change Display Item] from the popup menu displays the window as shown below. Items displayed on this window depend on each list view.
Clicking [Setup Display Item] from the [View] menu can also display this window.
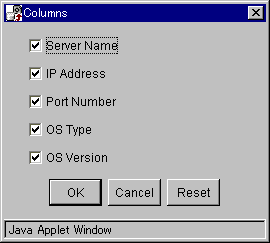
Each item can be individually selected from this window. Selecting [Reset] redisplays the initial state.
Perform the following procedure to rearrange the items displayed on each list view:
Drag the title of an item to be moved to the desired position.
Drop the title at the desired position.
Items that were moved left-justified.
The following operation windows are available for backup management.
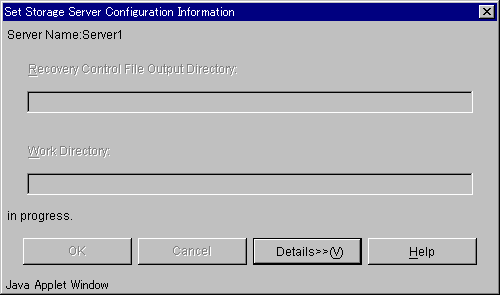
Use this window to set the Storage Server configuration information.
The following window is displayed by selecting a server on the server list view and clicking on [Set Storage Server Configuration Information] from the [Operation] menu.
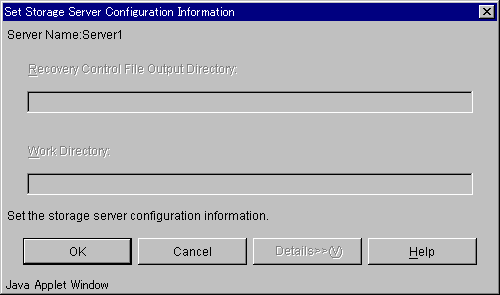
While server information is being set up, the following window is displayed:
When server information has been set up, the following window is displayed:
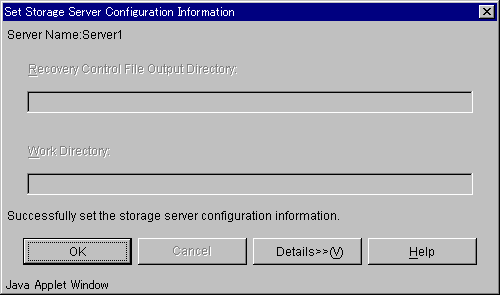
Click the [OK] button to redisplay the server list view. Click the [Details>>] button to open the details window.
Detailed information is displayed as follows:
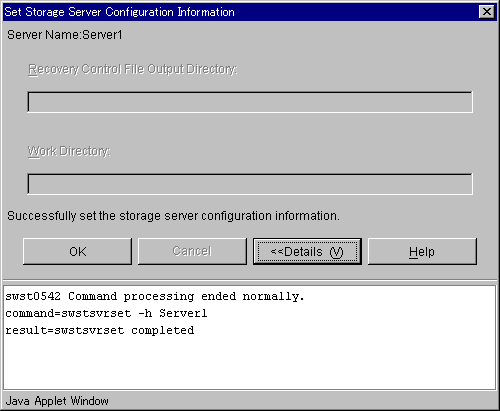
Click the [OK] button to redisplay the server list view. Click the [<<Details] button to close the details window.

When the Storage Management Server also serves as the Storage Server, you need to perform the above configuration on the Storage Management Server, too.
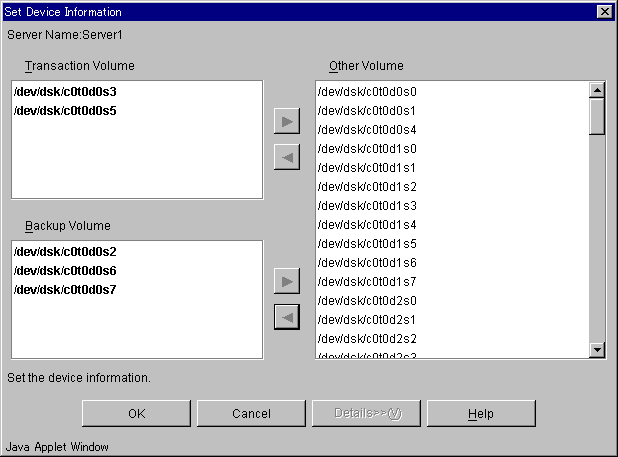
The device information setup window sets up device information.
To display the setup window, select a server (Solaris, Windows, HP-UX or Linux) on the server list view. Then select the [Operation] menu and click on [Set Device Information].
Volumes that have not been set up as Transaction or Backup Volume are displayed in the "Other Volume" field.
When device information has been set up, the following window is displayed:
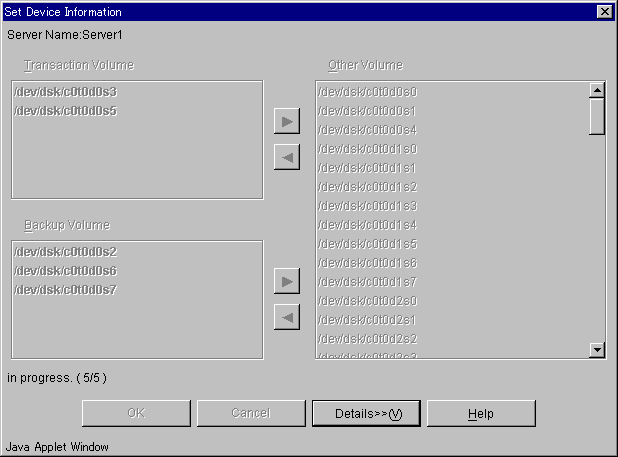
When device information has been set up, the following window is displayed:
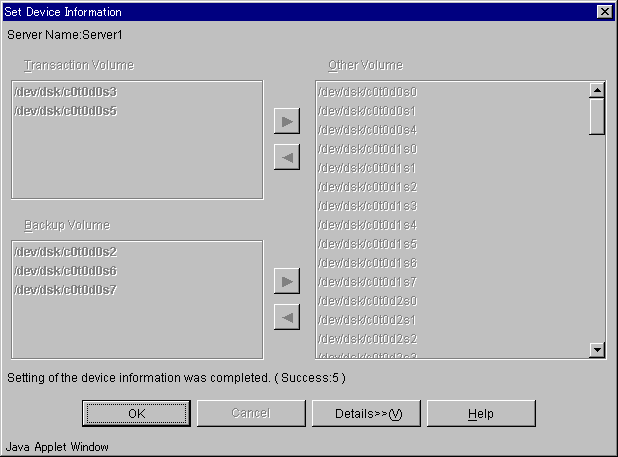
Click the [OK] button to redisplay the server list view. Click the [Details>>] button to open the details window.
Detailed information is displayed as follows:
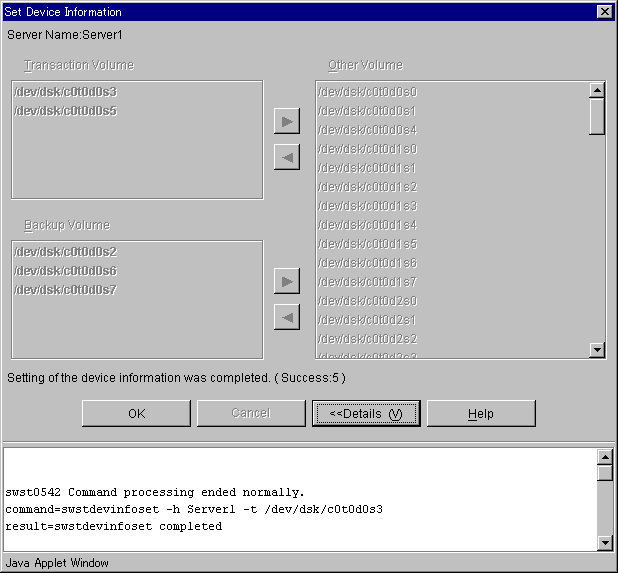
Click the [OK] button to redisplay the server list view. Click the [<<Details] button to close the details window.
The adjust resources window adjusts resources.
The setup window can be displayed be selecting a server on the server list view and clicking [Match Resources] from the [Operation] menu.

Click the [OK] button to adjust resources.
While resources are being adjusted, the following window is displayed:

While resources are being adjusted, the following window is displayed:

Click the [OK] button to redisplay the server list view. Click the [Details>>] button to open the details window.
Detailed information is displayed as follows:
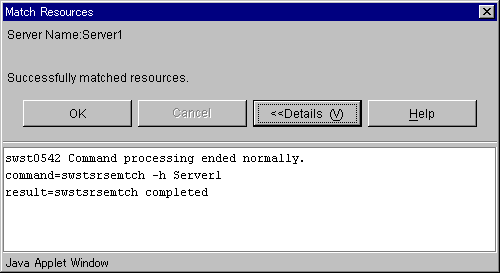
Click the [OK] button to redisplay the server list view. Click the [<<Details] button to close the details window.
The backup policy can be defined for a Transaction Volume by one of the following:
All Transaction Volumes
The backup policy is defined for all of the Transaction Volumes at once.
Transaction Volume
The backup policy is defined for a Transaction Volume.
Configure/modify backup policy collectively for all Transaction Volumes.
There are two ways to display the backup policy definition window:
The set backup policy window can be displayed by selecting a " Transaction Volume" on the transaction view and clicking the right mouse button from the popup menu, select [Set Backup Policy].
Or select a " Transaction Volume" on the transaction view, click on the [Operation] menu and select [Set Backup Policy].
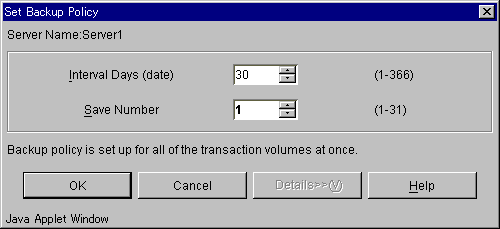
A number from 1 to 366 can be specified in the [Interval Days] input field.
A number from 1 to 31 can be specified in the [Save Number] field.
The default is 30 for [Interval Days] and 2 for [Save Number].

If the displayed initial values are left unchanged when the backup policy has been already set, the backup policy is not changed. To reset the backup policy to the displayed initial values ([Interval Days] is 30 or [Save Number] is 2), click the spin buttons of the input field.
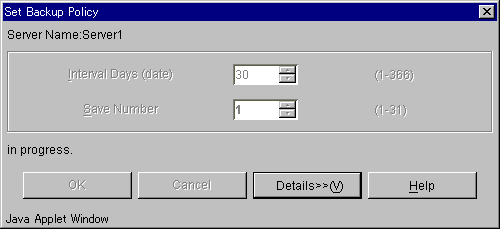
The following window is displayed while the backup policy is being defined:
When the backup policy has been defined, the following window is displayed:
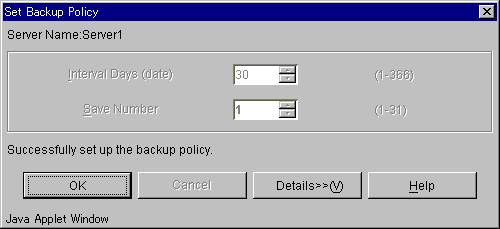
Click the [OK] button to redisplay the transaction view. Click the [Details>>] button to open the details window.
Detailed information is displayed as follows:
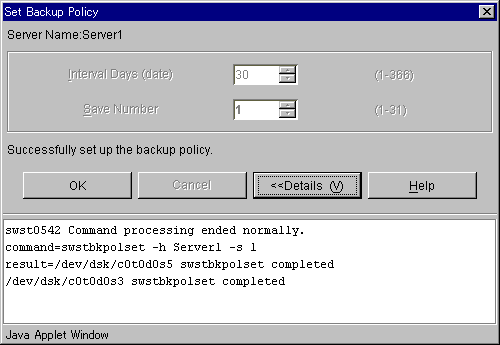
Click the [OK] button to redisplay the transaction view. Click the [<<Details] button to close the details window.
This window defines the backup policy for a Transaction Volume selected on the Transaction Volume list view.
Perform the following operation to display the Set Backup Policy window:
|
Selection on the Transaction Volume list view |
Operation |
|---|---|
|
Normal Transaction Volume |
Select [Set Backup Policy] from the popup menu appearing after the right mouse button is clicked. Or, Select [Set Backup Policy] from the [Operation] menu. |
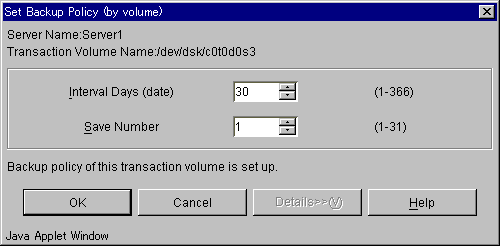
A number from 1 to 366 can be specified in the [Interval Days] input field.
A number from 1 to 31 can be specified in the [Save Number] input field.
For default, the current backup policy is displayed.
Click the [OK] button to define the backup policy. Click the [Cancel] button to cancel defining the backup policy.
While the backup policy has been defined, the following window is displayed:
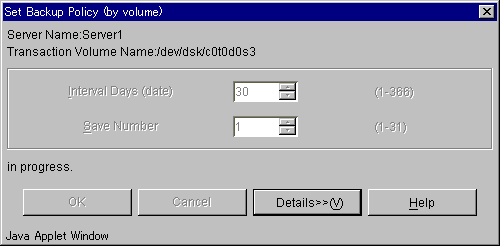
When the backup policy has been defined, the following window is displayed:
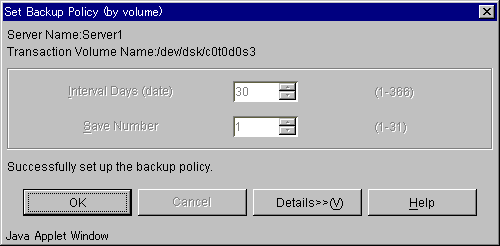
Click the [OK] button to redisplay the Transaction Volume list view. Click the [Details>>] button to open the details window.
Detailed information is displayed as follows:
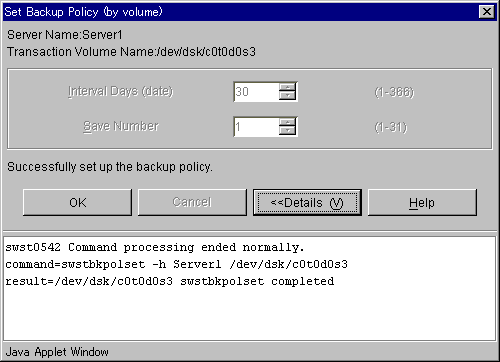
Click the [OK] button to redisplay the Transaction Volume list view. Click the [<<Details] button to close the details window.
The backup policy deletion screen deletes the backup policy for a Transaction Volume. The backup policy can be deleted by either of the following:
Volume
The backup policy for a selected Transaction Volume is deleted.
This window deletes the backup policy for a Transaction Volume selected on the Transaction Volume list view.
Perform the following operation to display the delete backup policy window:
|
Selection on the Transaction Volume list view |
Operation |
|---|---|
|
Normal Transaction Volume |
Select [Delete Backup Policy] from the popup menu appearing after the right mouse button is clicked. Or, Select [Delete Backup Policy] from the [Operation] menu. |
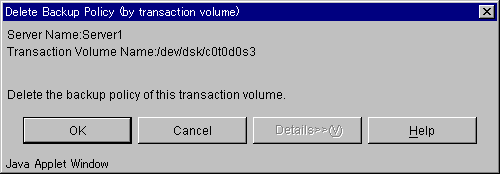
Click the [OK] button to delete the backup policy. Click the [Cancel] button to cancel deleting the backup policy.
The following window is displayed while the backup policy is being deleted:
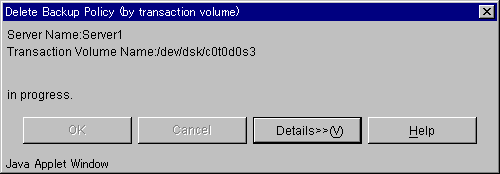
When the backup policy has been deleted, the following window is displayed:
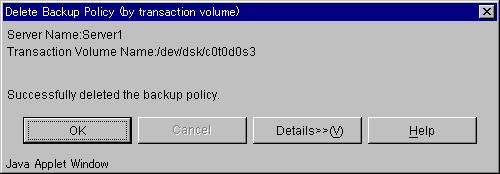
Click the [OK] button to redisplay the Transaction Volume list view. Click the [Details>>] button to open the details window.
Detailed information is displayed as follows:
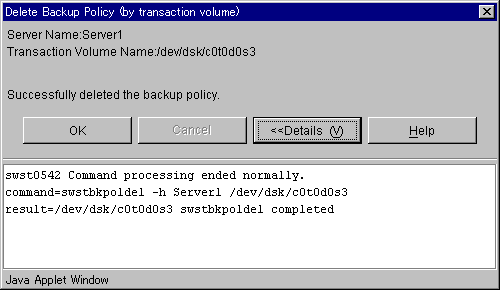
Click the [OK] button to redisplay the Transaction Volume list view. Click the [<<Details] button to close the details window.
The Start Synchronous Processing window begins Start Synchronous Processing for a Transaction Volume selected on the Transaction Volume list view.
When Start Synchronous Processing is begun, this window uses the EC function of the disk array unit GR series to begin copying from the selected Transaction Volume to an unused Backup Volume.
Start Synchronous Processing can be executed by either of the following:
Transaction Volume
This window starts Synchronous Processing for a Transaction Volume selected on the Transaction Volume list view.
Perform the following operation to display the Start Synchronous Processing window:
|
Selection on the Transaction Volume list view |
Operation |
|---|---|
|
Normal Transaction Volume |
Select [Start Synchronous Processing] from the popup menu appearing after the right mouse button is clicked. Or, Select [Start Synchronous Processing] from the [Operation] menu. |
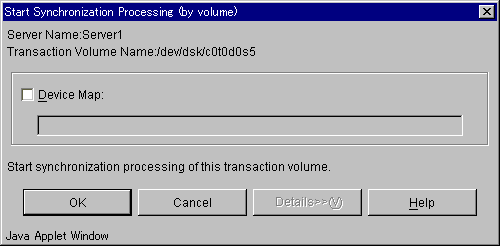
To execute Synchronous after specifying a target Backup Volume, specify the device map file as [Device map name]. Specify the full path of the file name on the storage server (for example, /home/usr1/devmap1) as the device map file.
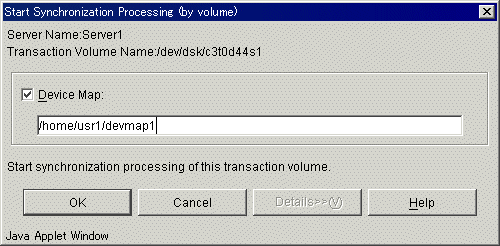
For more information about the device map file, see "Preparing device map file," in the ETERNUS SF AdvancedCopy Manager Operator's Guide.
If [Device Map] is not checked, the target Backup Volume is automatically selected.
Click the [OK] button to Start Synchronous Processing. Click the [Cancel] button to cancel Synchronous Processing.
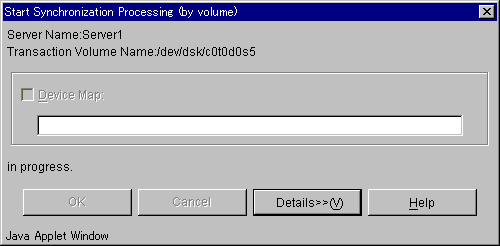
The following window is displayed while Start Synchronous Processing is being executed:
When Start Synchronous Processing is complete, the following window is displayed:
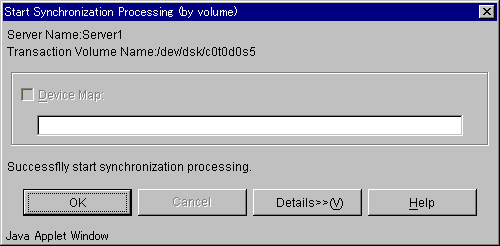
Click the [OK] button to redisplay the Transaction Volume list view. Click the [Details>>] button to open the details window.
Detailed information Start Synchronous Processing is displayed as follows:
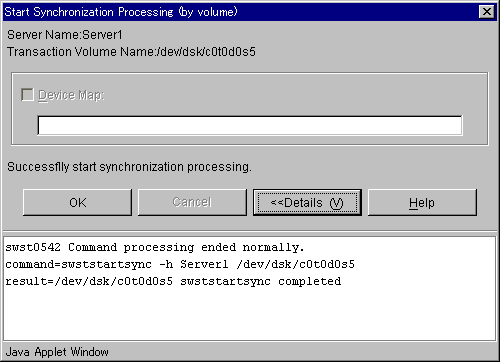
Click the [OK] button to redisplay the Transaction Volume list view. Click the [<<Details] button to close the details window.
The Cancel Synchronous Processing window cancels synchronous processing that the selected Transaction Volume executing.
Synchronous Processing can be canceled by either of the following:
Transaction Volume
This window cancels backup synchronous processing that the Transaction Volume executing.
Perform the following operation to display the Cancel Synchronous Processing window:
|
Selection on the Transaction Volume list view |
Operation |
|---|---|
|
Normal Transaction Volume |
Select [Cancel Synchronization processing] from the popup menu appearing after the right mouse button is clicked. Or, Select [Cancel Synchronization processing] from the [Operation] menu. |
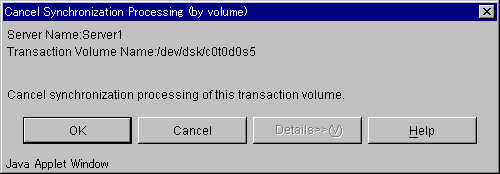
Click the [OK] button to cancel synchronous processing. Click the [Cancel] button to cancel "Cancel Synchronous Processing".
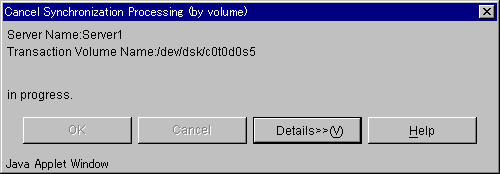
While Cancel Synchronous Processing is being executed, the following window is displayed:
When Cancel Synchronous Processing is complete, the following window is displayed:
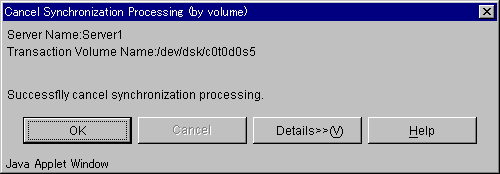
Click the [OK] button to redisplay the Transaction Volume list view. Click the [Details>>] button to open the details window.
Detailed information is displayed as follows:
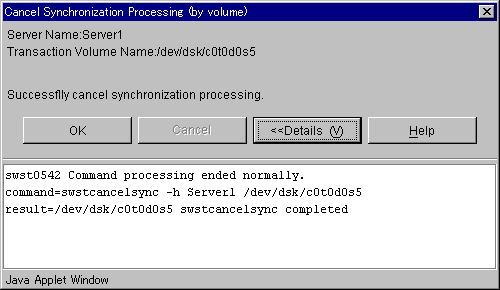
Click the [OK] button to redisplay the Transaction Volume list view. Click the [<<Details] button to close the details window.
The backup window backs up a Transaction Volume selected on the Transaction Volume list view.
The Transaction Volume can be backed up by either of the following:
Transaction Volume
This window backs up a normal Transaction Volume selected on the Transaction Volume list view.
Perform the following operation to display the backup window:
|
Selection on the Transaction Volume list view |
Operation |
|---|---|
|
Normal Transaction Volume |
Select [Backup] from the popup menu appearing after the right mouse button is clicked. Or, Select [Backup] from the [Operation] menu. |
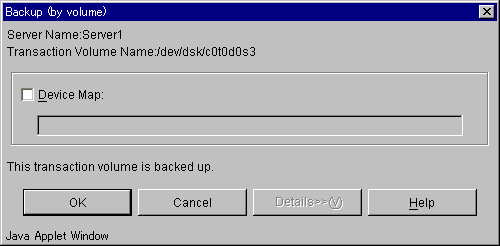
To perform a snapshot high-speed backup operation specified with the target Backup Volume, specify the name of device map created on the storage server whose volume is to be backed up. Specify the full path (e.g., /home/usr1/devmap1) of the name of the file on the storage server
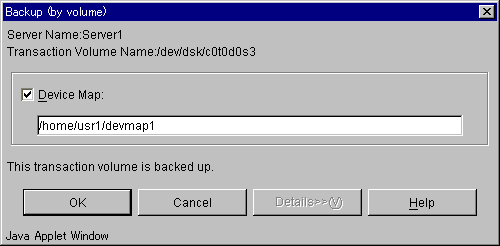
For details about the device map file, refer to "Preparing device map file" in ETERNUS SF AdvancedCopy Manager Operator's Guide.
If [Device Map] is not checked, the target Backup Volume is automatically selected.
Click the [OK] button to start backup. Click the [Cancel] button to cancel starting backup.
The following window is displayed while a volume is being backed up:
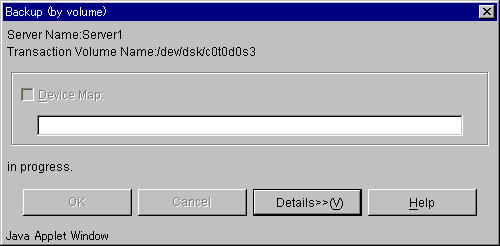
When a volume has been backed up, the following window is displayed:
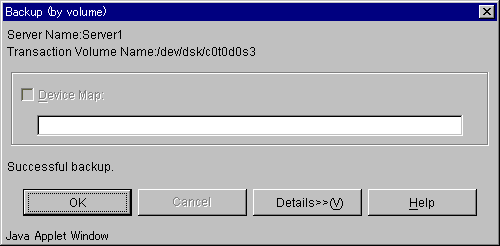
Click the [OK] button to redisplay the Transaction Volume list view. Click the [Details>>] button to open the details window.
Detailed information is displayed as follows:
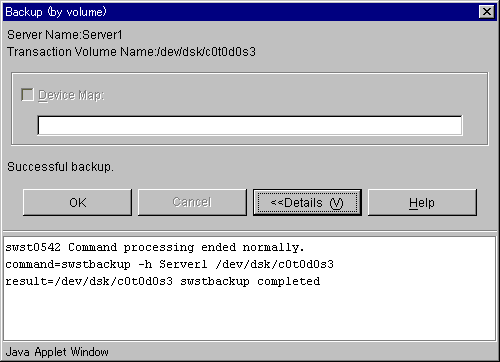
Click the [OK] button to redisplay the Transaction Volume list view. Click the [<<Details] button to close the details window.
The restore window restores a Transaction Volume.
Use either of the following methods to specify restore:
Transaction Volume specified
Backup history specified
This window restores a Transaction Volume selected on the Transaction Volume list view with the latest history. To display the restore window, select a Transaction Volume and click the right mouse button. From the popup menu, select [Restore].
Selecting a Transaction Volume on the Transaction Volume list view and [Restore] from the [Operation] menu also displays the restore window.
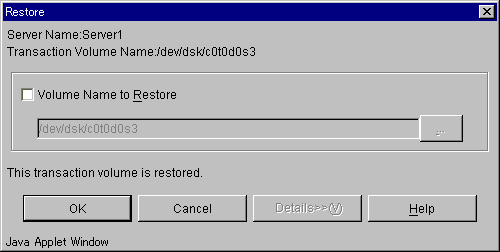
The Transaction Volume selected on the Transaction Volume list view is displayed in [Volume Name to Restore] as a default value.
Pressing the [...] button displays the volume selection window. On this window, the restore destination volume can be specified.
Click the [OK] button to restore a volume. Click the [Cancel] button to redisplay the Transaction Volume list view.
While a volume is being restored, the following window is displayed:
When restore processing is complete, the following window is displayed:
Click the [OK] button to redisplay the Transaction Volume list view. Click the [Details>>] button to open the details window.
Detailed information is displayed as follows:
Click the [OK] button to redisplay the Transaction Volume list view. Click the [<<Details] button to close the details window.
This window restores a Transaction Volume with a backup history selected from the backup history list.
To display the restore window, select a backup history from the backup history list. Click the right mouse button and select [Restore] from the popup menu.
The restore window can also be displayed by selecting a backup history from the backup history list and clicking [Restore] from the [Operation] menu.
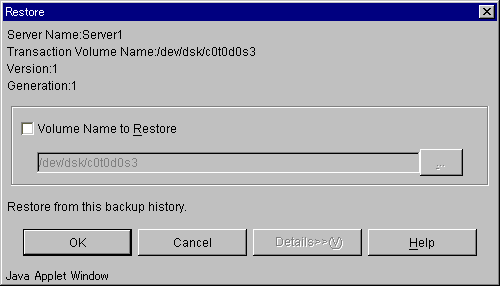
The Transaction Volume selected on the tree view is displayed in [Volume Name to Restore] as a default value.
Pressing the [...] button displays the volume selection window. On this window, the restore destination volume can be specified.
Click the [OK] button to restore a volume. Click the [Cancel] button to redisplay the backup history list view.
While a volume is being restored, the following window is displayed:
When restore processing is complete, the following window is displayed:
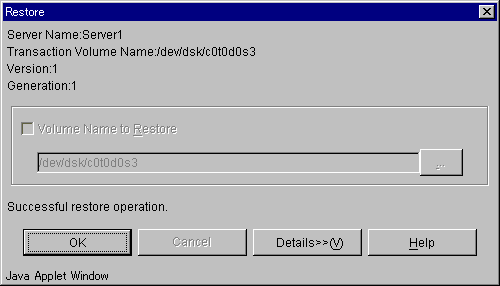
Click the [OK] button to redisplay the backup history list view. Click the [Details>>] button to open the details window.
Detailed information is displayed as follows:
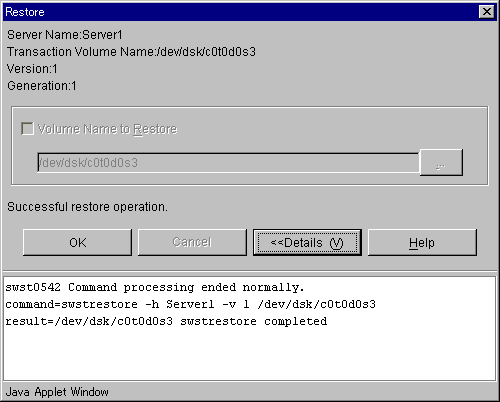
Click the [OK] button to redisplay the backup history list view. Click the [<<Details] button to close the details window.
deleted
The history deletion window deletes backup history information
Use either of the following methods to delete a backup history:
Deleting a backup history with a Transaction Volume selected
Deleting a backup history with a backup history selected
This method deletes all backup history information items of the Transaction Volume selected
Backup history can be deleted by either of the following:
Transaction Volume
All backup historys items for the selected Transaction Volume are deleted.
This window deletes a backup history of the Transaction Volume selected on the Transaction Volume list.
Perform the following operation to display the Delete History window:
|
Selection on the Transaction Volume list view |
Operation |
|---|---|
|
Normal Transaction Volume |
Select [Delete History] from the popup menu appearing after the right mouse button is clicked. Or, Select [Delete History] from the [Operation] menu. |
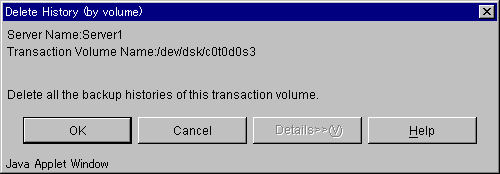
Click the [OK] button to delete a backup history. Click the [Cancel] button to cancel deleting a backup history.
While a backup history is being deleted, the following window is displayed:
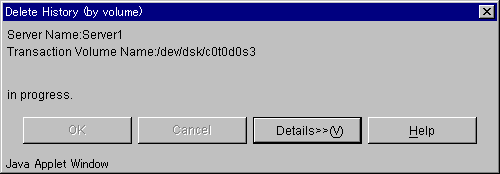
When a backup history has been deleted, the following window is displayed:
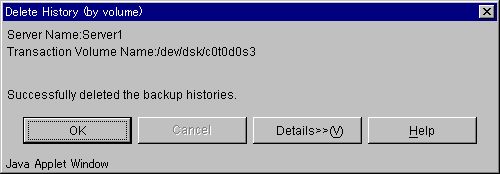
Click the [OK] button to redisplay the Transaction Volume list view. Click the [Details>>] button to open the details window.
Detailed information is displayed as follows:
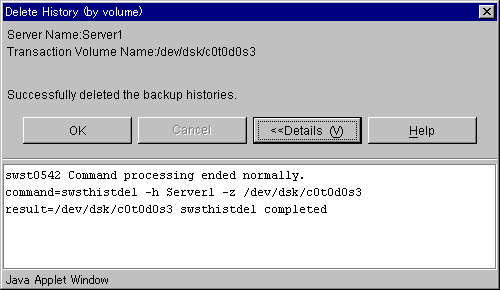
Click the [OK] button to redisplay the Transaction Volume list view. Click the [<<Details] button to close the details window.
This method deletes backup history information by generation for the selected Transaction Volume.
A backup history can be deleted by either of the following:
Transaction Volume
Backup history information of the selected Transaction Volume is deleted.
This window deletes a backup history item selected on the backup history list.
Perform the following operation to display the history deletion window:
|
Selection on the backup history list view |
Operation |
|---|---|
|
Backup history of the normal Transaction Volume |
Select [Delete History] from the popup menu appearing after the right mouse button is clicked. Or, Select [Delete History] from the [Operation] menu. |
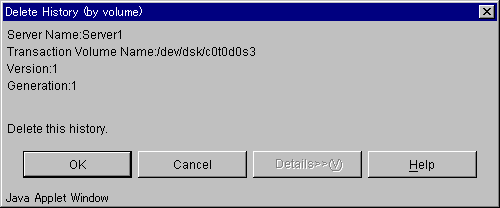
Click the [OK] button to delete a backup history. Click the [Cancel] button to cancel deleting a backup history.
While a backup history is being deleted, the following window is displayed:
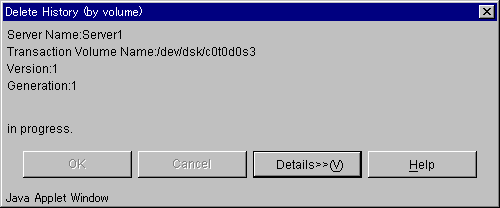
When a backup history is being deleted, the following window is displayed:
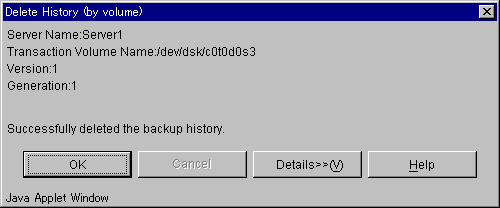
Click the [OK] button to redisplay the backup history list view. Click the [Details>>] button to open the details window.
Detailed information is displayed as follows:
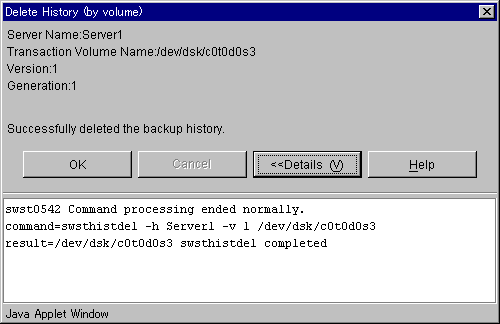
Click the [OK] button to redisplay the backup history list view. Click the [<<Details] button to close the details window.
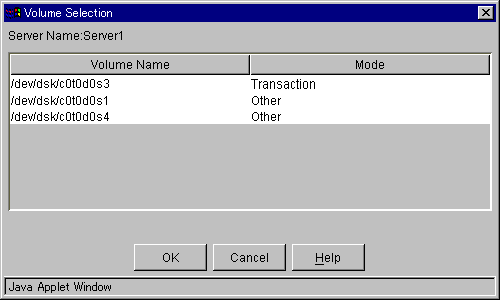
When restoring a volume to other than the Transaction Volume, the restore destination volume can be selected on the volume selection window.
The volume list displays the Transaction Volume selected on the Transaction Volume list view or backup history list view. It also displays the volumes other than the Transaction or Backup volume having the same size as the Transaction Volume.
This section describes the access permission required for the backup window. See "Authentication Feature Window Operations" for details of the access permission.
|
Operation name |
Write permission |
Execute permission |
Read permission |
|---|---|---|---|
|
Window display |
Yes |
Yes |
Yes |
|
Backup |
Yes |
Yes |
No |
|
Restore |
Yes |
Yes |
No |
|
Delete of history |
Yes |
Yes |
No |
|
Start Synchronous Processing |
Yes |
Yes |
No |
|
Cancel Synchronous Processing |
Yes |
Yes |
No |
|
Adjust resources |
Yes |
Yes |
No |
|
Definition of backup policy |
Yes |
No |
No |
|
Delete Backup Policy |
Yes |
No |
No |
|
Set device information |
Yes |
No |
No |
|
Set Server Information |
Yes |
No |
No |
Yes: Operation enabled No: Operation disabled
Contents
Index
 
|