

| PRIMECLUSTER Global Disk Services Configuration and Administration Guide 4.1 (Solaris(TM) Operating System) |
Contents
 
|
| Chapter 5 Operation | > 5.2 Settings | > 5.2.5 Proxy Configuration |
This subsection describes procedures for joining proxy volumes or proxy groups to volumes or groups in GDS Snapshot installed systems.
Selecting a master volume or a master group
Click an icon of a volume or a group to which a proxy is joined in the Main screen.
Selecting the [Join] menu
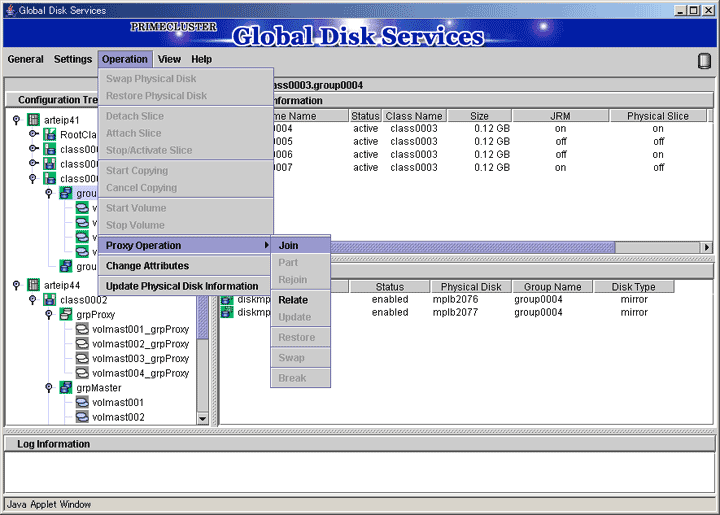
Select [Operation]:[Proxy Operation]:[Join] in the Main screen.
Selecting a proxy to be joined
The Select Proxy dialog box appears.

The following figure shows the window for group connection.
On the window for volume connection, the <OK> button appears in the position of the <Next> button.
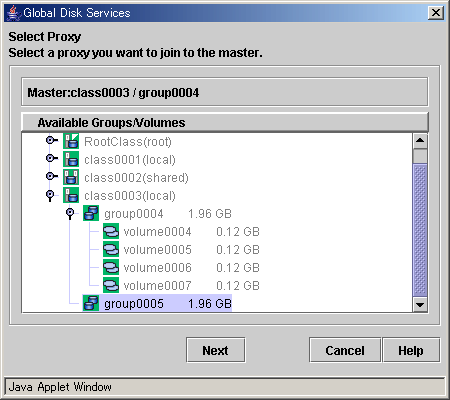
Select a volume or a group to be joined to the master volume or the master group from the [Available Groups/Volumes].
Volumes or groups conforming to all of the following conditions are selectable.
|
Object |
Volume |
Group |
|---|---|---|
|
Conditions |
|
|
 Status of Proxy Volumes That Can Be Joined
"active" proxy volumes cannot be joined. To join an "active" proxy volume, stop the proxy volume in advance.
When joining volumes, select a volume to be joined to the master volume and click <OK>.
When joining groups, select a group to be joined to the master group and click <Next>.
Clicking <Cancel> cancels the join process.
Defining attributes of proxy volumes created in the proxy group
When joining groups, the Volume Attributes Definition dialog box appears.
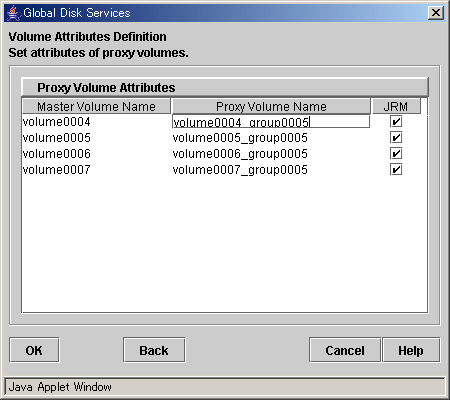
When a proxy group is joined to a master group, proxy volumes are created within the proxy group and joined to corresponding master volumes within the master group. In the Volume Attributes Definition dialog box, set attributes of such proxy volumes.
Proxy Volume Name
Assign volume names of proxy volumes. [Proxy Volume Name] shows default volume names. To change the default value, click and edit the volume name.
 For the volume naming conventions, see "Object Name."
 Automatically Generated Proxy Volume Names
Proxy volume names are automatically generated as "master volume name" + "_" (underscore) + "proxy group name" (e.g. volume0001_group0002).
JRM
Set JRM (Just Resynchronization Mechanism) for volumes. The default value is "on." To turn "off", uncheck the [JRM] box.
 JRM for Volumes
The JRM setting in the Proxy Volume Attributes Definition dialog box is the "JRM for Volumes" of the proxy volume. Note that it is not the "JRM for Proxies." For details, see "Just Resynchronization Mechanism (JRM)."
When the settings are complete, click <OK>. Clicking <Cancel> cancels the join process.
Confirming
A confirmation dialog box appears asking you whether to join the proxy.
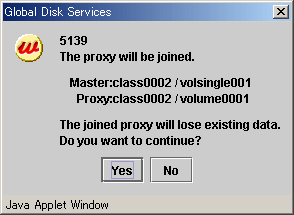
To continue the process, click <Yes>. Clicking <No> displays the Select Proxy dialog box shown in step 3 again.
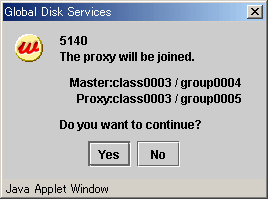
To continue the process, click <Yes>. Clicking <No> displays the Volume Attributes Definition dialog box shown in step 4 again.
Information message of the completion
A message window appears informing you that the join process is complete.

Click <OK> to close the information message window.
Contents
 
|