
| PRIMECLUSTER Global Disk Services Configuration and Administration Guide 4.1 (Solaris(TM) Operating System) |
Contents
 
|
| Chapter 5 Operation | > 5.2 Settings | > 5.2.3 Operating from the Settings Menu |
In this section, how to create a new volume is explained.
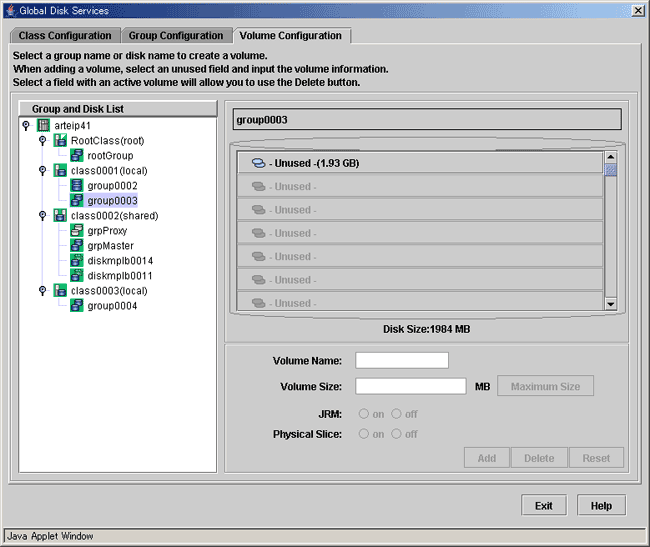
In the [Settings] menu, select [Volume Configuration]. The Volume Configuration screen appears.

Follow the procedures below to create a volume.
Selecting group/disk
In the [Group and Disk List], select the group or the disk.
Selecting unused volume
Click <Unused> with a volume icon, and select an unused volume.
Setting volume attributes
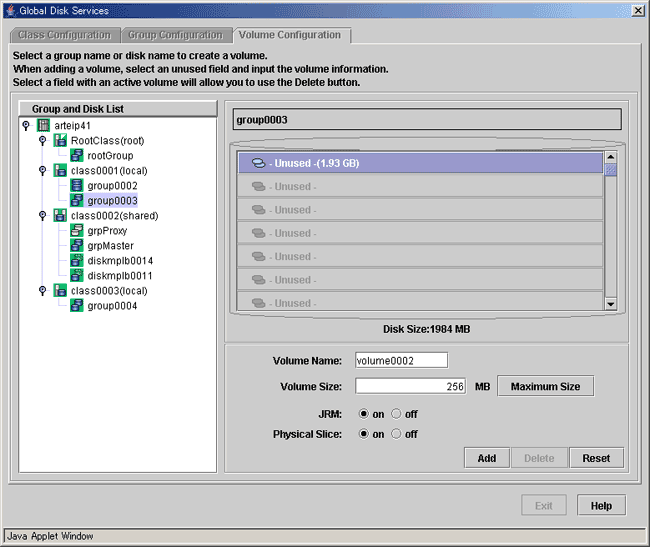
Selecting an unused volume will allow you to type in the volume attributes field (Volume Name, Volume Size, JRM, Physical Slice).
Setting [Volume Name]
Type the volume name.
 For information on assigning a volume name, see "Object Name."
Setting [Volume Size]
Type the volume size in MB units, using numbers only.
 Size and Cylinder Boundary
When the specified size does not match the cylinder boundary, it will automatically adjust by rounding up. For details, see "Volume Size."
[Maximum Size] button
Sets the value in the [Volume Size] field to the maximum available size.
Setting [JRM]
Default is set to "on." Change the setting when you want to disable the just resynchronization copying feature.
When you select a stripe group or concatenation group in step 1, the setting will fail.
Setting [Physical Slice]
Sets the volume's physical slice attribute value.
on : a volume which consists of physical slices is created.
off: a volume without physical slices is created.
When you select a stripe group or concatenation group in step 1, the setting will fail.

Determining the new volume
After setting the attributes, click <Add>. A new volume will be created.
If you click <Reset>, creation of the new volume will be canceled.
After creating all volumes, click <Exit> and close Volume Configuration screen.
After creating the volume, the volume will be started. You can access to the volume using the following special files.
/dev/sfdsk/class_name/rdsk/volume_name
/dev/sfdsk/class_name/dsk/volume_name
 Shared Class Volume Operation
Volume created in a shared class cannot be used from other nodes immediately. If you wish to access from other nodes, you must activate the volume from the node you wish to access.
After activating the volume, the node which created the volume, and the node which activated the volume will gain access. However, since operating from two nodes could affect data consistency, you must be careful when operating the volume.
Contents
 
|