
| PRIMECLUSTER Global Disk Services Configuration and Administration Guide 4.1 (Solaris(TM) Operating System) |
Contents
 
|
| Chapter 5 Operation | > 5.2 Settings | > 5.2.3 Operating from the Settings Menu |
In this section, how to create a new group is explained.
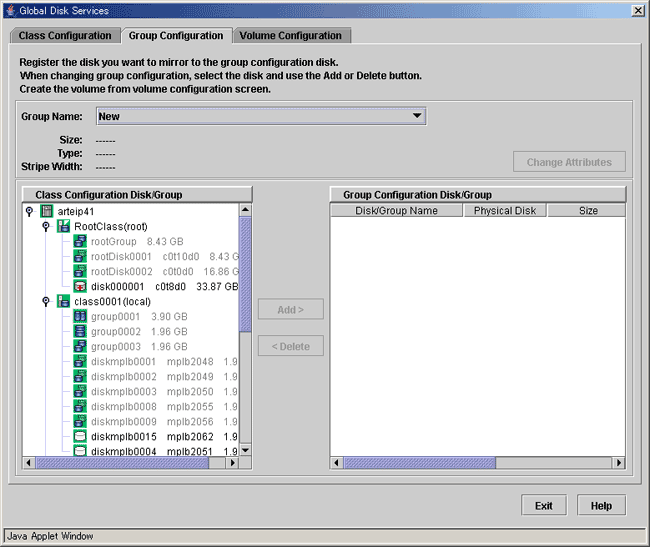
In the [Settings] menu, select [Group Configuration]. Group Configuration screen appears.

Follow the procedures below to create a new group.
Selecting group name
In the [Group Name] list, select "New."
Selecting disk/lower level group
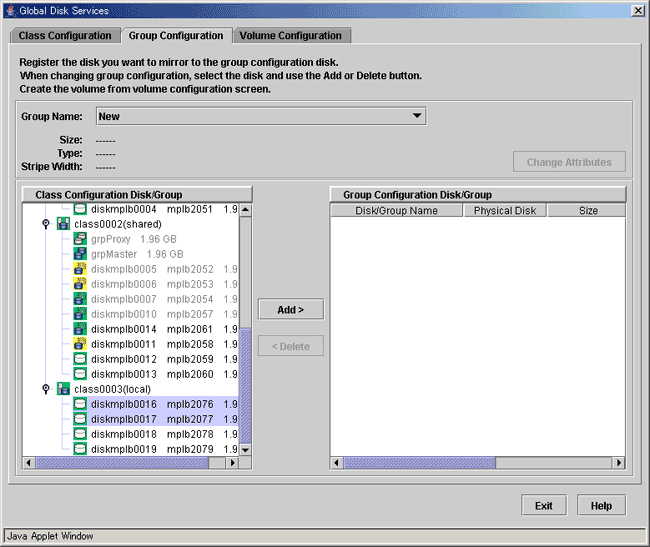
In the [Class Configuration Disk/Group] field, select the disk/lower level group you want to include in the disk group.
You can select more than one disk/group at a time.
Selecting a disk/group will make the <Add> button available.

Creating a group
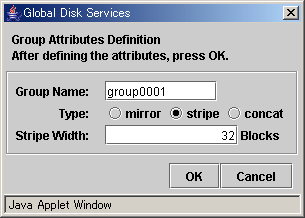
Click <Add>, and the Group Attributes Definition screen appears. You will be able to specify the group attributes such as group name, type and stripe width.

Setting [Group Name]
Enter the group name.
Change the default group name if necessary.
Setting [Type]
Set the group type.
Select "mirror" for mirroring, "stripe" for striping, and "concat" for concatenating. The default setting is "mirror."
Setting [Stripe Width]
You will be able to enter this field only when you select "stripe" for the [Type]. For the stripe width, you can specify a value of two raised to the power.
The default setting is "32."
After setting the attributes, click <Exit> and a new group will be created.
If you click <Cancel> in the Group Attributes Definition screen, connection of the disk itself will be canceled.
 For information on assigning a group name, see "Object Name."
Completing group creation
After creating all groups, click <Exit> and close Group Configuration screen.
Contents
 
|