Follow the procedure below to delete the cluster environment for a Managed Server transaction.
Note
Perform the procedures using Administrator privileges. The Windows "Computer Browser service" must be activated if a user belonging to the Administrators of the domain wants to perform deletion. If the other products are not using "Computer Browser Service", after this operation is completed, "Computer Browser Service" can be stopped without causing any problems.
Do not use the Telnet Server service.
Delete the node.
Use the AdvancedCopy Manager command to delete the node.
Stop the cluster transaction.
Stop the cluster transaction to which the applicable AdvancedCopy Manager belongs, using the Failover Cluster Manager.
Leave the shared disk for shared data of AdvancedCopy Manager online. Refer to your cluster software manuals for information on how to stop the cluster transaction and how to vary the shared disk online.
If the clustered system is the 1:1 Standby system, the Mutual Standby system, or the n:1 Standby system, go to step 5.
If the system is the Cascade system, go to step 3.
Move transactions to the secondary node B.
With Failover Cluster Manager, move transactions to which the applicable AdvancedCopy Manager belongs to the secondary node B.
Refer to your cluster software manuals for information on how to move them.
Note
When the secondary node B consists of two or more nodes, perform step 3 and step 4 on all of the secondary nodes B.
On the secondary node B, execute the cluster unsetup command.
Execute the following command.
The programDir is "Program Directory" specified at the AdvancedCopy Manager's agent installation.
When executing in the Management Server
programDir\ACM\bin\stgclunset_mscs |
When executing in the Managed Server
programDir\bin\stgclunset_mscs |
The cluster unsetup command window is displayed.
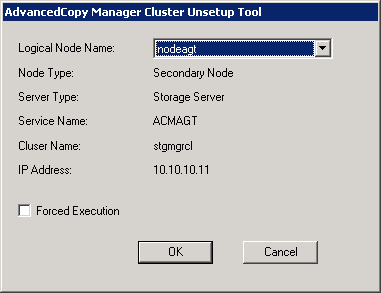
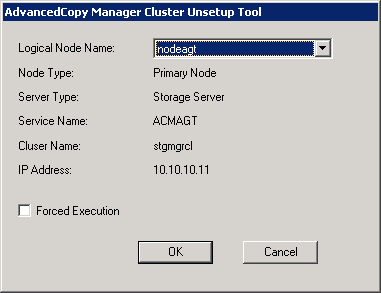
Select the logical node name of the AdvancedCopy Manager transaction to be deleted. For unsetup after node failure, select the Forced Execution checkbox. After confirming each field, click OK.
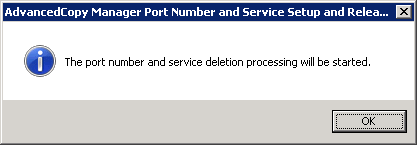
The following page is displayed. Click OK.
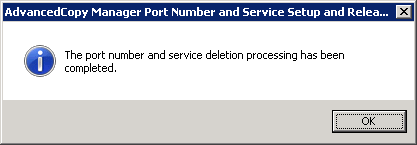
The following page is displayed. Click OK.
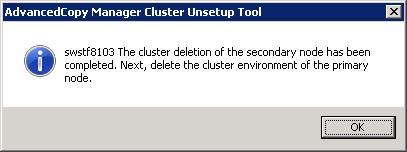
Complete the cluster unsetup of the secondary node B.
When the completion window of cluster unsetup is displayed, click OK.
Note
For the secondary node B, the swstf8143 message is displayed.
Note
If there are remaining secondary nodes B for which step 3 and step 4 have not been performed, perform from step 3 on the nodes. When step 3 and step 4 is completed on all secondary nodes B, go to step 5.
Move transactions to the secondary node A.
With Failover Cluster Manager, move transactions to which the applicable AdvancedCopy Manager belongs to the secondary node A.
Refer to your cluster software manuals for information on how to move them.
On the secondary node A, execute the cluster unsetup command.
Execute the following command.
The programDir is "Program Directory" specified at the AdvancedCopy Manager's agent installation.
When executing in the Management Server
programDir\ACM\bin\stgclunset_mscs |
When executing in the Managed Server
programDir\bin\stgclunset_mscs |
The cluster unsetup command window is displayed.
Select the logical node name of the transaction to be deleted. For unsetup after node failure, select the Forced Execution checkbox.
After confirming each field, click OK.
The following page is displayed. Click OK.
The following page is displayed. Click OK.
Complete the cluster unsetup of the secondary node A.
When the completion window of cluster unsetup is displayed, click OK. Next, execute unsetup for the primary node.
Move transactions to the primary node.
With Failover Cluster Manager, move transactions to which the applicable AdvancedCopy Manager belongs to the primary node.
Refer to your cluster software manuals for information on how to move them.
On the primary node, execute the cluster unsetup command.
Execute the following cluster unsetup command.
The programDir is "Program Directory" specified at the AdvancedCopy Manager's agent installation.
When executing in the Management Server
programDir\ACM\bin\stgclunset_mscs |
When executing in the Managed Server
programDir\bin\stgclunset_mscs |
The cluster unsetup command window is displayed.
Select the logical node name selected in the cluster unsetup window on the secondary node. For unsetup after node failure, select the Forced Execution checkbox.
After confirming each field, click OK.
The following page is displayed. Click OK.
The following page is displayed. Click OK.
Complete cluster unsetup of the primary node.
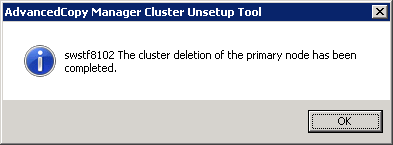
When the completion window of cluster unsetup is displayed, click OK.
Delete and/or move the resources that were used by AdvancedCopy Manager.
If the shared disk for shared data of AdvancedCopy Manager is not used for the transaction
Use the Failover Cluster Manager to move them to another transaction.
If "New" is selected in the IP Address Resource when the AdvancedCopy Manager cluster setup
If the following resources are not being used, use the Failover Cluster Manager to delete them.
AdvancedCopy IP Address_logicalNodeName
AdvancedCopy Network_logicalNodeName
For information about moving disk resource, refer to your cluster software manuals.
Delete the port number of AdvancedCopy Manager that was set for transaction use.
Delete the port number set for the Managed Server transaction from the %SystemRoot%\system32\drivers\etc\services file. Delete the port numbers on the primary node and secondary nodes. The service name is as follows:
stgxfws_logicalNodeName
Restart the cluster transaction.
Use the Failover Cluster Manager to switch the cluster transaction that was stopped in step 2 online. For information about switching the cluster transaction online, refer to your cluster software manuals.
The deletion the cluster environment for a Managed Server transaction in Windows clustered system is completed.