See the procedure below to set the PreCheckScript in the cluster application.
Note
When adding/deleting a resource or changing the setting of a resource in the cluster application on Solaris, delete the userApplication once as a setting procedure. In this case, follow this procedure to set the PreCheckScript again.
Enter the following command to display the wizard menu for configuring RMS.
# hvw -xj -n configname
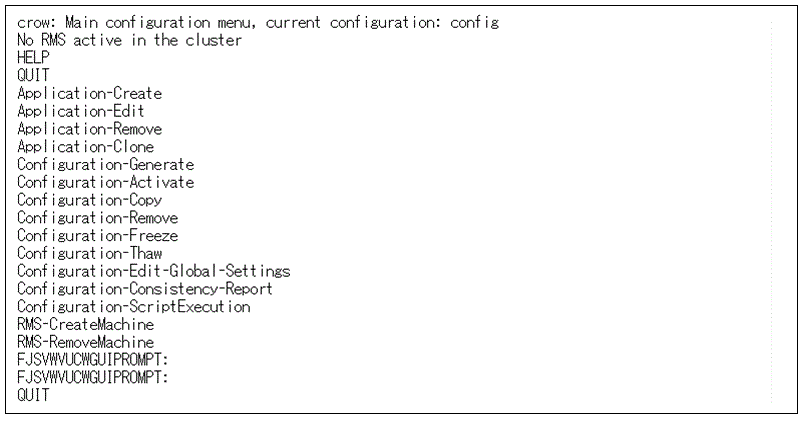
RMS Wizard is started and the Main configuration menu is displayed.
Enter "Application-Edit" and then select [Application-Edit].
Figure 4.1 Main configuration menu
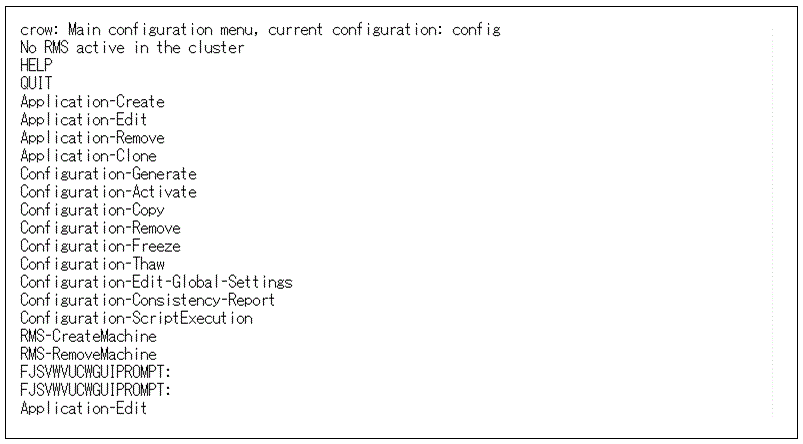
Enter "OPTIONS" and then select [OPTIONS].
Figure 4.2 [Application selection] menu

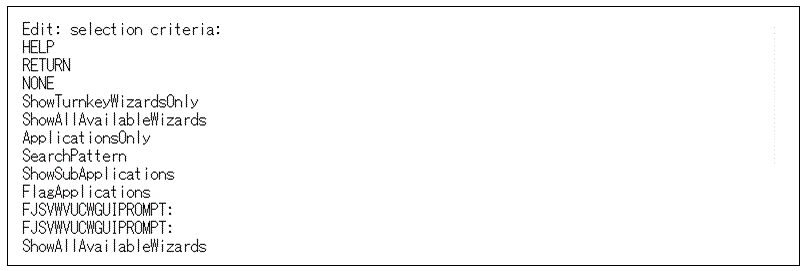
Enter "ShowAllAvailableWizards" and then select [ShowAllAvailableWizards].
Figure 4.3 Option menu of the application setting
In the screen below, enter the application name that sets the PreCheckScript, and enter the return key.
Here, enter "userApp_0" to set PreCheckScript of userApp_0.
Figure 4.4 [Application selection] menu

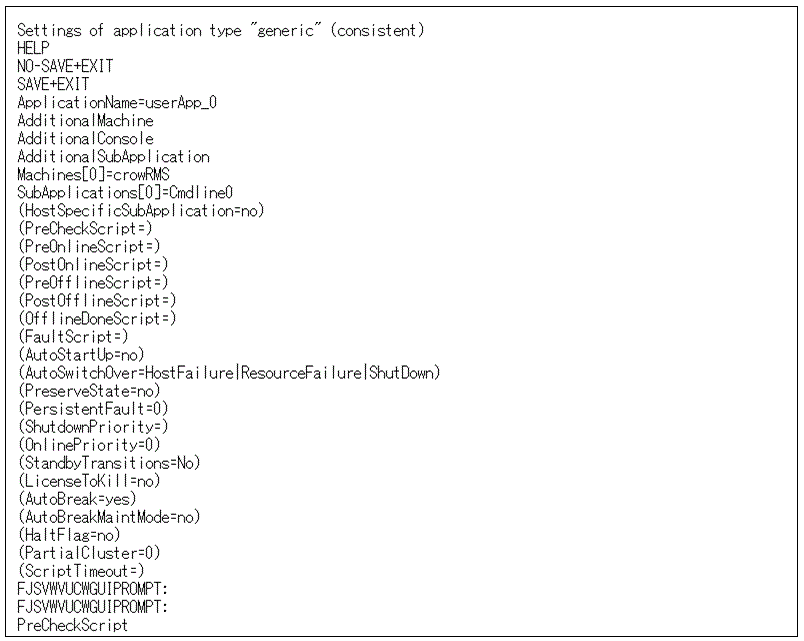
Enter "PreCheckScript" and then select [(PreCheckScript=)].
Figure 4.5 Application setting menu
Enter "FREECHOICE" and then select [FREECHOICE].
Figure 4.6 Selection menu of the PreCheckScript

Enter the file path of the PreCheckScript, and press the return key.
In the screen below, /usr/local/app/PreCheck.sh is specified for the PreCheckScript.
Figure 4.7 Entering PreCheckScript

Enter "SAVE+EXIT" and then select [SAVE+EXIT].
Figure 4.8 Application setting menu
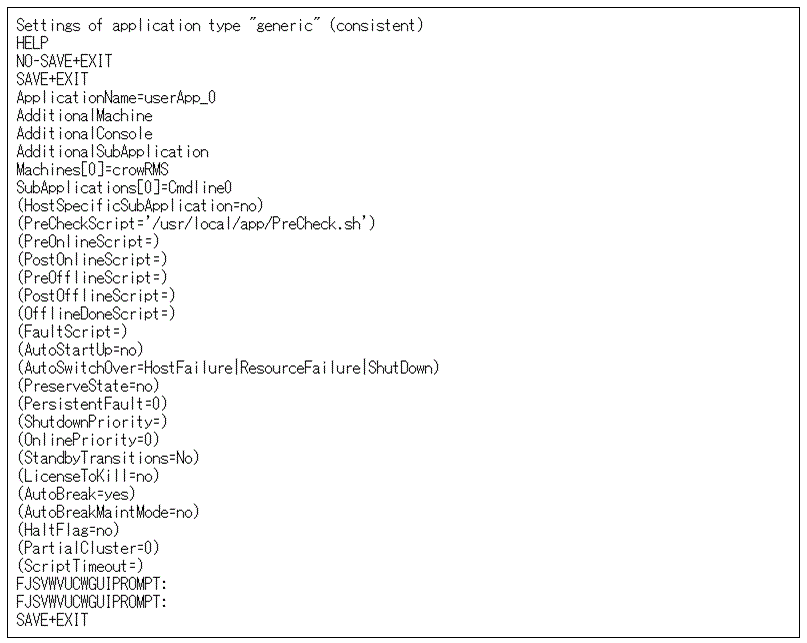
Enter "RETURN" and then select [RETURN].
Figure 4.9 [Application selection] menu

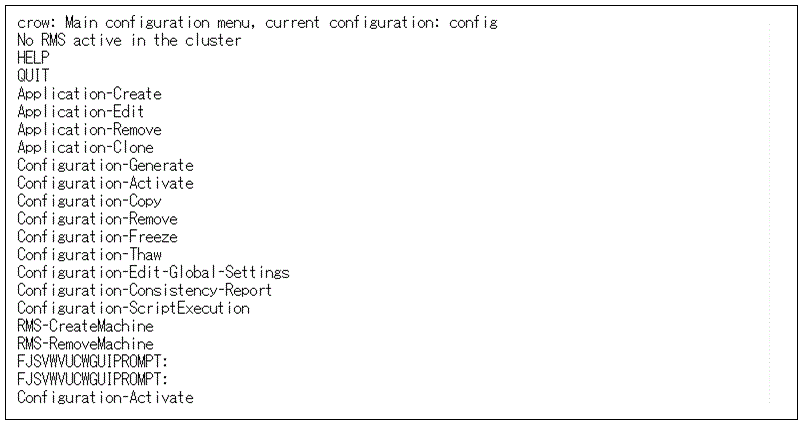
Enter "Configuration-Activate" and then select [Configuration-Activate].
Figure 4.10 Main configuration menu
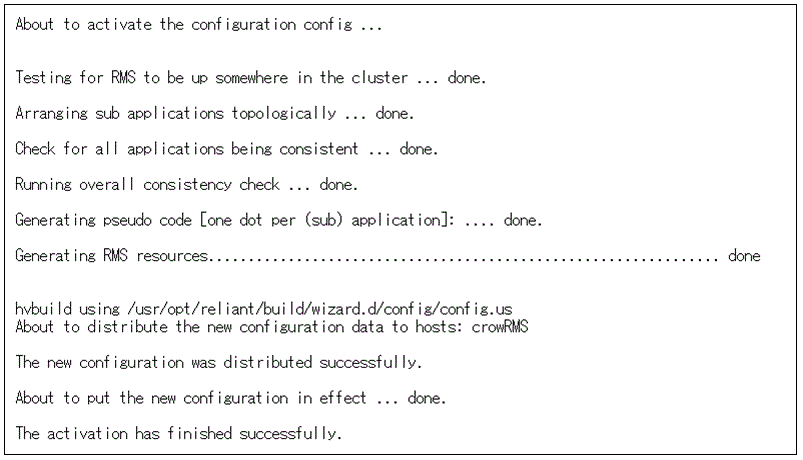
RMS configuration is generated and distributed.
Figure 4.11 Generation and distribution of the RMS configuration file
Enter "QUIT" and then select [QUIT].
Figure 4.12 Quitting main configuration menu
