This section explains how to set up a cluster application by using the cluster application GUI.
The terms "userApplication" and "Resource" that appear on the setup screen refer to "cluster application" and "resource" respectively.
Information
After you finish setting up the cluster application, start the cluster applications. For instructions on starting the application, see "7.2.2.1 Starting a Cluster Application."
For instructions on changing a cluster application, see "10.3 Changing a Cluster Application." For instructions on deleting a cluster application, see "10.2 Deleting a Cluster Application."
For the setting contents and notes on a cluster application that depends on the operation, see "6.11 Setting Contents and Notes on Cluster Application."
Note
Set up the cluster application and resources based on the cluster application and resource information in "Setup (cluster application)"of PRIMECLUSTER Designsheets that was created in the design stage, and the sheet corresponding to each resource. If you need to change the cluster application after it is created, the designsheets are helpful. Make sure to create the designsheets before performing necessary operation.
You cannot share one resource with multiple userApplication.
If there are files with the same name as shown below on setup of a cluster application, you cannot set up a cluster application properly. If files with the same name exist, delete them before setting up a cluster application.
/tmp/hostcheck
/tmp/sdxinfo
/tmp/work
/tmp/workc
/tmp/workn
/tmp/macaddr
/tmp/wgcnf000.tmp
/tmp/wgcnf001.tmp
/tmp/wgcnf002.tmp
/tmp/wgcnf003.tmp
If you use userApplication Configuration Wizard, the CF remote services (remote file copy and remove command execution) are enabled automatically. For instructions on disabling these definitions, see Notes in "5.1.1 Setting Up CF and CIP."
Do not make any settings that cause multiple cluster system nodes to be monitored with a single primary management server of Web-Based Admin View.
Use a single primary management server of Web-Based Admin View to monitor a single cluster system.
If you click <Registration> on the confirm registration screen for userApplication or Resource, the dialog boxes will appear (0805 followed by 0813) to show the status of the configuration process. While these dialog boxes are displayed, do not operate the userApplication Configuration Wizard screen, which is on the background.
The RMS configuration created in the userApplication Configuration Wizard cannot be used in the RMS Wizard. Moreover, the RMS configuration created in the RMS Wizard cannot be used in the userApplication Configuration Wizard.
Setting up cluster applications by using GUIs

Resource setup
Create all resources that make up the userApplication.
userApplication setup
Use all the resources and create the userApplication.
Note
RMS will not start if there is any remaining resource that is not part of userApplication. Delete unnecessary resources.
To create multiple userApplication, repeat steps 1) and 2).
Dependency relationship settings for userApplication
Dependency relationship settings are enabled when two or more userApplication are created.
These settings define how each userApplication is controlled on the same cluster node.
At the Web-Based Admin View top screen, select Global Cluster Services.
At the Global Cluster Services screen, select userApplication Configuration Wizard.
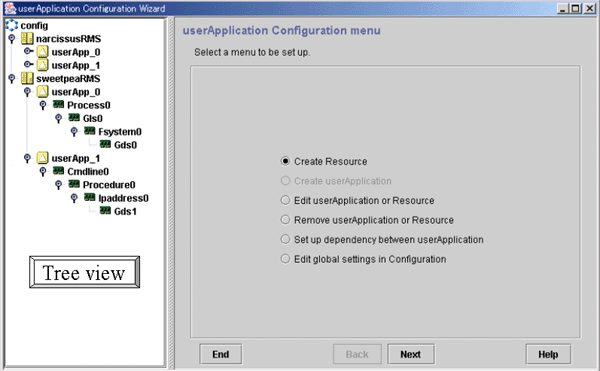
The userApplication Configuration Wizard screen has the configuration shown below.

The following table shows the icons that are displayed in the tree view of the userApplication Configuration Wizard.
Icon | Description |
|---|---|
| Indicates the configuration. |
| Indicates that a discrepancy was found in the configuration information. |
| Indicates SysNode. |
| Indicates userApplication. |
| Indicates userApplication that was created with the TURNKEY Wizard. The userApplication Configuration Wizard does not allow change and deletion operations for this userApplication and its Resources. |
| Indicates a controller. |
| Indicates a resource. |