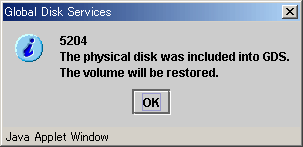
The following operations are required for swapping disks in the event of a disk error or for the purpose of preventive maintenance.
Figure 7.21 Disk Swap and Restoration Operation
When a disk unit abnormality occurs, contact field engineers to swap the disk units.
In GDS, regardless of hot swap or not, the following procedures are necessary before and after the disk swap.
swap physical disk
restore physical disk
Note
Identifying a Failed Disk Unit
You should pinpoint a hardware error on a disk unit based on, for example, log messages for the disk driver output in the /var/log/messages file. For details, see "D.1.13 Disk Unit Error."
Note
Notes on Physical Disk Swap
See "7.3.4 Swapping Physical Disks Registered with Shadow Classes." and "7.3.5 Notes."
Information
Disk Swap of PRIMEQUEST 500A/500/400 series [4.3A00]
For disk units under control of the SAF-TE (SCSI Accessed Fault-Tolerant Enclosure) unit, such as internal disks of PRIMEQUEST 500A/500/400 series, if physical disk swap is performed, after the disk is excluded from the GDS management normally, the disk power is turned off by the SAF-TE operation command (diskctrl) of Server Agent (PSA) and the LED light to indicate the mounting location is turned on. If a diskctrl command error message is displayed, see the reference manuals of PRIMEQUEST 500A/500/400 series to work around and swap disks.
With respect to physical disk restoration, the disk power is not turned on. If hot swap of a disk under control of the SAF-TE unit is performed, use the SAF-TE operation command (diskctrl) to turn on the disk power and restore the physical disk. For details on the SAF-TE operation command (diskctrl), see the reference manuals of PRIMEQUEST 500A/500/400 series.
Swap Physical Disk
In order to swap the disk units, you must take the physical disk offline.
The procedures are explained below.
Displaying the status of physical disk
In the Main screen, display the physical disk to be swapped. Click the icon and select the physical disk.
Selecting [Swap Physical Disk]
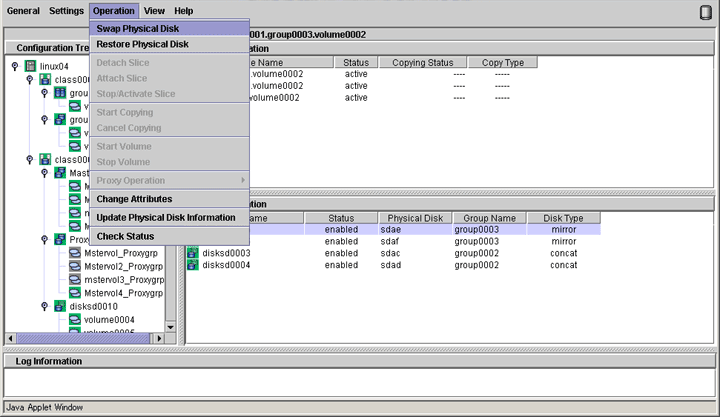
In the Main screen [Operation] menu, select [Swap Physical Disk].
Figure 7.22 Swap Physical Disk
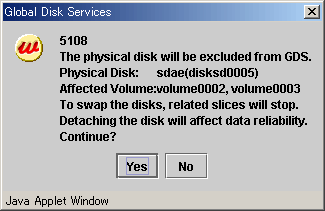
The confirmation screen shown below appears.
To continue the process, click <Yes>. Clicking <No> cancels the physical disk swapping process.
Figure 7.23 Confirming Swap Physical Disk
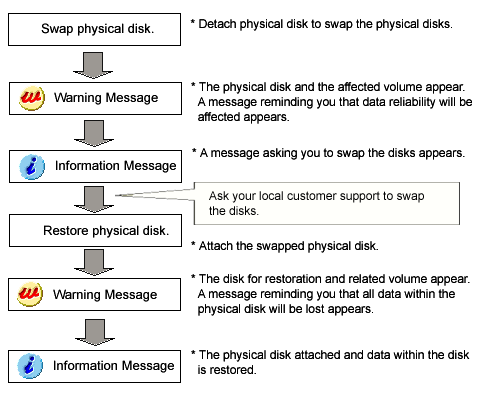
Requesting the swap of physical disks
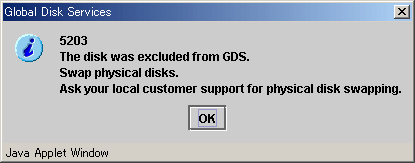
Click <Yes>, and a message notifying the offline status appears.
Click <OK>, and request field engineers to swap the disk unit.
Figure 7.24 Notifying Offline Completion
Restore Physical Disk
After swapping the disk units, you must put the swapped physical disk back online.
The procedures are explained below.
Check the device name change [RHEL6 or later]
When an internal disk registered in the root class or local class in a RHEL6, or RHEL7or later environment is swapped, a physical disk cannot be restored if there is a device name change that means the physical disk name is different from the name at the disk registration. Check that there is no difference between the device name of the swapped internal disk and the device name managed by GDS.
See
For the method to check the device name change, see "7.3.5.5 Swapping Internal Disks Registered with Root Classes or Local Classes [RHEL6 or later]."
Selecting the physical disk to restore
Select the physical disk you want to restore.
Selecting [Restore Physical Disk] menu
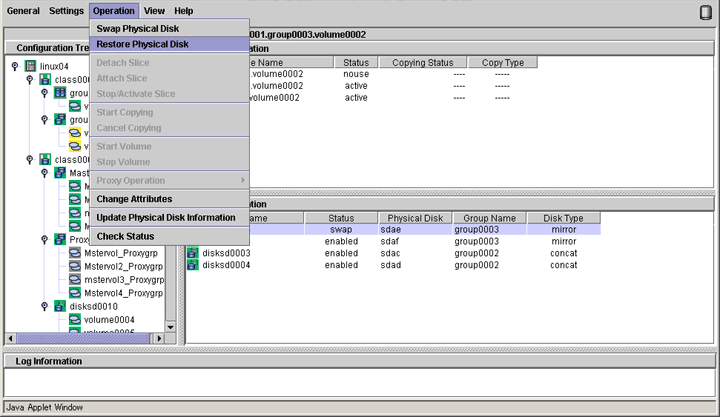
In the Main screen [Operation] menu, select [Restore Physical Disk].
Figure 7.25 Restore Physical Disk
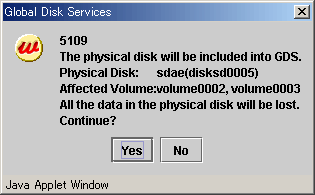
The confirmation screen shown below appears.
To continue the process, click <Yes>. Clicking <No> cancels the physical disk restore process.
Figure 7.26 Confirming Restore Physical Disk
Notifying online status
Click <OK>, and a message notifying the online status appears.
Figure 7.27 Notifying Online Completion
