Use the following procedure to set up application distribution and distribute an application.
Log in to the main menu.
Click Asset Management > Distribution > Application Distribution [Smart Device].
The initial window of Application Distribution [Smart Device] is displayed.
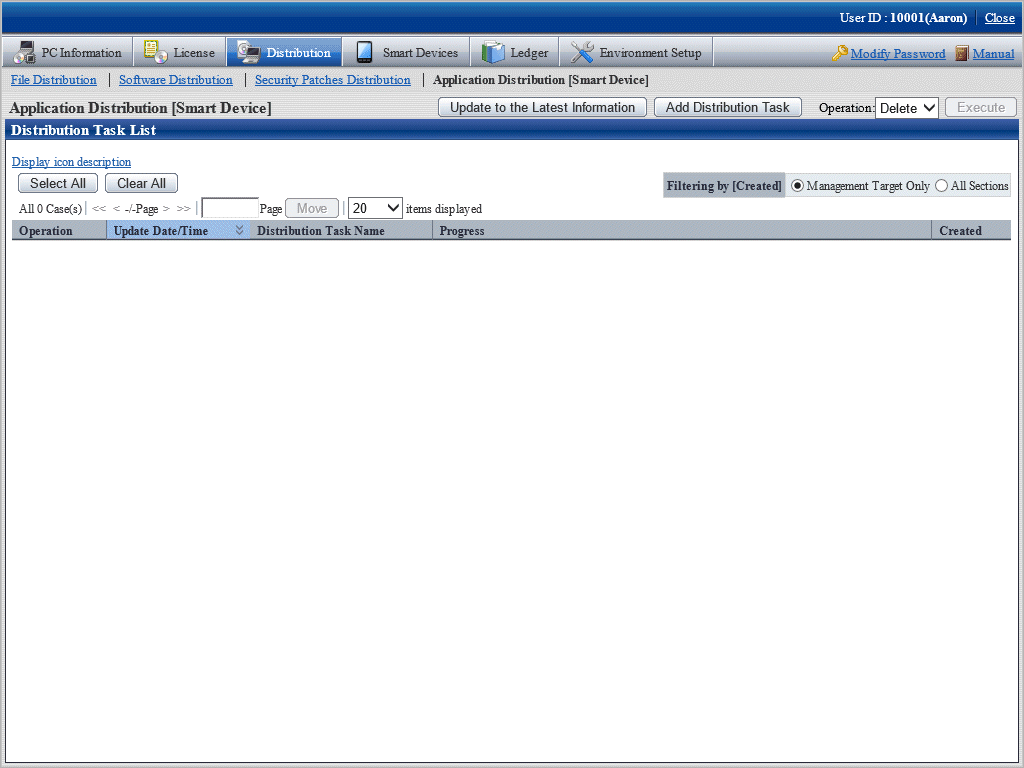
The following table explains the buttons:
Button name | Description |
|---|---|
Update to the Latest Information | Refreshes the information so that the latest information will be shown. |
Add Distribution Task | Adds a task for distributing an application. |
Operation / | Enabled when a check box in Distribution Task List is selected. When you select an operation from the operation list for the distribution task whose check box you selected and then click Execute, processing is performed for the distribution task. If you select multiple distribution tasks and operation fails for a specific task, perform that operation for all tasks. The list of operations is as follows:
|
The following table explains the Distribution Task List items:
Item | Description |
|---|---|
Operation (check box) | Select the check box for the distribution task for which you want to perform the delete or other process. |
Update Date/Time | Displays the date and time at which the distribution task was registered or updated. |
Distribution Task Name | Displays the name of the distribution task. You can view detailed information on the distribution task by clicking the distribution task name. |
Progress | Displays the progress of the distribution task. The color of the bar graph indicates the progress percentage.
The meaning of each icon is as follows:
The total calculated from "number of applications x smart devices targeted for distribution" is displayed as a number next to the icon. The breakdown is as follows:
|
Created | Indicates the department to which the manager who created the distribution task belongs. If the system administrator created the distribution task, this is fixed as "Management Target". |
Filtering by [Created] | You can use the Created item to filter the content of Distribution Task List. The content displayed in Distribution Task List depends on the privileges of the user logged in to the main menu.
|
Point
Maximum number of tasks to be managed
Up to 100 tasks can be managed on a system.
Tasks are not deleted automatically, so delete tasks that completed normally and are no longer required for operations.
When the number of tasks on a system reaches 100, you cannot add a distribution task by clicking the Add Distribution Task.
Click the Add Distribution Task button.
The Application Distribution [Smart Device] - Add Distribution Task window will be displayed.
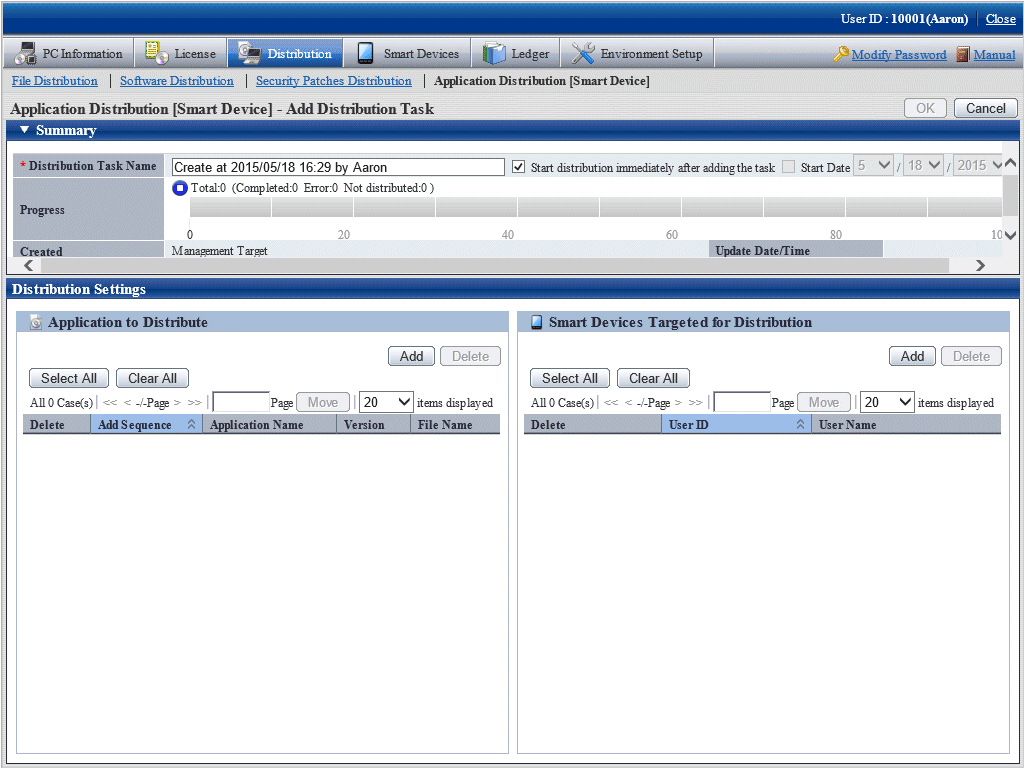
The following table explains the setting items of this window:
Item | Description |
|---|---|
OK | Registers or updates the settings and navigates the display to Distribution Task List. This button is enabled when at least one application to be distributed and at least one smart device targeted for distribution have both been registered. |
Cancel | Navigates the display to Distribution Task List without registering or updating the settings. |
Distribution Task Name | Specify the name of the task to be distributed, using up to 30 fullwidth characters or 60 halfwidth characters. By default, the creation date and time and the name of the creating user are displayed. This item is required.
|
Progress | Displays the progress of the distribution task. The content is the same as in the Distribution Task List window. |
Created | Indicates the department to which the manager who created the distribution task belongs. The content is the same as in the Distribution Task List window. |
Update Date/Time | Displays the date and time at which the distribution task was registered or updated. |
The following table explains the content of Application to Distribute in the Distribution Settings tab:
Item | Description |
|---|---|
Add | Adds an application to be distributed. The display then navigates to the Select Application window. This button is not displayed for a task that has started to be distributed. |
Delete | Deletes an application. This button is enabled when you select Delete. It is not displayed for a task that has started to be distributed. |
(Check box) | To delete an application, select the application to be deleted. |
Add Sequence | Displays the sequence in which applications were added. |
Application Name | Displays the application name specified by the manager. |
Version | Displays the version of the application. |
File Name | Displays the selected file name. |
The following table explains the content of Smart Devices Targeted for Distribution in the Distribution Settings tab:
Item | Description |
|---|---|
Add | Adds a smart device to be targeted for distribution. The display then navigates to the Select Smart Device window. This button is not displayed for a task that has started to be distributed. |
Delete | Deletes a smart device. This button is enabled when you select Delete. It is not displayed for a task that has started to be distributed. |
(Check box) | To delete a smart device, select the smart device to be deleted. |
User ID | Displays the user ID of the user who is using the smart device. |
User Name | Displays the user name of the user who is using the smart device. |
Select the application to distribute.
Clicking Add for Application to Distribute in the left pane of the Distribution Settings tab displays the Select Application window.
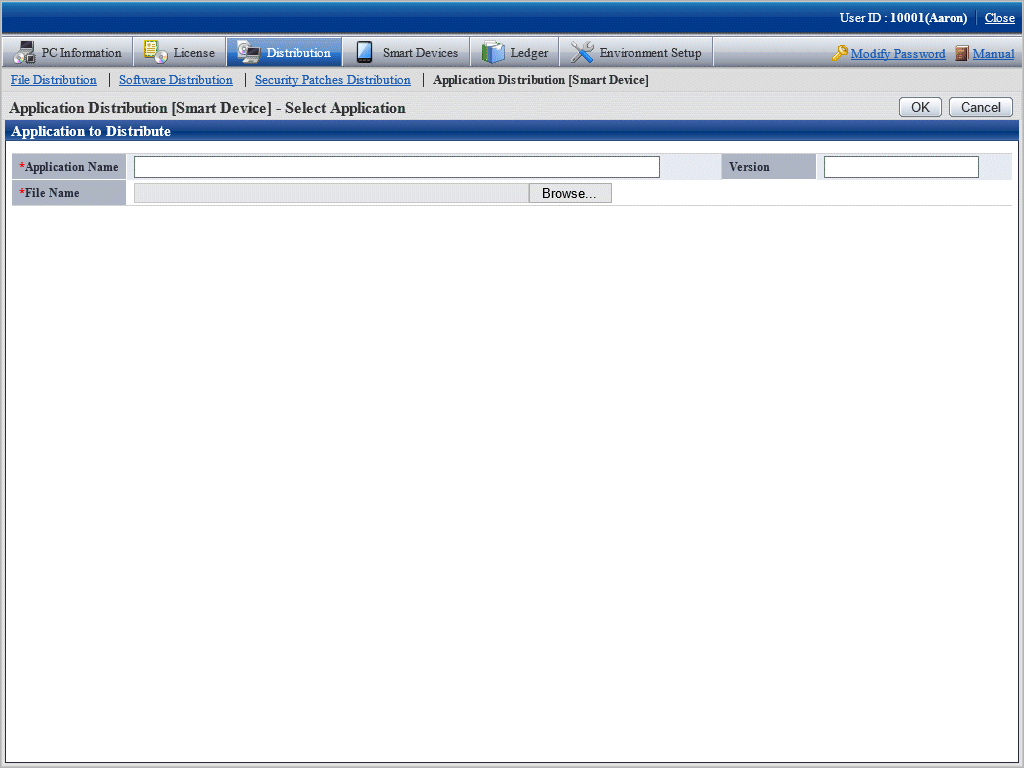
The following table explains the setting items of this window:
Item | Description |
|---|---|
OK | Registers the application and navigates to the Select application window. |
Cancel | Navigates to the previous window without registering the application. |
Application Name | Enter the application name. You can use up to 128 fullwidth characters and 256 halfwidth characters. |
Version | Enter version information. You can use up to 16 halfwidth characters. |
File Name | Click Browse and select the application to be distributed. |
Browse | Starts the file selection window. |
When you register an application and click OK, the application to be distributed is added to the list.

If you accidentally register an application, select the application you want to delete from the list and click Delete.
Point
Number of applications registered in one task
You can register up to 10 applications in one task.
When the number of applications exceeds 10, split the task.
Point
About registering applications
To distribute an application to an Android device, register the apk file.
To distribute an application to an iOS device, compress the ipa file and manifest file to zip format before registering them.
When registering applications, the apk file and the zip file cannot coexist.
If a smart device is registered in a task
If an Android device is registered, you can register only apk files.
If an iOS device is registered, you can register only zip files.
Click Add for Smart Devices Targeted for Distribution in the bottom right pane of the window.
The Select Smart Device window will be displayed.
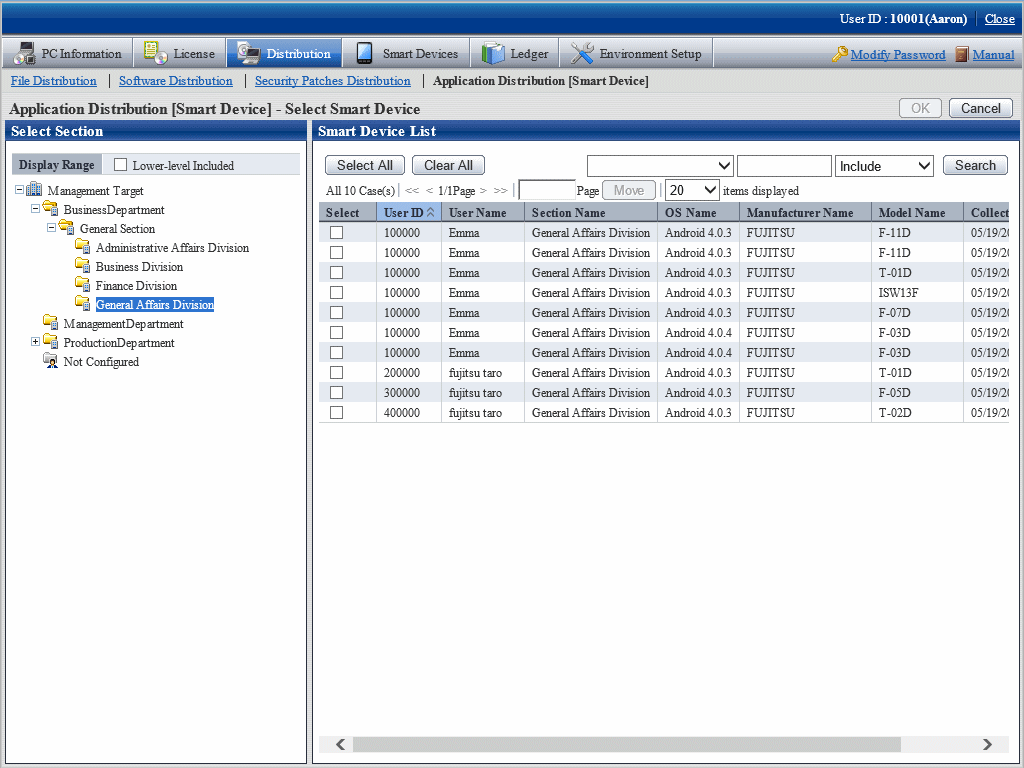
The following table explains the setting items of this window:
Item | Description |
|---|---|
Search | Filters the list based on whether a specific string is included in a specific column. |
OK | Adds the selected smart device and navigates to the previous window. |
Cancel | Navigates to the previous window without adding the smart device. |
(Check box) | Select the smart device to be added. |
User ID | Displays the user ID of the user who is using the smart device. |
User Name | Displays the user name of the user who is using the smart device. |
Section Name | Displays the name of the department to which the user who is using the smart device belongs. |
OS Name | Displays the OS of the smart device. |
Manufacturer Name | Displays the name of the smart device manufacturer. |
Model Name | Displays the model name of the smart device. |
Collection Date/Time | Displays the inventory collection date and time. |
In the Select Smart Device window, select the smart device to be targeted for distribution, select the check box, and click OK. The smart device targeted for distribution will be added to the list.

Point
Number of smart devices registered in one task
You can register up to 500 smart devices in one task.
When the number of smart devices exceeds 500, split the task.
Point
Smart devices that can be registered
If an application has been registered in a task, you can register the following smart devices:
If an apk file is registered, you can register only an Android device.
If a zip file is registered, you can register only an iOS device.
If the settings are correct, click OK.
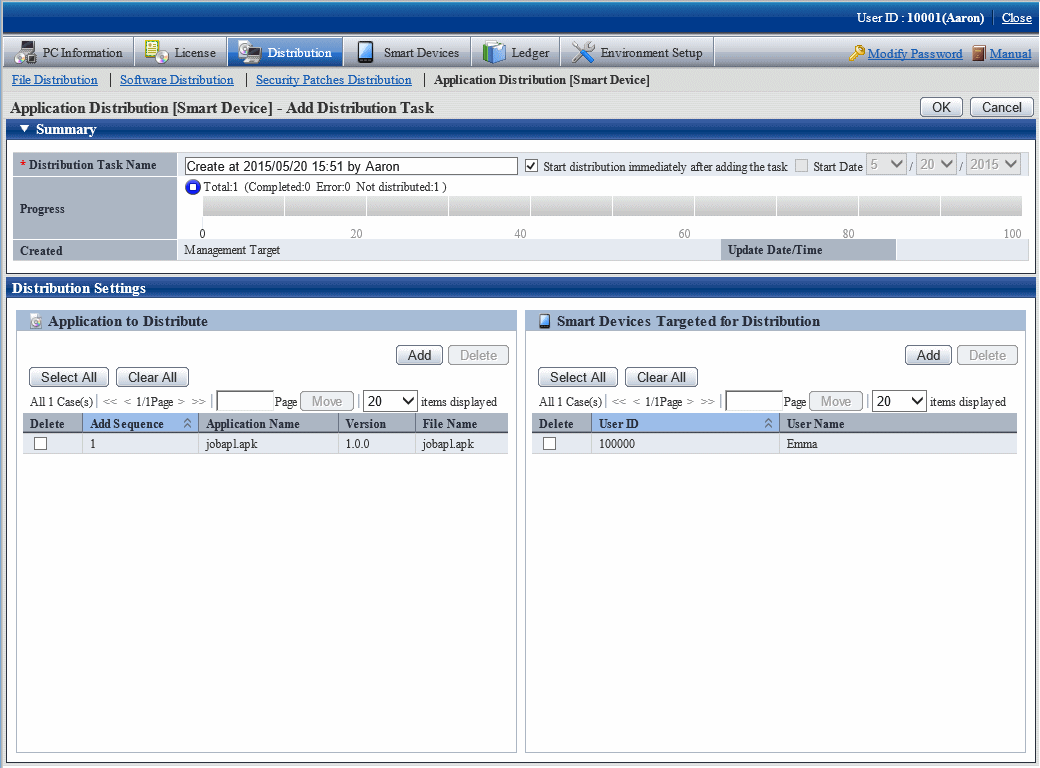
If Start the distribution immediately after adding the task is selected, click OK. The following message box will be displayed:
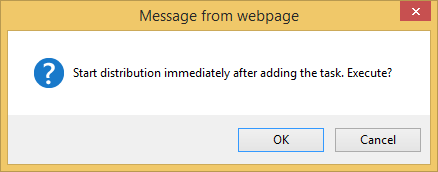
Click OK to add the distribution task and start distribution of the application.
If you click Cancel, distribution of the application does not start.