This section explains how to delete inventory information of PCs no longer required, such as disposed PCs.
Note
On CT, inventory collection is performed with difference collection (default). If inventory information is sent from the CT in question after it has been deleted via the main menu, the information that has not been sent will not be displayed.
If you want to delete inventory information but keep the CT in question installed, inventory information can still be collected using the procedures below:
Manually perform inventory collection on PCs for the CT in question (refer to "Sending Inventory Information to the Upstream Server" in the Operation Guide for Clients for details).
Select PC Information in the main menu and then the CT, and execute the actions described in "Inventory Collection" (refer to "Operation action" for details on the actions in "Inventory Collection").
To check the PCs on which inventory information is deleted, refer to the CS operation details log.
Delete inventory information from the section tree
Inventory information can be deleted by clicking a node in the section tree, then selecting the PC and deleting its inventory information.
Follow the steps below:
Log in to the main menu and click PC Information.
The following window will be displayed.
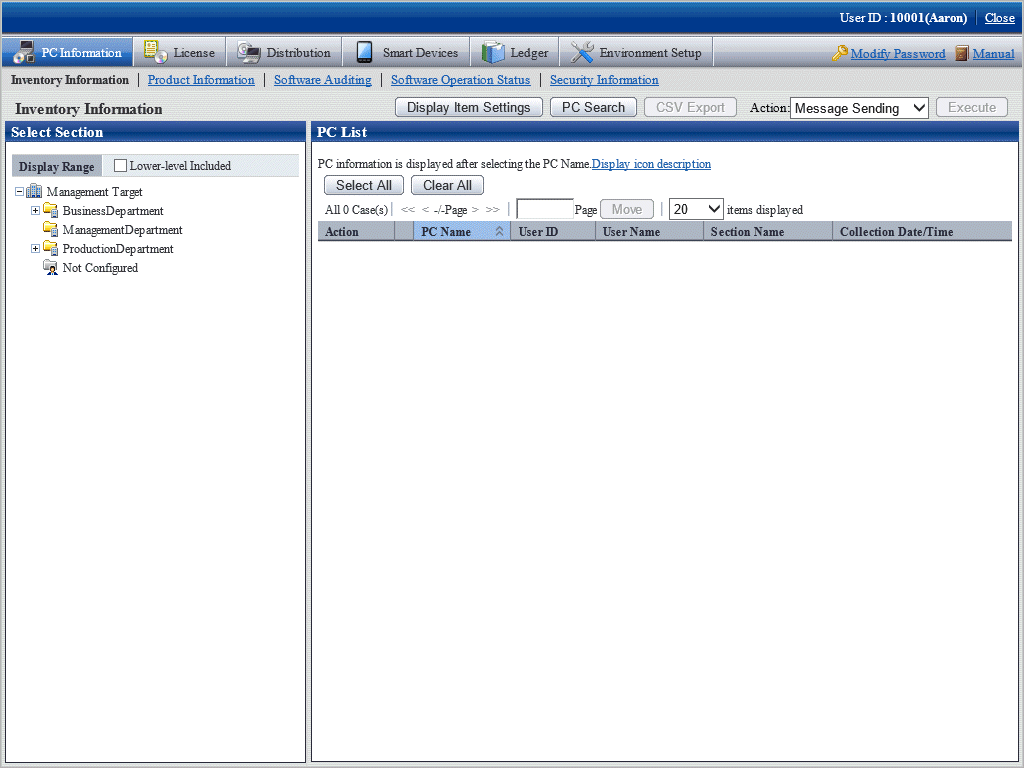
In the left pane, select a section.
The PCs in the selected section will be displayed in the right pane.
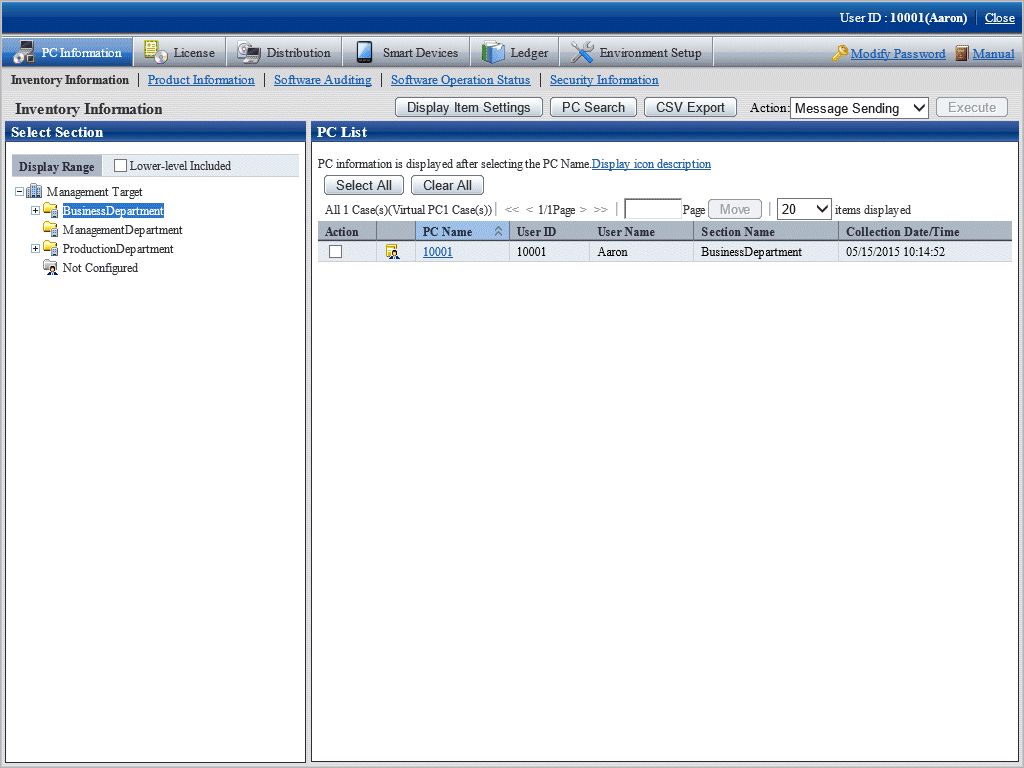
Select the PC that contains the inventory information to be deleted.
In Action, select Inventory Delete, and then click Execute.
Inventory information on the selected PCs will be deleted.
Delete inventory information after search
Inventory information can be deleted by searching for the PC and then deleting its inventory information.
Follow the steps below:
Log in to the main menu and click PC Information.
The following window will be displayed.

Click PC Search.
The following search condition window will be displayed.
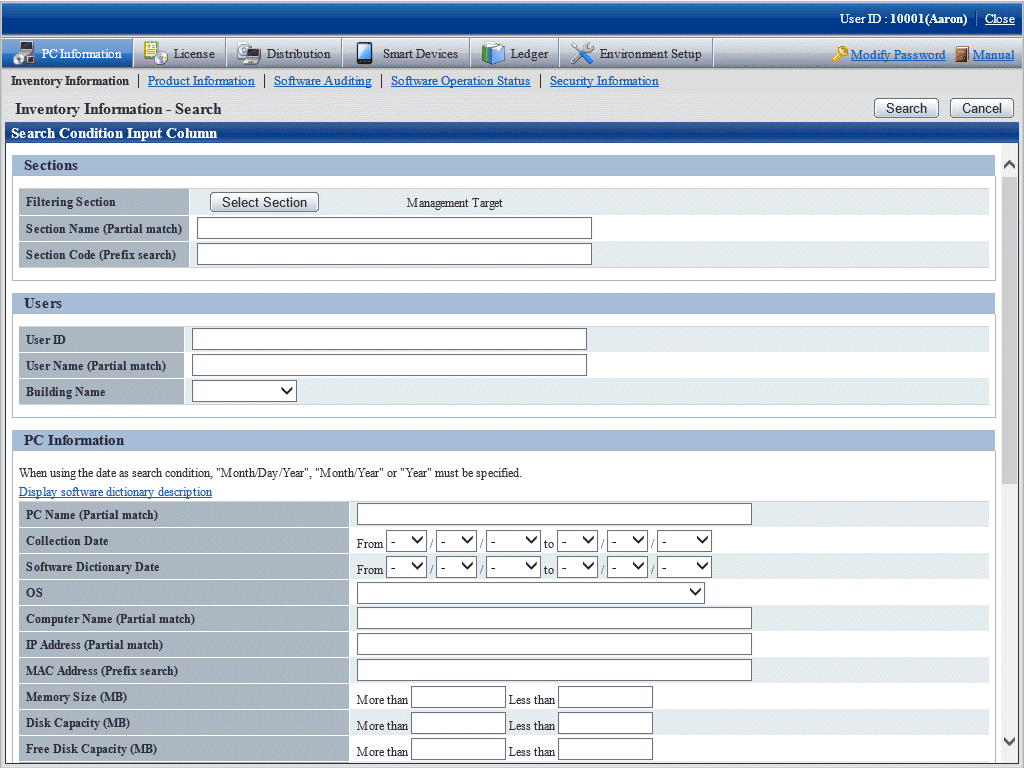
If you click Select Section, the following window will be displayed.
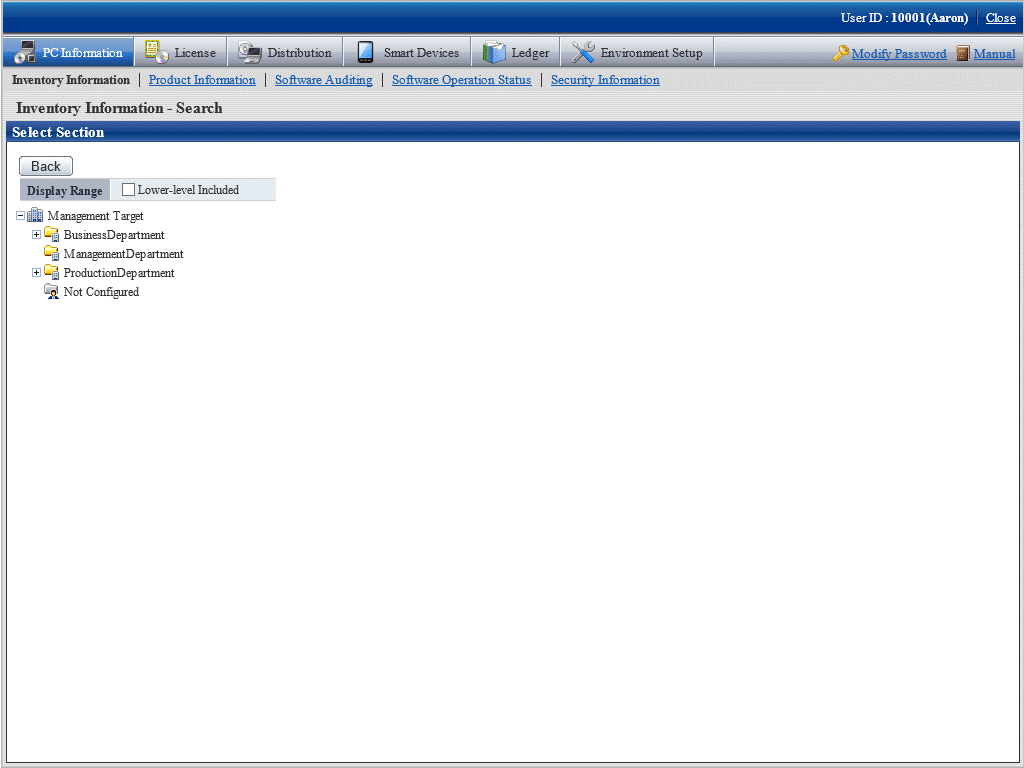
Specify the search conditions, and then click Search.
The following window will be displayed, listing the PCs that match the specified conditions.
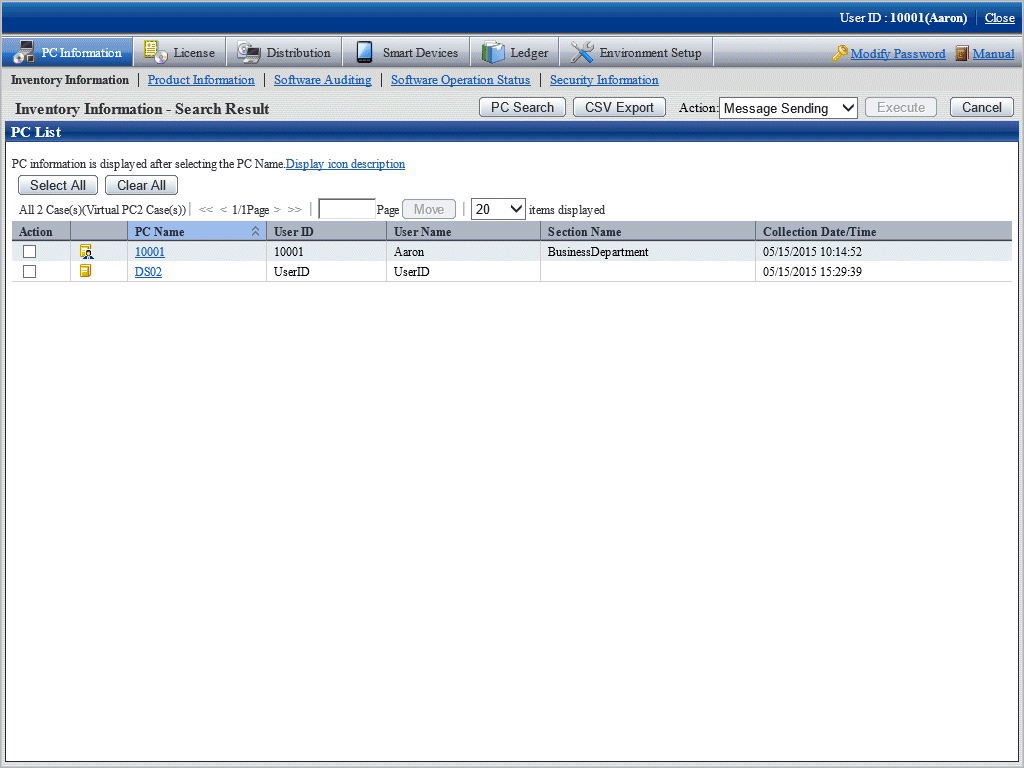
Select the PC that contains the inventory information to be deleted, then in Action, select Inventory Delete, and then click Execute.
Inventory information on the selected PC will be deleted.