Perform the following settings of conditions under which to distribute the software for CS and DS.
Interval and time frame of software download
The procedure is as follows.
Logon to the main menu, click Environment Setup.
The Environment Setup window will be displayed.
Click CS/DS Settings and Status.
The following window will be displayed.
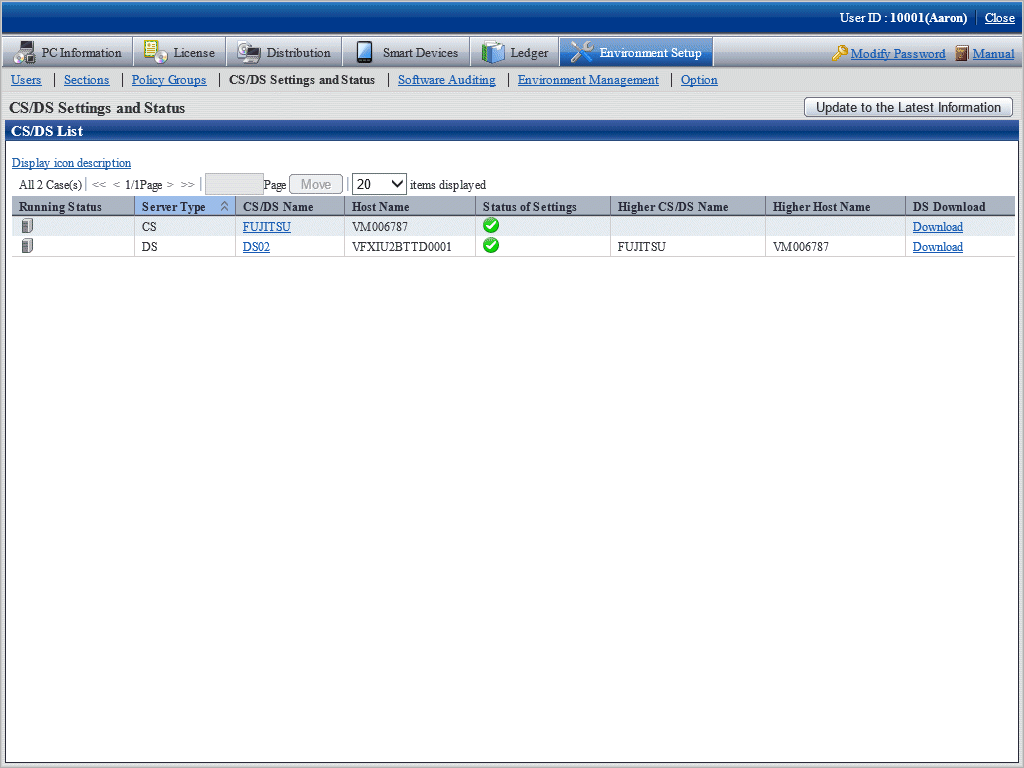
The following describes the items in the window.
Item | Description |
|---|---|
Running Status | Display operation status of CS/DS.
|
Server Type | Display the type of CD/DS |
CD/DS Name | Display respective CS/DS name. Click CD/DS name to confirm and change the setup of each CD/DS. But you cannot click server name when the section management ID is used to log on. |
Host Name | Display Host name corresponding to CD/DS name. |
Status of Settings | Indication of reflection state of each server corresponding to respective setup information on CS/DS/CT.
|
Higher CD/DS Name | Corresponding to server, displayed when higher server existing. |
Higher Host Name | Display of Host name corresponding to higher CS/DS name. |
DS Download | It can download the installer of DS. |
Click the link of server name.
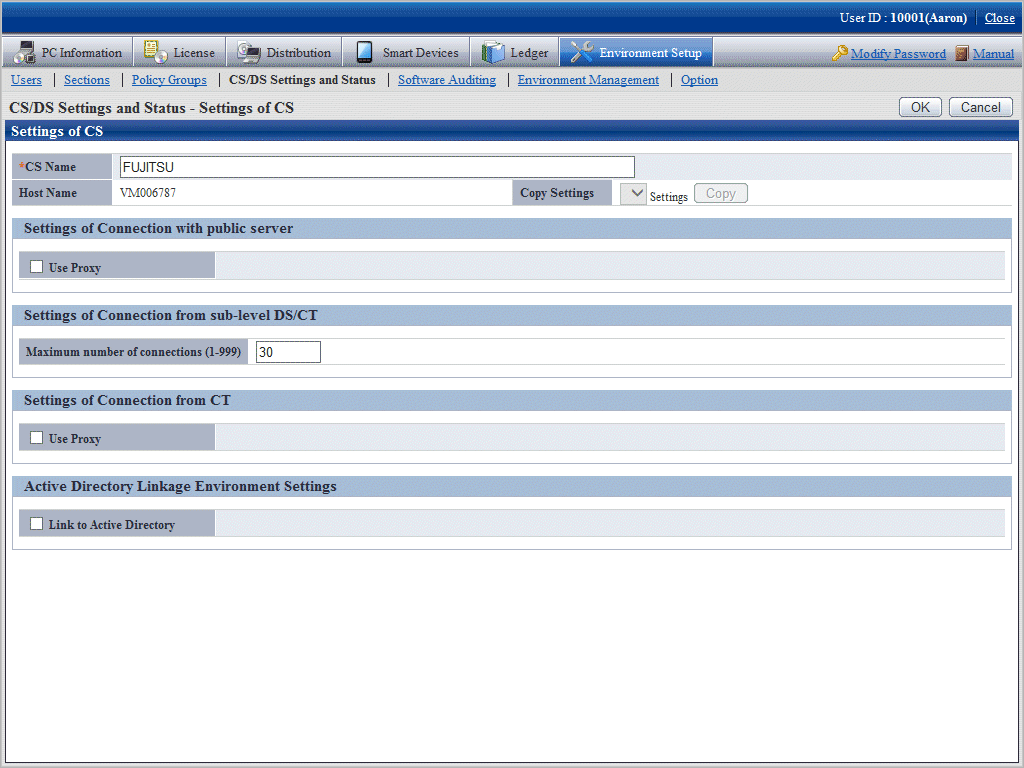
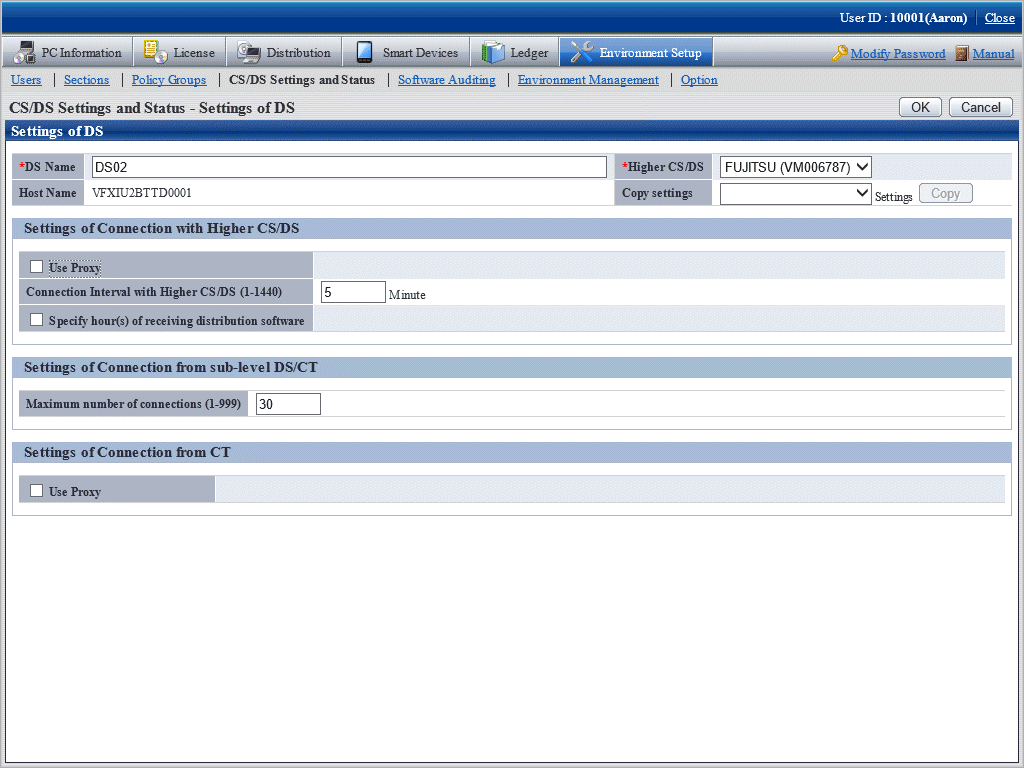
The following window will be displayed.
When CS is selected
When DS is selected
Set the following items.
Item | Description |
|---|---|
CS/DS name | Display of general name specified for CS/DS in installation. Japanese, single-byte alphanumeric characters, including special characters of "-", "@", and "." within 50 characters for server name. blank characters not allowed. Cannot be omitted. |
Higher CS/DS | Select from the list to change the higher server. This item can only be set when DS is set. |
Copy button | Settings of CS/DS registered can be rewritten. Select the Cs/DS registered from the list, click Copy button, setup of the CS/DS selected will be rewritten. |
Input the following items in Settings of Connection with public server and Settings of Connection with Higher CS/DS.
Connection setup with higher server to DS when it's DS.
When CS is selected
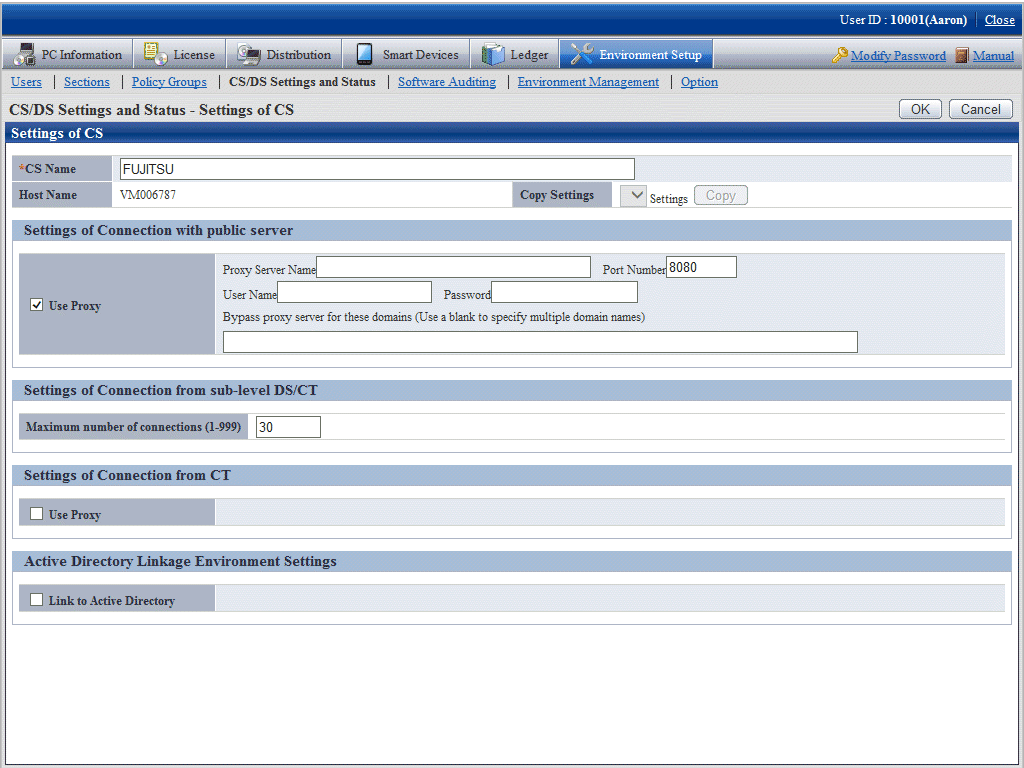
Set the following items.
Item | Description |
|---|---|
Use proxy | Select this item in case of use proxy. Finish specifying the following contents during selection.
|
When DS is selected
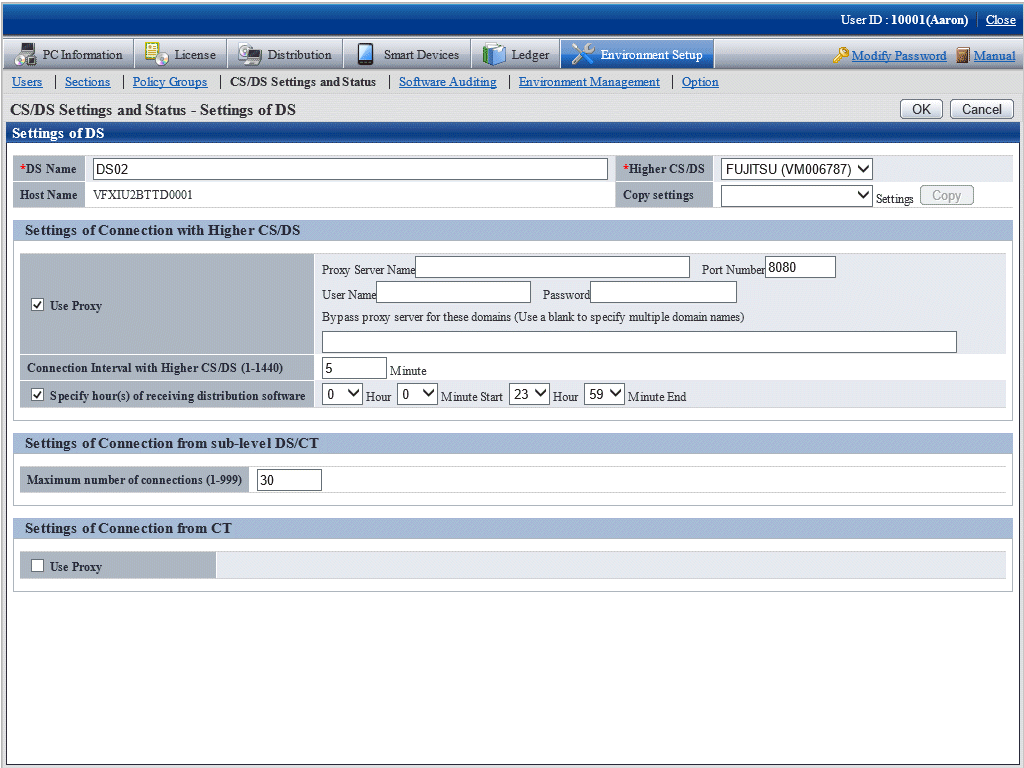
Set the following items.
Item | Description |
|---|---|
Use proxy | Select this item in case of proxy use. Finish designating the following contents during selection.
|
Connection Interval with Higher CS/DS | Specify download period of file and software from the higher server, specify in 1-1440, a value in unit of minute. Default is 30 and it cannot be omitted. |
Specify hour(s) of receiving distribution software | Select this item in time frame when specifying file and software download. Specify time frame to download file and software from higher server. Without selection, the download period can be any time in the 24 hours. Select between 0-23 for hour unit and 0-59 for minute unit. The start time and end time shall not be specified to be the same. |
Enter the following items in Settings of Connection from sub-level DS/CT.
Item | Description |
|---|---|
Maximum number of connections | Total number of lower DS or CT connecting to CS or DS simultaneously, specify in 1-999 (number of pieces). Default is 30 and it cannot be omitted. |
Click OK button.