To confirm an added project, perform the following operations.
Go to the [Project Management] menu in the [Home] window and click the [To the list] link. Alternatively, select the [Project] navigation tab.
The list of the information of currently added projects is displayed.
Figure 3.3 Project List Window
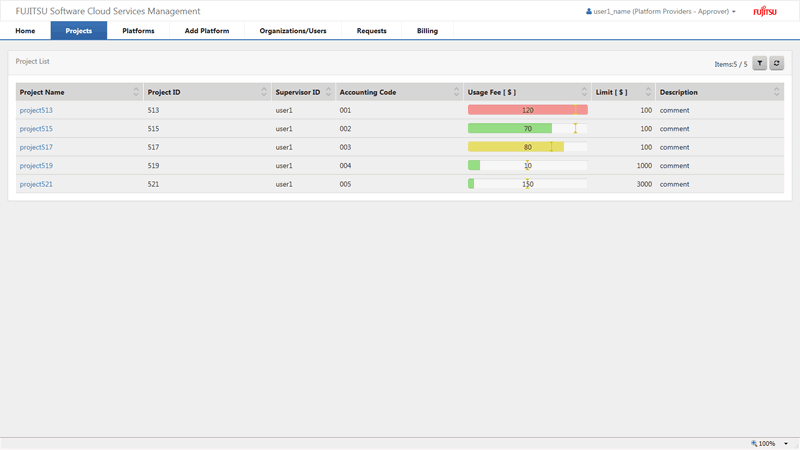
In [Usage Fee], the value of [Limit] is configured as 100%, and the percentage of the corresponding usage charges are indicated using progress bars. The progress bars change color depending on the amount of use in relation to the threshold and limit values.
Usage charges < Threshold: green
Usage charges >= Threshold: yellow
Usage charges >= Limit value: red
Clicking the [Filter] button displayed in the upper right of the list displays the Project Filter window. Specify keywords for [Project Name], [Project ID], [Supervisor ID], or [Accounting Code] to refine the displayed list of projects. Usage charges can be filtered based on their status, such as "Under the Threshold", "Under the Limit, over the Threshold", and "Over the Limit".
Information
The items displayed to the left of the [Filter] button are displayed as "filtered items / items retrieved from the management server".
Point
Range of project reference depends on the user role
Depending on the user role, the projects which can be checked will vary.
User Role | Projects which Can be Referenced |
|---|---|
Planners - Approver and Representative Operators - Approver, Representative, and Administrator | All Projects |
Platform Providers - Approver |
|
Platform Providers - Representative | Projects of which the representative is a project member |
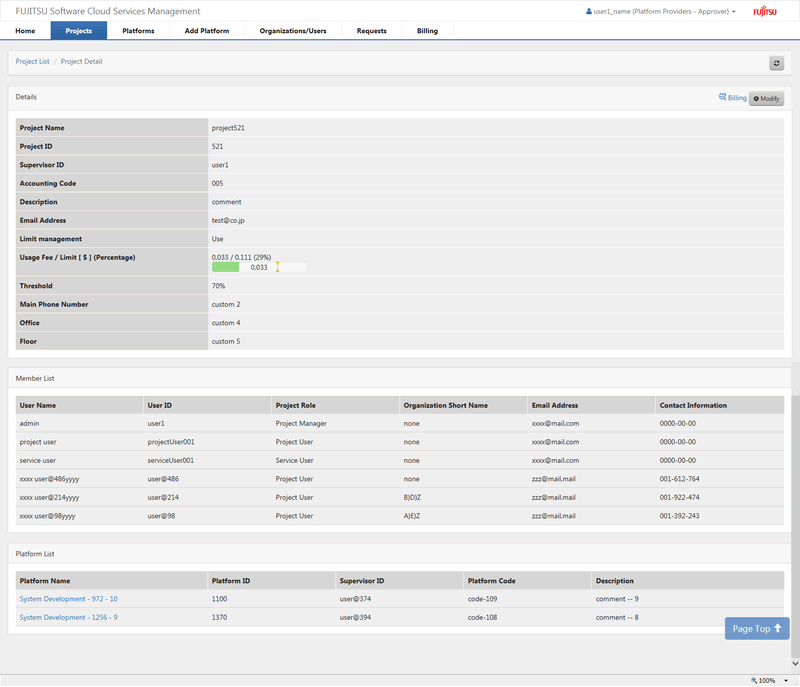
Clicking a project name in the list displays the [Project Details] window. [Details] displays the details of an added project, the list of project members, and a list of platforms linked to the project.
Figure 3.4 Project Details Window