Start the PowerCOBOL development environment by selecting PowerCOBOL from the Fujitsu NetCOBOL group. From the Start button, select Programs and then select the Fujitsu NetCOBOL for Windows menu. Click on PowerCOBOL.
PowerCOBOL initializes with a project manager. From within this facility, you can open an existing project or use the project wizards to create new projects.
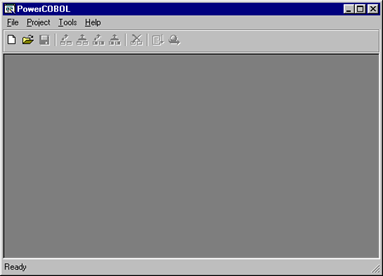
The following window is displayed:
Figure 3.1 The initial PowerCOBOL development window

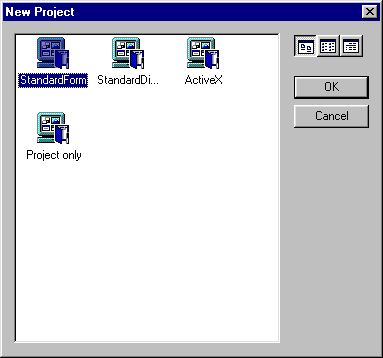
From the File menu, select New Project. The following window appears:
Figure 3.2 The New Project wizard window

Using the mouse, highlight the Standard Form selection in the center and click on the OK button.
The PowerCOBOL new project wizard will now create a template application. This will consist of a form (window) and a few basic properties.
You may use this template application as a starting point to develop GUI applications written in PowerCOBOL.
Note: If you do not want PowerCOBOL to create an application template, you can select the Project only wizard shown in the previous figure.
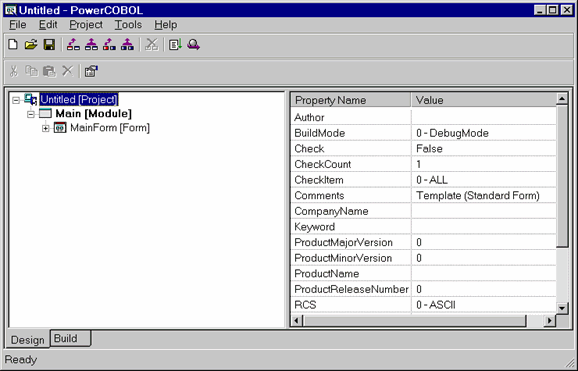
You will now be presented with the following window:
Figure 3.3 The PowerCOBOL Project Manager window

The PowerCOBOL Project Manager window is arranged to show application controls (components) such as forms (windows), dialog boxes, controls (for example, buttons, checkboxes, etc.), and supporting COBOL procedures in the left windowpane.
This information is arranged in a hierarchical tree diagram. You may traverse levels of the hierarchy by clicking on the + and - signs in the tree.
In the right windowpane are the properties associated with the current application control highlighted in the left windowpane. The current values of each property are also displayed.
You may modify a property at any time by clicking on its value and changing it there. In some instances, you may be presented with dropdown menus to select pre-defined properties.
This interface provides a consistent and intuitive mechanism for managing the multitude of properties and possible values associated with GUI development.
You are now ready to begin creating the sample application's graphical user interface.