Sample 29 demonstrates how to use the simplified inter-application communication function to read or write messages to or from logical destinations. For details on how to use the simplified inter-application communication function for message transfer, refer to the topic “Using Simplified Inter-application Communication” in Chapter 18 of the “NetCOBOL User’s Guide.”
Overview
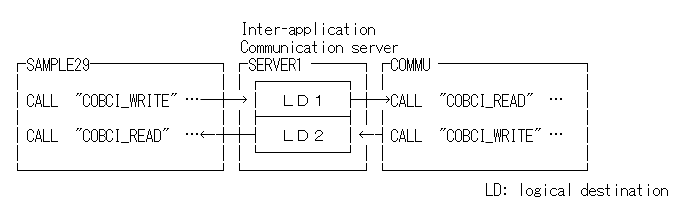
The sample program transfers messages between SAMPLE29 and COMMU.
SAMPLE29 establishes a connection to server "SERVER1", writes messages to logical destination "MYLD1", and reads messages from logical destination "MYLD2". If no message comes from logical destination "MYLD2", SAMPLE29 waits for the message arrival for up to 60 seconds. After reading messages from the logical destination "MYLD2", SAMPLE29 reads messages from logical destination "MYLD1" in order of priority.
COMMU establishes a connection to server "SERVER1", reads messages from logical destination "MYLD1", then writes messages to logical destinations "MYLD1" and "MYLD2”.
Available Programs
SAMPLE29.COB (COBOL source program)
COMMU.COB (COBOL source program)
SAMPLE29.PRJ (Project file)
PRM_REC.CBL (library text)
SAMPLE29.INI (logical destination definition file)
Applicable COBOL Functions
Using Simplified Inter-application Communication
Applicable COBOL Statements
The CALL, DISPLAY, IF, and MOVE statements are used.
Prerequisites to Execution
To make the Sample 29 programs ready for execution, execute the following utility:
COBCISRV
After you run this, you can build and execute Sample 29.
You may refer to Chapter 18, “Communication Functions” in the “NetCOBOL User’s Guide” for more general information on the following topics:
Activating the server for simplified inter-application communication.
Creating logical destinations "LD1" and "LD2" on the server for simplified interapplication communication.
Changing the information on the opponent machine name of the logical destination definition file (SAMPLE29.INI) by using the logical destination definition file creation utility (COBCIU32.EXE). Specify the host name of the server as the opponent machine name and click on the Set button.
Building the Program
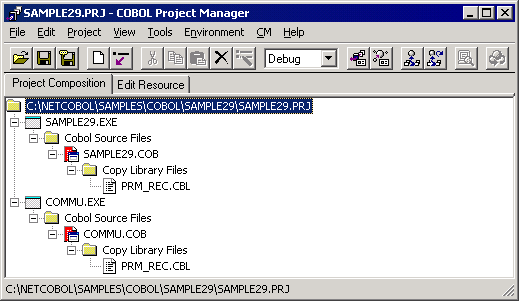
The project file for Sample 29 is SAMPLE29.PRJ in the SAMPLE29 directory. Select “Open Project” from the “File” menu to load it into the COBOL Project Manager window.
Fully opened, this simple project includes two separate executable files that share the same copy libraries, as shown in the following figure.
Build the project by selecting Build from the Project menu.
The MAIN and TEST compiler options have been specified.
Setup the Server Program Execution Environment
Select "Run-time Environment Setup Tool" from the "Tools" menu of Project Manager.
The run-time environment setup tool is displayed.
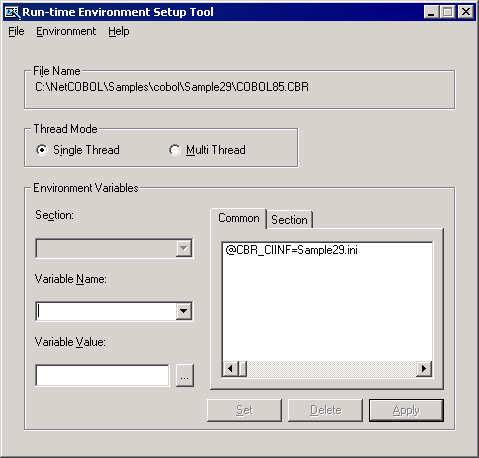
Select "Open" on the "File" menu and create an object initialization file (COBOL85.CBR) in the folder that contains the executable file (SAMPLE29.EXE).
Select the Common tab and enter data as shown below:
The path name of the logical destination definition file of the @CBR_CIINF environment variable has been pre-assigned to SAMPLE29.INI. This is the default setting for both the SAMPLE29 and COMMU executable files.
Click the Apply button.
The data is saved in the run-time initialization file.
Select "Exit" on the "File" menu to terminate the run-time environment setup tool.
Debugging the Program
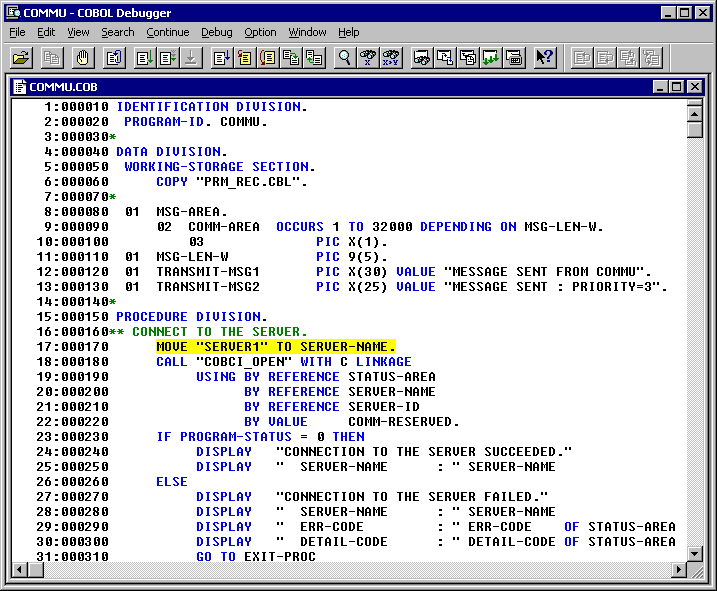
To run these programs under the control of the Debugger, select Debug from the Tools menu. The Start Debugging dialog box appears. Press the ENTER key.
When the source is read into the COBOL Debugger, it will look like the following figure.
Executing the Program
To execute this sample, you must start both executable files—SAMPLE29.EXE and COMMU.EXE. You can do this by double-clicking the mouse on the executable files in the COBOL Project Manager window.
Execution Result

Check the messages displayed on the console to ensure the following:
In the SAMPLE29 console window:
Messages from COMMU have been read from logical destination "MYLD2".
Messages have been read from logical destination "MYLD1" in order of priority.
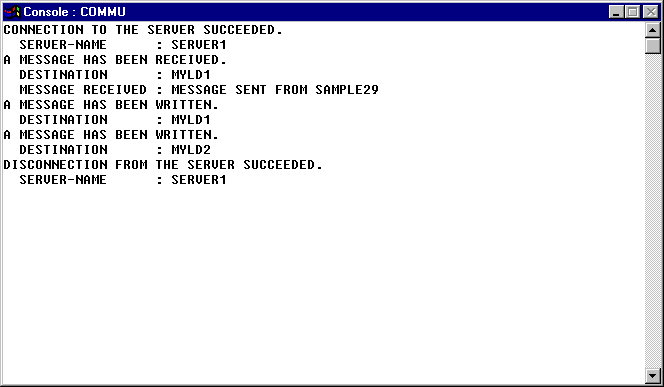
In the COMMU console window:
Messages from SAMPLE29 have been read from logical destination "MYLD1".
Messages have been written to logical destination "MYLD1" and logical destination "MYLD2".