Sample 11 extracts data from a database and assigns it to a host variable using the SQL database function.
In normal operation, the database is placed on a server and is accessed by the client via an ODBC driver.
However, a database file is included with this sample to enable you to use a relational database off-line. This database file-called STOCK.MDB-- includes the Microsoft Access runtime support. It can therefore be used as long as Open Database Connectivity (ODBC) is installed and configured properly.
For more about using ODBC drivers, refer to the “Database (SQL)” chapter in the “NetCOBOL User’s Guide”, and the relevant documentation from your database vendor.
To run this sample program in a true distributed configuration, the following products are required:
Client
ODBC driver manager
ODBC driver
Products needed for the ODBC driver
On the server
Database
Products needed for accessing the database via ODBC
Overview
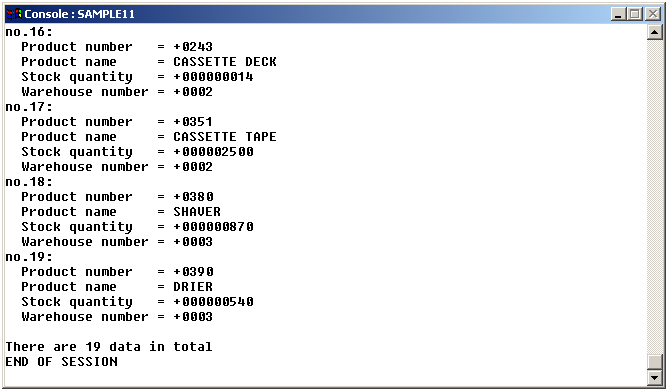
The sample program accesses the database on the server and outputs all data stored in the database table "STOCK" to the client console. When all data has been referenced, the link to the database is disconnected.
Files Included in Sample 11
SAMPLE11.COB (COBOL source program)
SAMPLE11.PRJ (COBOL project file)
SAMPLE11.CBI (COBOL compiler option file)
COBOL85.CBR (COBOL run-time initialization file)
SAMPLE11.INF (ODBC information file)
STOCK.MDB (Sample database for Microsoft Access)
COBOL Statements Used
The DISPLAY, IF and PERFORM statements are used.
Embedded SQL statements (embedded exception declarations and CONNECT, DECLARE CURSOR, OPEN, FETCH, CLOSE, ROLLBACK, and DISCONNECT statements) are also used.
Prerequisite to Executing the Program
ODBC is a defined interface that attempts to provide a highly generic API into any database system that provides compliant drivers. Just about every database system available today provides ODBC drivers for a variety of platforms.
In order to execute this sample, you must have already installed 32-bit ODBC support on your Windows 2000, XP, Windows Server 2003, or Windows Server 2008, along with the Microsoft Access Driver.
Verifying Whether ODBC is installed
In order to verify whether your system has the proper support installed, look in your Administrative Tools for the icon of ODBC data source administrator.
An example is given below.
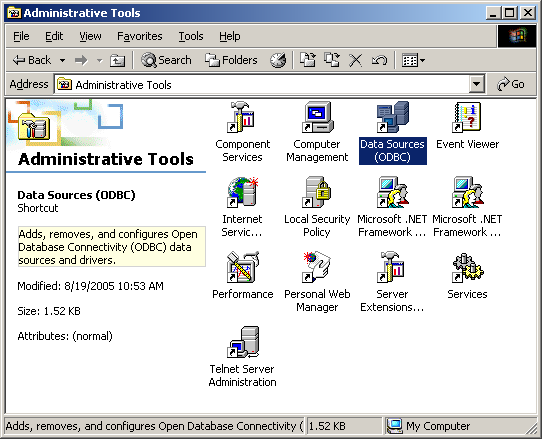
Double-click on this icon.
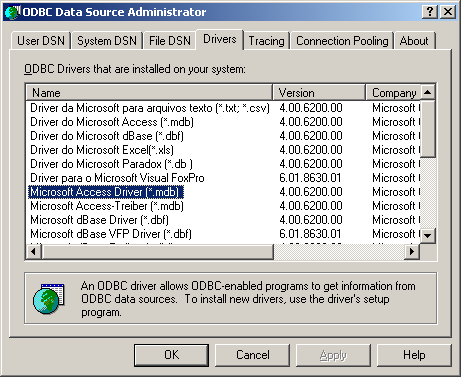
Select the Drivers (or ODBC Drivers) tab and verify that the Microsoft Access Driver (*.mdb) is installed. The driver is shown highlighted in the following figure.
Note
Depending on the version of Microsoft Access, the ODBC drivers may not be installed by default - you must manually select these options when you install Microsoft Access (either from the Microsoft Access installation CD or the Office Professional CD).
You will also require a sample Microsoft Access run-time enabled database called "STOCK.MDB". This file can be found in the SAMPLE11 folder.
Once you have verified installation of 32 Bit ODBC, Microsoft Access and the associated drivers, you are ready to proceed with executing the sample.
Defining an ODBC Source for Your Application
The first development task that needs to be accomplished is to define an ODBC Source for the application.
An ODBC Source can be thought of as simply specifying to the ODBC manager a symbolic name that you wish to use in your application to describe an ODBC connection to a specific ODBC database driver and database.
The following figures may or may not match what you see on your particular operating system, but you should be able to perform the following tasks by using the instructions provided.
Bring up the Administrative Tools and double click on the Data Sources (ODBC) icon. The main ODBC Data Source Administrator window is displayed.
You will add a new User DSN. Select the User DSN tab, and click on the Add button.
ODBC Data Source Administrator displays the “Create New Data Source” dialog box.
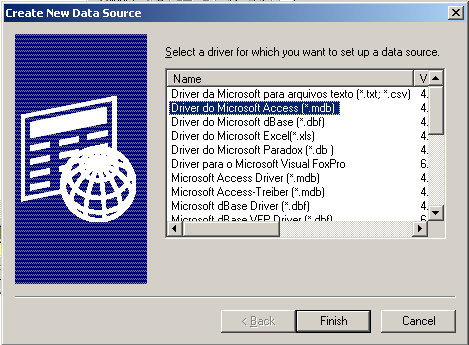
Select the Microsoft Access Driver (*.mdb) and click on the Finish button.
The ODBC Microsoft Access Setup dialog box is displayed.
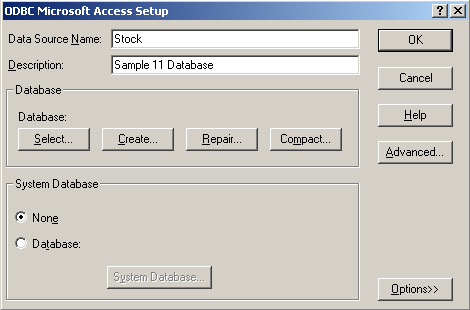
Enter Stock in the Data Source Name field and Sample 11 Database in the Description field as shown above.
You also need to select a file (database) to bind this driver to. Click on the Select button in the ODBC Microsoft Access Setup dialog box. The Select Database dialog box is displayed. Navigate through the directories and find the "Stock.mdb" database file:
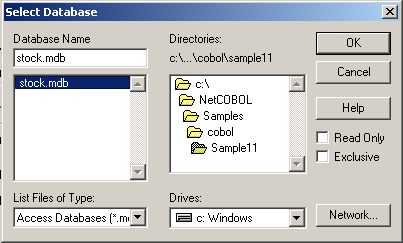
Click on the OK button. This will take you back to the ODBC Microsoft Access Setup dialog box.
Click on the OK button. This will take you back to the main ODBC Source Administrator window.
Note that "Stock" has been added to the list in User DSN. Although you should not set any additional options for this exercise, you may wish to highlight “Stock” and click on the Configure button.
This will give you an idea of some of the additional options that are available when developing these types of applications. Once you are back to the main ODBC Source Administrator window, click on the OK button. This will exit the ODBC configuration facility. You have now defined the new ODBC Source (Stock) you are going to use with COBOL.
Building/Rebuilding the Program
Project manager's build function is used to create the executable program.
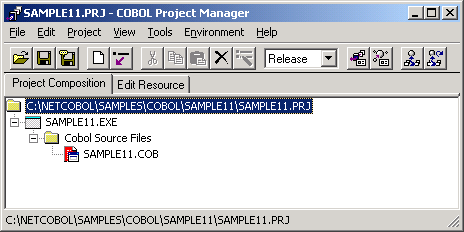
In the following screen snapshots, the sample program was installed to C:\NetCOBOL. Your installation folder may be different.
The project manager is started, and project file "SAMPLE11.PRJ" is opened.
Select "Build" from Project Manager's "Project" menu or click on the Build button in the Project Manager toolbar.
After the build terminates, check that SAMPLE11.EXE is created.
Setting ODBC information
The ODBC information file is necessary for the execution of this sample program. When connecting it with the database by using the ODBC driver, necessary information is included as for the ODBC information file.
The ODBC information file is made by using ODBC information Setup Tool (SQLODBCS.EXE). Refer to the “Database (SQL)” chapter in the “NetCOBOL User’s Guide” for more detailed information.
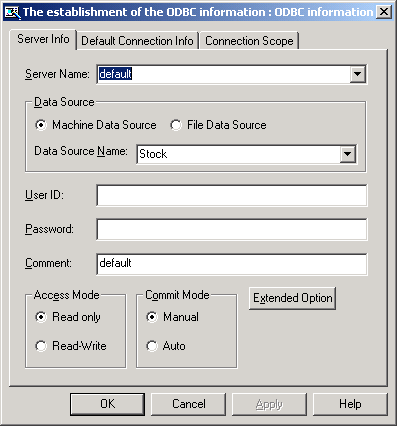
The following figures show the place where information necessary to connect it with an attached sample database by this sample program was set.
Note
Information shown up is included in SAMPLE11.INF. When data bases other than Microsoft Access are used, setting other items might become necessary.
Setting Run-time Environment Information
Select "Run-time Environment Setup Tool" from the "Tools" menu of the Project Manager.
The run-time environment setup tool is displayed.
Select "Open" on the "File" menu and select COBOL85.CBR in the folder that contains the executable program (SAMPLE11.EXE).
Select the Common tab and enter data as shown below:
For the environment variable @ODBC_Inf , specify SAMPLE11.INF.
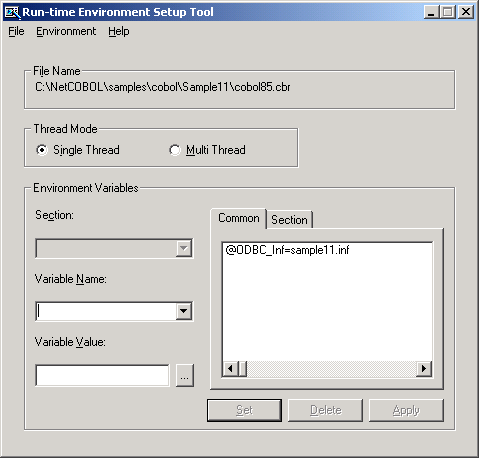
Click the Apply button.
The data is saved in the object initialization file.
Select "Exit" on the "File" menu to terminate the run-time environment setup tool.
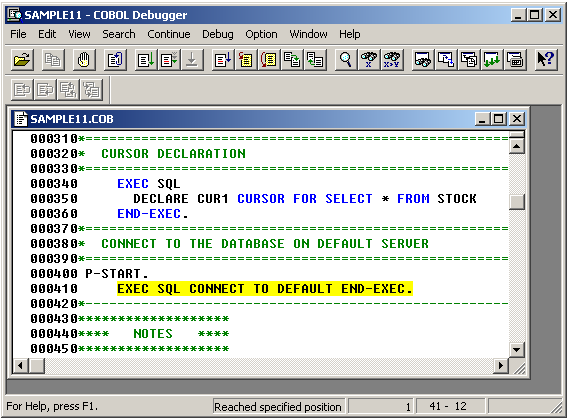
Debugging the Program
To run the program under the control of the Debugger, select Debug from the Project menu. The Debugger starts and displays the Start Debugging dialog box. Press the ENTER key.
When the source is read into the COBOL Debugger, it will look like the following figure.
Executing the Program
To execute this program, you can double-click on SAMPLE11.EXE in the Project Tree or select Execute from the Project menu, with the project or .EXE file selected.
Execution Result
The data extracted from the table is displayed, as shown in the following figure.