Sample 8 demonstrates a program that outputs data (input from the console window) to a printer using a print file. Refer to “Printing” in the “NetCOBOL User’s Guide” for details on using a print file.
Overview
The sample program inputs data of up to 40 alphanumeric characters from the console window, and outputs the data to the printer.
Files Included in Sample 8
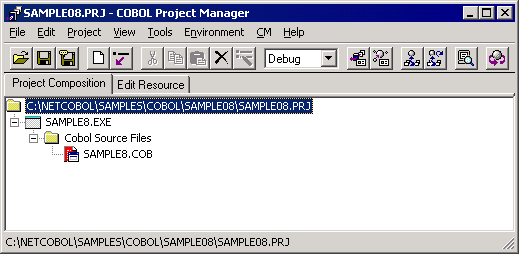
SAMPLE8.COB (COBOL source program)
SAMPLE08. PRJ (COBOL project file)
SAMPLE08. CBI (COBOL compilation option file)
COBOL Statements Used
The ACCEPT, CLOSE, EXIT, GO TO, IF, OPEN, and WRITE statements are used.
Building/Rebuilding the Program
Project manager's build function is used to create the executable program.
In the following screen snapshots, the sample program was installed to C:\NetCOBOL. Your installation folder may be different.
The project manager is started, and project file "SAMPLE08.PRJ" is opened.
Select "Build" from Project Manager's "Project" menu or click on the Build button in the Project Manager toolbar.
After the build terminates, check that SAMPLE08.EXE is created.
Debugging the Program
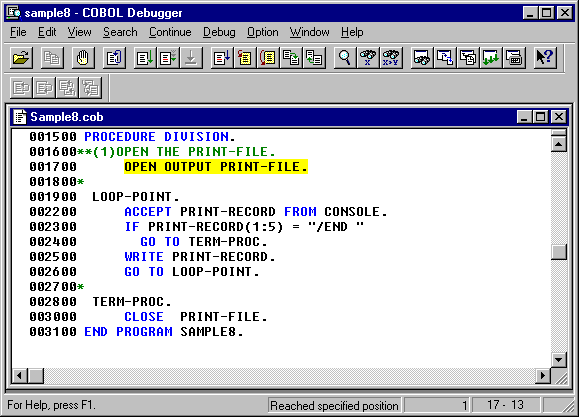
To run this program under the control of the Debugger, select Debug from the Project menu. The Debugger starts and displays the “Start Debugging” dialog box.
Press the ENTER key here and you will be taken into the Debugger, as shown in the following figure.
Executing the Program
To execute in COBOL Project Manager, select Execute from the Project menu. There are no command line arguments.
A console window is then displayed.
In the console window, enter the data to be printed . Data of up to 40 characters can be entered at a time.
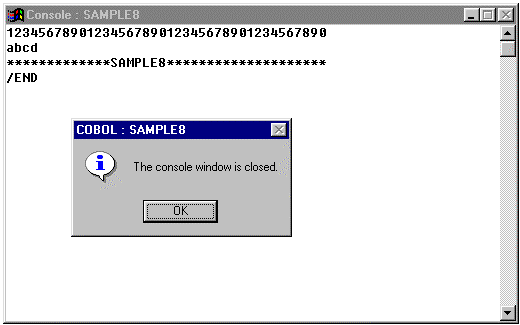
To terminate the program, press the RETURN key, type /END and press the RETURN key. Click on the OK button to close the message window.
Execution Result
The input data is written to the printer at termination of the program.
