Sample 5 demonstrates an application that calls a subprogram from the main program. Sample 5 was created using free format source.
It also demonstrates how to pass an argument string to a program and how to display a message box.
Overview
Reads the contents of the master file (indexed file created in Sample 2), stores the records in a work file whose name is provided in the @MGPRM environment variable (a way of passing information to a main program’s linkage section), then passes the work file to a subprogram which prints the records.
The master file stores product codes, product names, and unit prices. The work file name must be specified in the @MGPRM parameter at program execution.
Files Included in Sample 5
SAMPLE5.COB (COBOL source program)
PRINTPRC.COB (COBOL source program)
S_REC.CBL (COBOL library file)
SAMPLE05. PRJ (COBOL project file)
SAMPLE04. CBI (COBOL compilation option file)
COBOL85.CBR (COBOL runtime initialization file)
COBOL Statements Used
The CALL, DISPLAY, EXIT, GO TO, MOVE, OPEN, READ, and WRITE statements are used.
Using Free Format in a COBOL Source Program
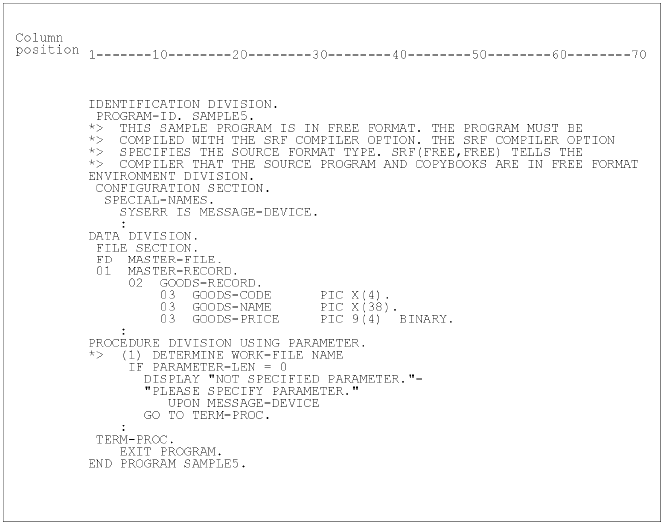
The following is an example of using free format in a COBOL source program.
Note
In the above figure, colons are used to denote sections of source code that have been omitted.
In free format, COBOL statements can be written in any character position on the line. Lines beginning with “*>“ are treated as comments.
Note
You must specify the SRF compiler option in order to use free format. The SRF compiler option has two parameters; the first specifies the format for the source program and the second specifies the format of copybooks. All copybooks must have the same format type. The available types are FIX, for fixed format source, VAR, for variable format source, and FREE, for free format source.
File Interdependence
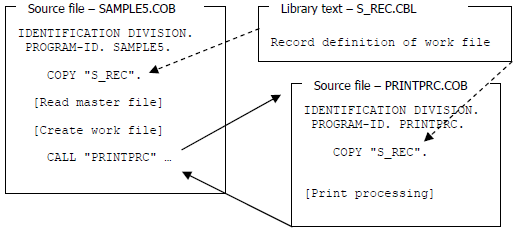
Following figure shows the relationship between sources files used in Sample05.
Prerequisite to Executing the Program
The master file created in Sample 2 is used. Therefore, execute the program in Sample 2 before executing Sample 5.
Building/Rebuilding the Program
Project manager's build function is used to create the executable program. In the following screen snapshots, the sample program was installed to C:\NetCOBOL. Your installation folder may be different.
The project manager is started, project file "SAMPLE05.PRJ" is opened.
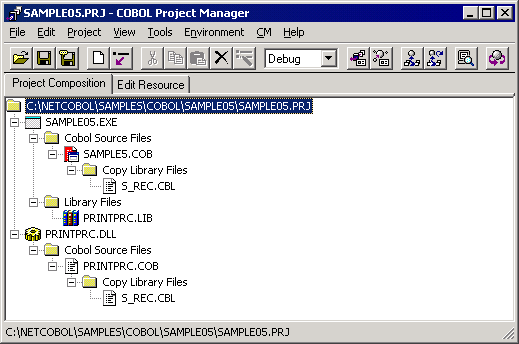
This project file contains the following two TARGET.
SAMPLE05.EXE (executable file name of main program)
PRINTPRC.DLL (DLL file name of subprogram)
The project file is selected, and "Compiler options" is selected from "Project"-"Options" menu.
The "Compiler options" dialog is displayed.
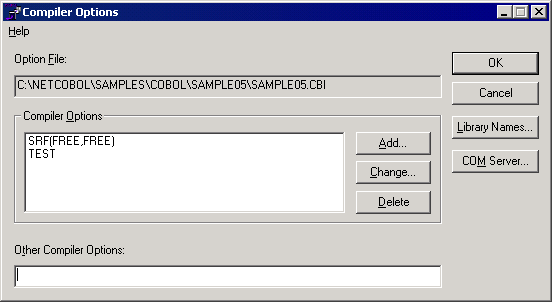
Confirm compiler option SRF(FREE,FREE) is specified. After confirming the information, click the OK button.
You are now returned to the Project Manager window.
Select "Build" from Project Manager's "Project" menu or click on the Build button in the Project Manager toolbar.
After the build terminates, check that SAMPLE05.EXE and PRINTPRC.DLL are created.
Setting Runtime Environment Information
Select "Runtime Environment Setup Tool" from the "Tools" menu of the Project Manager.
The runtime environment setup tool is displayed.
Select "Open" on the "File" menu and select COBOL85.CBR in the folder that contains the executable program (SAMPLE05.EXE).
Select the Common tab and enter data as shown below:
For the file-identifier INFILE, specify the path name of the master file (MASTER) created in Sample 2.
A work file name in the @MGPRM parameter. The string in this parameter is passed to the first linkage section item in the executing program. The work file name can contain up to 8 alphanumeric characters. The extension “TMP” is added to the work file name before the file is created.
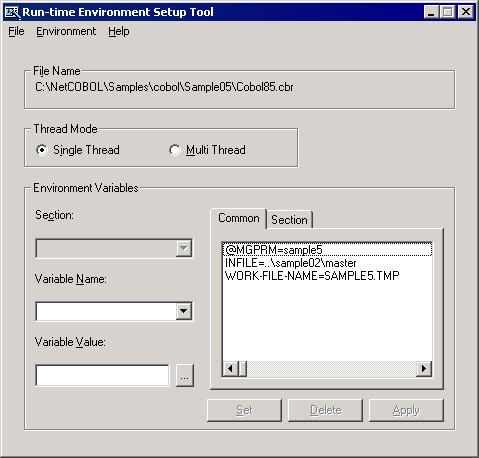
Click the Apply button.
The data is saved in the object initialization file.
Select "Exit" on the "File" menu to terminate the runtime environment setup tool.
Debugging the Program
To run this program under the control of the Debugger, select Debug from the Project menu. The Debugger starts and displays the “Start Debugging” dialog box.
Press the ENTER key here and you will be taken into the Debugger.
Executing the Program
To execute the sample program, click on the Execute button in the Project Manager window.
The message “GENERATE WORK-FILE=sample5.TMP” is displayed.
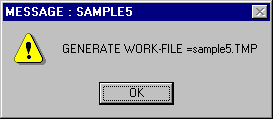
Confirm the contents, then click on the OK button to close the message box.
Execution Result
The master file contents are written to the default printer at the completion of program execution.