In this section, you will learn how to create a COBOL application that uses Visual Basic as a graphical front end.
It is assumed that you have already installed Visual Basic, version 5.0 or higher on your machine. If you have not, please do so before continuing this section.
It is also assumed that you have gone through the Visual Basic Tutorial entitled “Your First Visual Basic Application,” located in the “Visual Basic Programmer’s Guide.” This will help you understand the terminology used later in this chapter.
An Overview of the Visual Basic COBOL Application
The application you are going to develop will be a simple graphical window with a text box and two command buttons.
It will be named HICOBOL (short for "Hello from COBOL").
The text box will be assigned a text value by Visual Basic. When selected, one of the command buttons will call your HICOBOL program and pass two parameters.
One parameter is a numeric value. The COBOL program will set this value to 100 each time, but it will be ignored by the Visual Basic part of the application (this parameter is defined to illustrate the technique). You may enhance the application on your own to use this value as appropriate.
The second parameter is a character string. The COBOL program will always set this to "Hello from COBOL". When the COBOL program exits, this value will be returned to Visual Basic and the graphical text box will be updated with this new string to illustrate the interaction between Visual Basic and COBOL.
This will happen each time a user clicks on the command button. The second command button will cause the graphical text box to be reset to display a different string.
How NetCOBOL Interacts with Visual Basic
NetCOBOL was created to work well with other language environments from a runtime perspective.
Most programming API’s (application programming interfaces) available on the Windows platforms support a C-style programming interface. This includes not only operating system services such as GUI interface components, but also additionally a vast array of other programming interfaces. These include database systems, client/server messaging and transaction systems, and even end user applications.
The arrival of NetCOBOL has brought seamless integration with operating system services and other languages to COBOL developers. Visual Basic integration is but one example of the excellent mixed language programming support found in NetCOBOL.
The integration point between NetCOBOL and Visual Basic is the creation of a DLL (dynamic link library) file from NetCOBOL.
Instead of producing a standalone executable (EXE) file within the COBOL development environment, you instead produce a DLL file. You can think of a DLL file as a dynamically callable COBOL subprogram, which does not have to be physically linked to a program that calls it and may even pass data back and forth.
To create a proper DLL, the linker needs to be given the name of the DLL to be produced, and the names to export.
Exported names are the names of entry points contained within the DLL file which are to be made public to allow other applications to call them after the DLL has been identified to the operating system.
You are going to create a simple DLL file called HICOBOL.DLL, which will contain a single exported entry point - the program name. The program name entry point will cause a calling program to enter the program at its first executable statement in the PROCEDURE DIVISION.
Once you have written the HICOBOL.COB program and have created the HICOBOL.DLL executable, you will exit NetCOBOL and enter Visual Basic to design the graphical interface.
While in Visual Basic, you will create a graphical user interface (GUI) for your COBOL application, which will call the HICOBOL.DLL program. Data will be passed back and forth as well.
To identify the NetCOBOL DLL to the Visual Basic program, you will code three simple Visual Basic DEFINE statements. One is for the NetCOBOL run-time load program. Another is for the NetCOBOL run-time unload program. The final DECLARE statement is for the HICOBOL.DLL executable you are going to create.
In order to get a NetCOBOL DLL program to work with Visual Basic, you need to first issue a single call from Visual Basic to ensure that the COBOL run-time support is properly loaded.
You then code a single Visual Basic statement to call the HICOBOL.DLL program and pass data to it.
Finally, you code a call to unload the COBOL run-time support when finished.
That’s all there is to it.
From an architectural standpoint, when you develop future, more complex Visual Basic COBOL applications you will arrange things slightly differently than in the following example. The main reason for this is that you only need to load the NetCOBOL run-time once at the start of your application, and issue the unload call just before you exit your Visual Basic application.
To keep the example simple and straightforward, you are going to code all three calls together (load the COBOL run-time, call HICOBOL, unload the COBOL run-time).
Developing the COBOL Portion of the Application
In this section you are going to develop the HICOBOL.DLL executable which will be called by Visual Basic.
You are going to use the COBOL Project Manager to assist you.
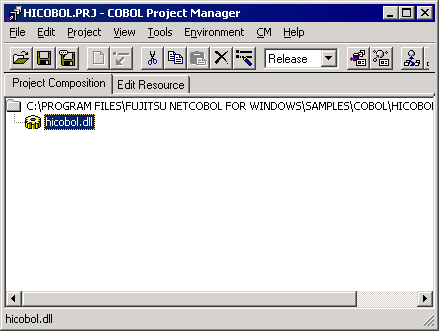
Start the COBOL Project Manager; the following window appears:
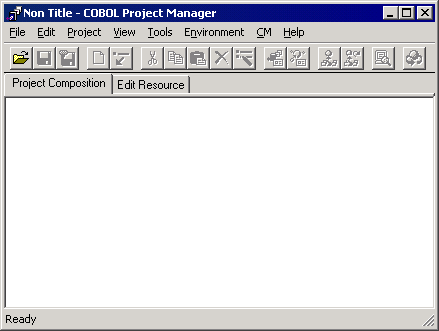
From the Project menu, select Open Project.
Project Manager displays the Open dialog.
We will use this dialog to create a new folder (sub-directory) to store the application you are about to develop.
Navigate to the
C:\Program Files\Fujitsu NetCOBOL for Windows\Samples\Cobol
folder.
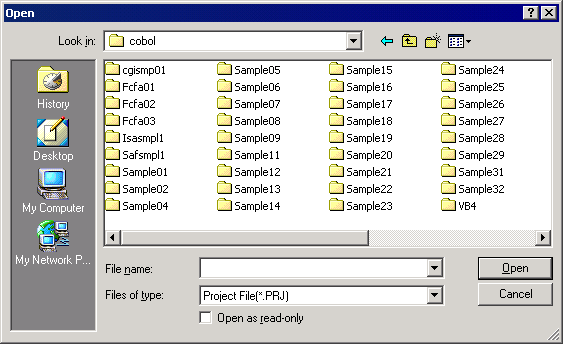
Locate and click on the Create New Folder button to the upper right of the dialog.
This creates a new folder in the Samples folder, called “New Folder”, with the text already selected.
Change the name of the folder to HICOBOL, by typing:
HICOBOL, and click on ENTER.
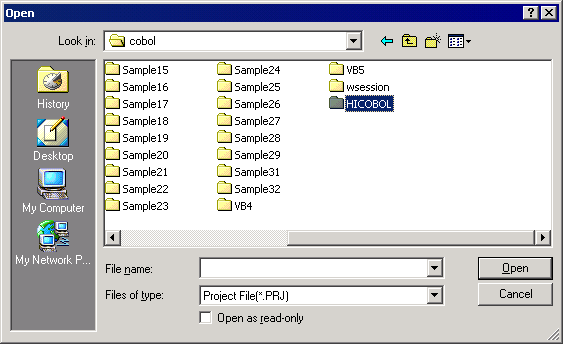
Double click on the new folder Hicobol, to switch to that folder.
In the File Name field, enter the name of the new project, HICOBOL, and click on the Open button.
Project Manager displays the following message:
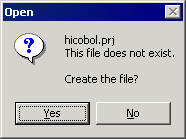
Click on the Yes button, and the project file is created.
Right click on the project name to display a pop-up menu and select “New File” to create a new target file.
Type over the file name (NewFile.EXE) with HICOBOL.DLL. The COBOL Project Manager window should now look like this:
Because we are not planning to create any other executables, you will now define the files that will be used to create this DLL.
Right-click the mouse on HICOBOL.DLL and select Create Folder from the popup menu.
Project Manager displays the Create Folder sub-menu:

This menu offers the types of files upon which HICOBOL.DLL might depend. You need to create just one folder - for the COBOL source file.
Select “COBOL Source File”.
Project Manager adds a “COBOL Source File” folder to the project tree.
Right click on “COBOL Source File” and select “New File” from the pop-up menu.
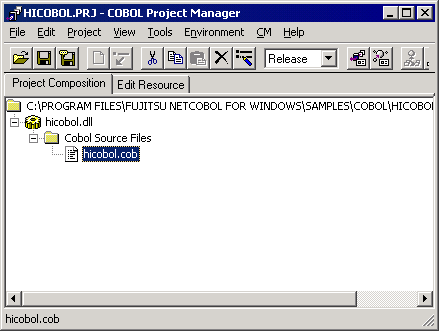
Overtype “NewFile.COB” with “HICOBOL.COB”.
The project tree should now look like this:
You are now ready to create the COBOL source program.
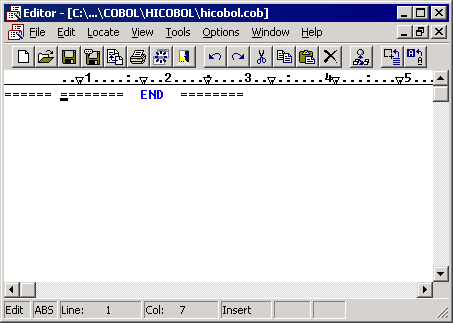
Within the COBOL Project Manager, double-click the mouse on the HICOBOL.COB file name.
This brings up a blank Editor window as shown below:
You are now ready to construct the HICOBOL.COB source program. The quickest way to do this is to use the Editor’s template function.
From the Edit menu select Template.
The Editor displays the Template dialog.
Expand the COBOL basic functions, Source unit nodes in the Categorization of template tree:
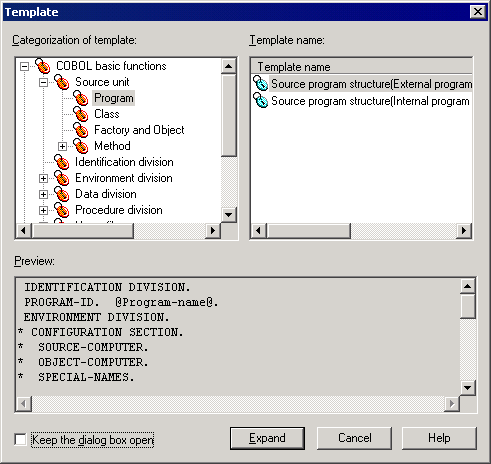
Select “Source program structure (External program definition)” from the list of Template name and click the Expand button.
The Editor inserts the template code.
You can now see the code that has been inserted in the Editor:
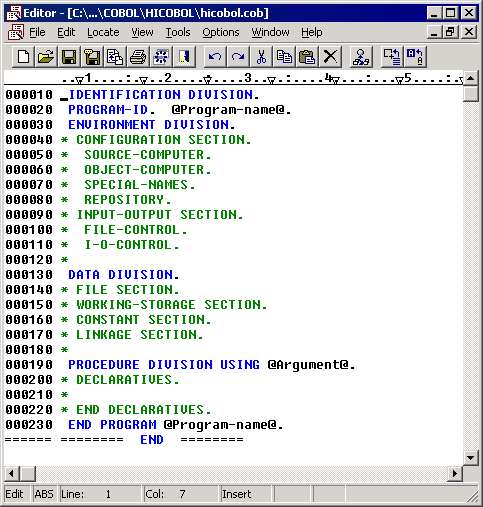
Uncomment the LINKAGE SECTION header, delete other unwanted comment lines, and insert the text shown below to create the HICOBOL program:
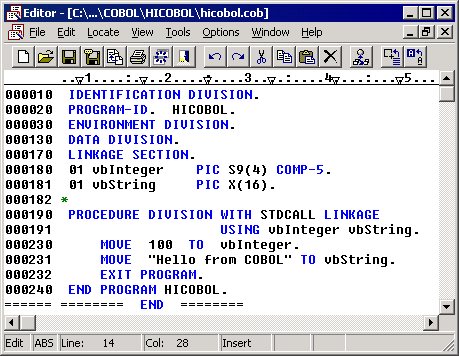
If you examine the HICOBOL program, you will understand what it does quite easily. Note that it contains a LINKAGE SECTION and thus needs two parameters passed to it, each time it is called.
The vbInteger parameter is always set to the value of 100. The vbString parameter is always set to the value of "Hello from COBOL".
These parameters will be defined in the Visual Basic application and passed to the COBOL program. They are passed by reference - meaning that the COBOL program gains access to the data areas in the Visual Basic program. The COBOL program updates the values and returns control to the Visual Basic program.
Select Save from the File menu to save the program.
Select Close from the File menu to close the Editor.
You are nearly ready to build the HICOBOL.DLL executable.
Return to the COBOL Project Manager window, select HICOBOL.PRJ in the project tree and, from the Project menu, select Options, Linker Options.
Project Manager displays the Linker Options dialog:
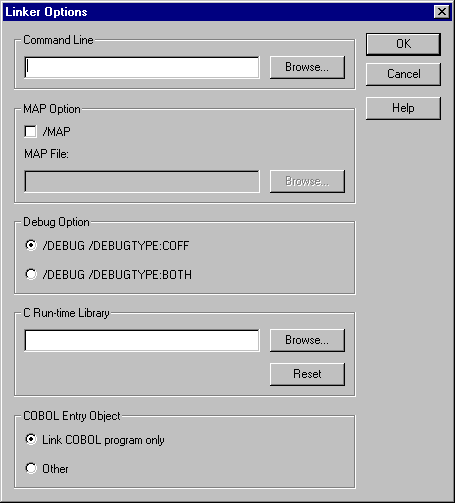
In the Command Line entry field type:
/EXPORT:HICOBOL
This tells the linker to make the HICOBOL entry point available as an external reference in the DLL file.
Click on OK.
From the Project menu select Build.
Project Manager compiles and, if there are no compile errors, links the program into a DLL file.
If you receive any compile errors, they will be displayed in red in the Builder window that is used to display compiler and linker messages.
Double-click on an error line to be taken to the location of the error in the editor.
Any errors should be typos so check your code carefully, correct it and save the file.
Return to the COBOL Project Manager window and again select Build from the Project menu.
Project manager recognizes that the source file has been updated since the last build and recompiles and relinks the appropriate parts of the project (in this case all the parts).
Once you have a successful build (or rebuild) of your application, the following is displayed in the Builder window:
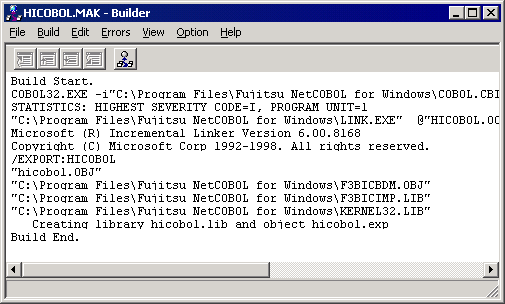
You have now completed the COBOL development side of this application.
Developing the GUI Interface Using Visual Basic
You will now use Visual Basic version 4.0 or higher to develop the graphical user interface for the HICOBOL application. The snapshots are taken using Visual Basic 6.0.
Bring up the Visual Basic development environment. (Select Visual Basic from the Windows Start, Programs menu.)
Visual Basic displays a window like this:
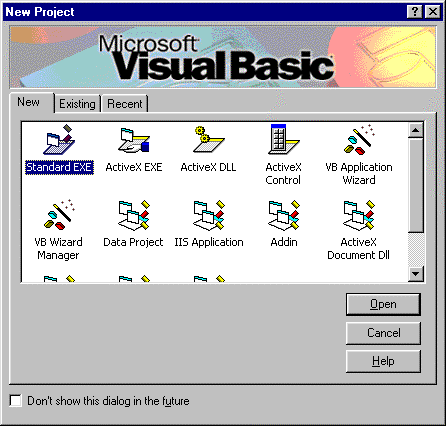
This window asks you to specify which type of application you are going to develop. You are going to develop a Standard EXE so:
Select Standard EXE and click on the Open button.
Visual Basic displays the following window (or one like it, depending on which display options you have set):
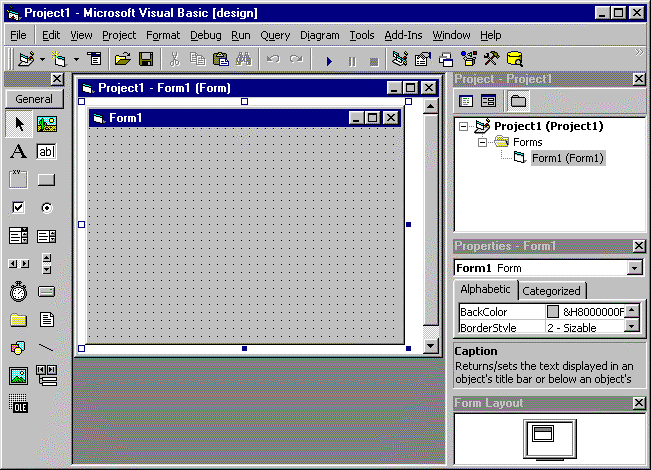
You should already be familiar with this environment. If not, it is strongly suggested that you go through the Visual Basic “Your First Visual Basic Application” tutorial in “Getting Started with Visual Basic” (or “Visual Basic Programmer’s Guide” - earlier versions).
In the center of this window is an object named Form1. This will become our main application window. You are going to create a text box and two command buttons on this form.
Create the Text Box:
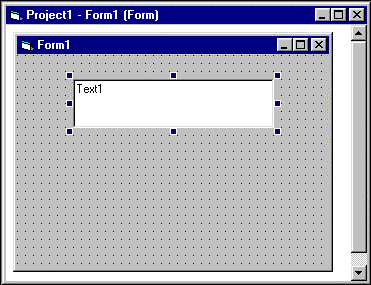
Move the mouse to the toolbox (the “object palette”) on the left-hand side of the window and click once on the text box icon.
Move the mouse over to the Form1 grid. Starting near the upper left hand corner of the grid, hold the left mouse button down, and drag the mouse down a bit and to the right to draw a text box to look something like this:
In the Properties window, enter "Hello from Visual Basic" in the Text property value.
You will notice that it instantly changes in the text box on Form1.
Create the Command Buttons:
Click on the command button icon, in the toolbox.
Move the mouse pointer near the bottom left of the Form1 window and draw a command button by holding the left mouse button down and dragging it.
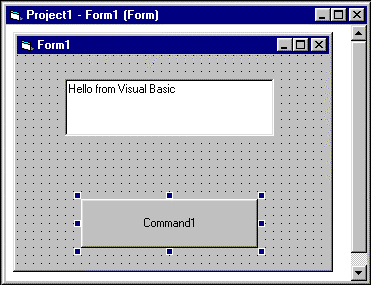
Change the Caption value (the text displayed on the command button) from Command1 to Hello COBOL, in the Properties window.
You may reposition the command button or the text box by selecting either with the mouse and dragging the selected object to the position you desire on the form.
Now place a second command button on Form1 between the text box and the first command button by repeating steps 3 to 5 above. Change the caption value to “Reset”.
Form1 should now look like this:
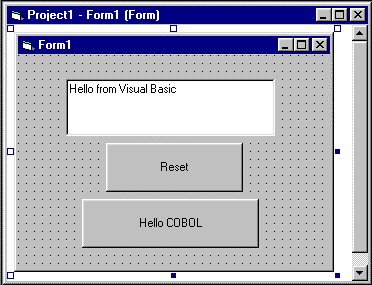
Create the Programming Logic in Visual Basic
Now that you have created the application’s main window (Form1) and its associated objects, it’s time to wire this all together by creating some program logic to define the interaction of the user interface.
Visual Basic makes this process simple and straightforward in the way it has implemented the event-driven programming paradigm.
In these steps you will take care of the following tasks:
Writing the actual Visual Basic Script (programming language) to handle events and to call the supporting COBOL application.
Declaring the components of the supporting COBOL application to Visual Basic.
Executing the overall application under the control of Visual Basic.
You will begin by writing the program logic.
The first requirement you will take care of is to implement the functionality for the Reset push button. The behavior that is desired is to have the text box string reset with a standard value each time a user clicks this command button.
Implementing the Reset Button
Move the mouse pointer over the Reset command button. Double click on this button.
This brings up a program code window to create a Visual Basic subroutine that will be executed every time a user clicks on the Reset button. Part of the subroutine code is created automatically (its definition and exit).
The cursor is automatically placed at the proper spot in the new subroutine to begin entering commands.
Enter the following line of code, which sets the text string to a new value:
Text1.Text = "Text Reset"
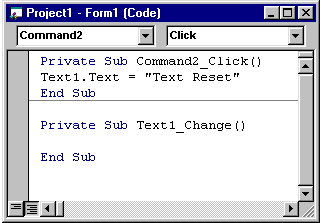
Click the mouse on the Close button (the X in the upper right hand corner) of the program code window you just typed in.
Implementing the Hello COBOL Button
The Hello COBOL command button is where most of the action in this application will take place. When a user clicks on this button, Visual Basic will call the HICOBOL.DLL executable and pass two parameters to it.
The COBOL program will update both parameters and return control to the Visual Basic program. Visual Basic will take the value of the string parameter (which the COBOL program will change to "Hello from COBOL") and update the text box value with it.
You need to perform the following steps at this point:
Move the mouse over the Hello COBOL command button and double click on it to open up a program code window.
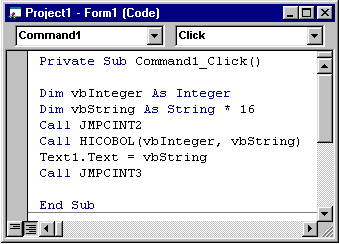
Enter the following code in the new code window between the Private Sub and End Sub statements:
Dim vbInteger as Integer
Dim vbString as String * 16
Call JMPCINT2
Call HICOBOL (vbInteger, vbString)
Text1.Text = vbString
Call JMPCINT3
Let’s look at what each of the above noted statements does at run-time:
Dim vbInteger as Integer - This defines a numeric data item named vbInteger.
Dim vbString as String * 16 - This defines a character string of 16 characters named vbString.
Call JMPCINT2 - This calls the supplied NetCOBOL routine which initializes the COBOL run-time support. It need only be called once per application.
Call HICOBOL (vbInteger, vbString) - This calls the COBOL DLL file you previously created, and passes the two parameters to it.
Text1.Text = vbString - This command instructs Visual Basic to update the Text string in the Text1 text box with the value contained in vbString, which will be returned from the HICOBOL COBOL program.
Call JMPCINT3 - This calls the supplied NetCOBOL routine which unloads (exits) the COBOL run-time support. It need only be called once per application.
Your Code window should look like this:
Defining the COBOL Components to Visual Basic
The final step that needs to be performed is to define to Visual Basic the external COBOL executables that are going to be referenced in this application. Do the following:
While the program code window shown above is still open, click on the small down arrow to activate the drop down box that currently has the value Command1. This box is located in the upper left of the project code window. It should appear as follows:
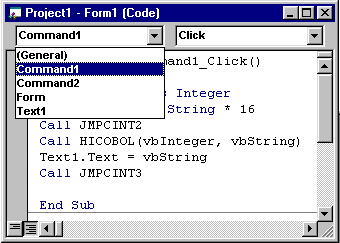
This drop down list box allows you to navigate through your program source code for each event subroutine you have defined. You need to go to the General section of your program to create declarations for the external COBOL executables.
Click on (General).
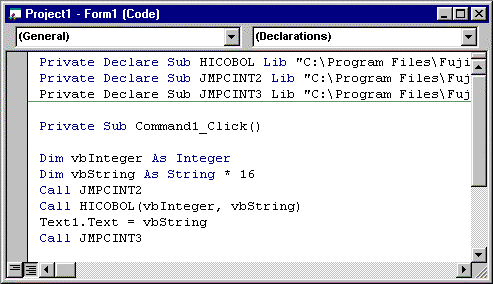
Enter the following 3 statements in any order (as one long string each) in the program code window in the General Section area:
Private Declare Sub HICOBOL Lib "C:\Program Files\Fujitsu NetCOBOL for Windows\SAMPLES\COBOL\HICOBOL\HICOBOL.DLL" (vbInteger as Integer, ByVal vbString as String)
Private Declare Sub JMPCINT2 Lib "C:\Program Files\Fujitsu NetCOBOL for Windows\F3BIPRCT.DLL" ()
Private Declare Sub JMPCINT3 Lib "C:\Program Files\Fujitsu NetCOBOL for Windows\F3BIPRCT.DLL" ()
The three statements above have been wrapped to multiple lines because of the page size of this manual. They should be entered into the program code window as a single line each (not wrapped).
These statements define to Visual Basic where the external COBOL modules that will be referenced at run-time reside. Be sure to alter the path settings above when entering these if you changed the default installation directory when you installed NetCOBOL to reflect your machine’s installation location.
Your Visual Basic code should now look like this:
Close the program code window.
You have now completed all of the steps required to create this sample application.
You should save the Visual Basic portion you’ve just created.
Select Save Project from the File menu.
You will be prompted to save the form.
Change the Form name from Form1.frm to HICOBOL.frm, and save it in the HICOBOL folder (within the "C:\Program Files\Fujitsu NetCOBOL for Windows\samples\cobol" folder).
Select Save Project again, to save the project.
Name it HICOBOL.vbp and save it.
Executing the HICOBOL Application under Visual Basic
You are now ready to execute the HICOBOL application.
From the Run menu of Visual Basic, select Start.
The HICOBOL graphical window you just created appears:
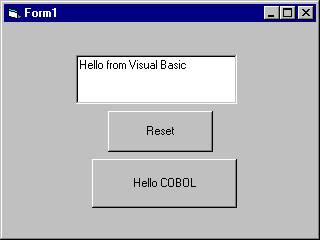
Click on the Reset button.
The text in the Text box changes to “Text Reset”.
Click on the Hello COBOL command button.
Visual Basic issues a call to the HICOBOL.DLL executable.
The program updates the parameters, which then update the text box in your graphical window to read "Hello from COBOL".
Click on the Reset button.
The text in the Text box returns to “Text Reset”.
Close the window to exit the application.
If you want to create a standalone EXE for your application, use the Make command under the Visual Basic File menu.
Note that Visual Basic applications require you to distribute the Visual Basic Run-time DLL along with your EXE and the COBOL components required.