The Jobscheduler information can be printed. The print types that can be printed as Jobscheduler information are as follows.
Gantt Chart:
Prints a Gantt chart.
Group Monitoring Map:
Prints a group monitoring map.
Job Net Monitoring Map:
Prints a job net monitoring map.
Group List:
Prints a group list.
Job net list:
Prints a job net list.
Job Net History:
Prints a job net history.
Job History:
Prints a job history.
To print the Jobscheduler information, select the print type and then specify the necessary print output items. The following describes how to select a print type. For procedures for setting up the print output items, see the respective print output items.
Procedure
Displaying the Print Jobscheduler Info [Login] window
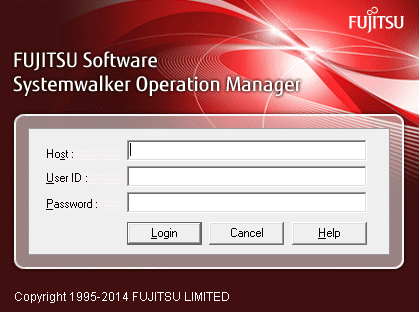
Select Start/App >> Systemwalker Operation Manager >> Print Jobscheduler Info. The Print Jobscheduler Info [Login] window will be displayed.
Figure 9.1 Print Jobscheduler Info [Login] window

Specifies the host name of the server to connect to.
Specifies the ID of the user connecting to the server.
Specifies the password for the user ID that was specified in the User ID field.
Note
You cannot connect to the destination server with the Windows version of Systemwalker/OperationMGR V5.0L2.0 or earlier or the UNIX version of Systemwalker/OperationMGR 5.1 or earlier.
Displaying the Print Jobscheduler Info window
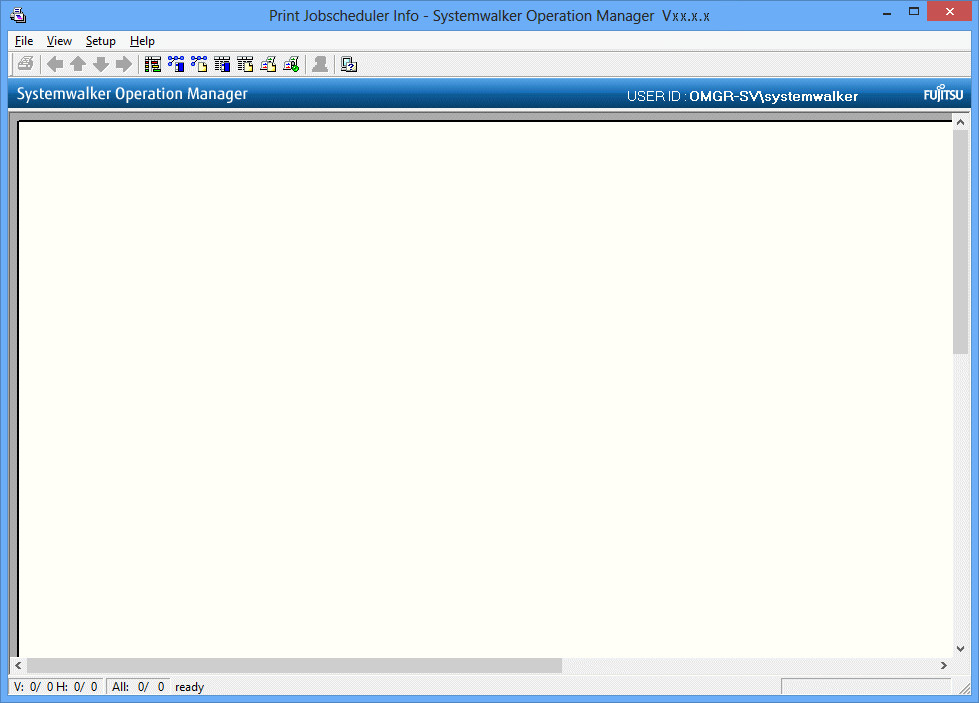
Specify the destination host name and user ID in the Print Jobscheduler Info [Login] window to display the Print Jobscheduler Info window.
Figure 9.2 Print Jobscheduler Info window

Displays a Gantt chart or monitoring map on a printed page basis. The contents displayed in this area will be printed.
Information
![]() When operating multiple subsystems
When operating multiple subsystems
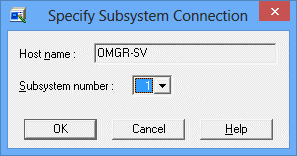
When operating multiple subsystems, specify the destination host name and user ID in the Print Jobscheduler Info [Login] window to display the Specify Subsystem Connection window. Specifying a subsystem number here displays the Print Jobscheduler Info window.

Selecting the print type
Select the print type in the Print Jobscheduler info window using one of the following operations.
Select Gantt Chart, Monitoring Map, List or History from the View menu.
Click the Gantt Chart, Group Monitoring Map, Job Net Monitoring Map, Group List, Job Net list, Job History or Job Net History button in the toolbar.