In order to delete the database, database environment and the repository settings, perform the database unsetup.
Note
For performing the database unsetup, you must be logged on as the user who has installed the ETERNUS SF Manager. If the database unsetup is performed by a different user, it may be failed.
For systems that were in cluster operation, this task is unnecessary because the settings have been cleared during the deletion of the Management Server transaction.
You should, however, clear the settings according to the instructions in "Deletion of Cluster Environment for Management Server Transactions" or "Deletion of Cluster Environment for Managed Server Transactions" in the ETERNUS SF Cluster Environment Setup Guide. If you uninstall without clearing the settings, uninstallation processing will terminate prematurely with an error.
For using Terminal Service (via a remote desktop connection)
If the operating system of the Management Server is Windows Server 2003, the Terminal Service must connect to the console session (ID 0). Refer to the following links for information on how to make console session connections:
http://support.microsoft.com/kb/947723
http://support.microsoft.com/kb/278845
Do not use the telnet server service for performing the database unsetup, as it will not work properly.
The database unsetup uses Symfoware functions. If other software is used to perform Symfoware monitoring, database unsetup may fail. Therefore, stop Symfoware monitoring before performing executing the database unsetup.
The procedure is as follows:
Click [Start] > [Programs] > [ETERNUS SF Manager] > [DB setup tool].
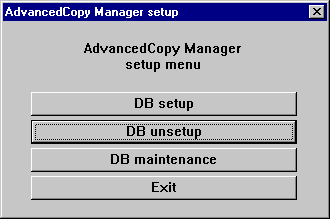
The following screen is displayed. Click the [DB unsetup] button.

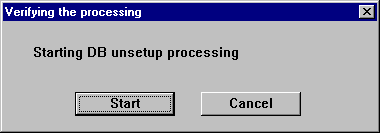
The following verification screen is displayed. Click the [Start] button.

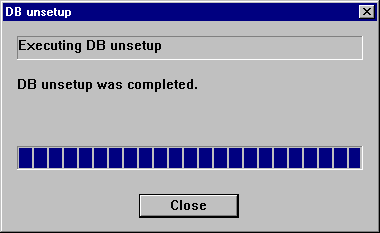
When database unsetup is completed, the following screen is displayed. Click the [Close] button to close the screen.

Finish DB unsetup by clicking the [Exit] button on the screen displayed in step 2.
The procedure is completed.