This section explains the procedure for installing the product on linkage servers.
Point
Using multiple WSUS servers
Install a Systemwalker Software Configuration Manager agent on all WSUS servers.
If WSUS servers have been chained (with upstream servers and downstream servers)
Install Systemwalker Software Configuration Manager agents on both upstream and downstream servers.

Procedure for installing on linkage servers
Use the following procedure to install Systemwalker Software Configuration Manager agents:
Log in with administrator privileges.
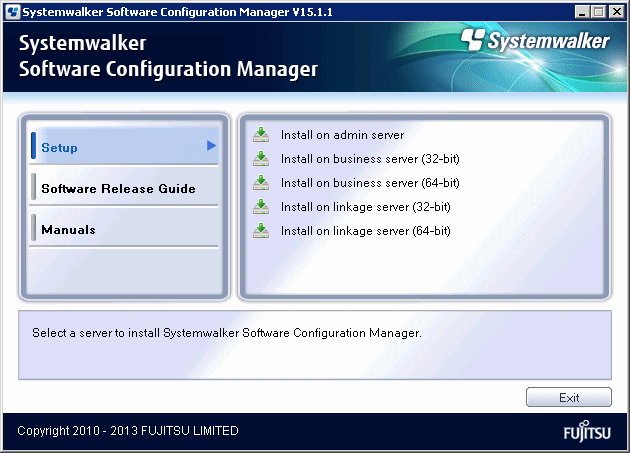
Insert the DVD-ROM labeled "Systemwalker Software Configuration Manager Media Pack 15.1.1" in the DVD-ROM drive.
The following window will be displayed:
Note
If this window is not displayed automatically, start the installer manually by executing "swsetup.exe" on the DVD-ROM.
Select either Install on linkage server (32-bit) or Install on linkage server (64-bit).
Select either the 32-bit version or the 64-bit version depending on the CPU architecture for the server where the product is to be installed.
A welcome window will be displayed.
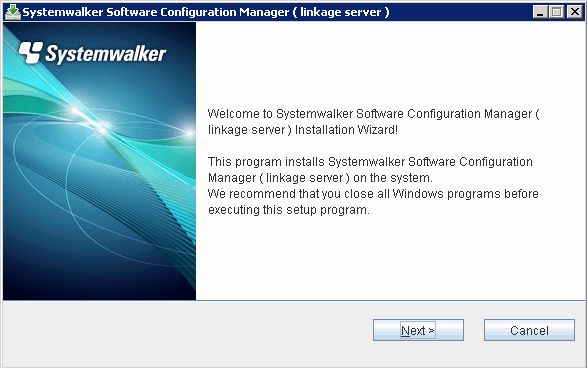
Click the Next button.
The Select the installation target window will be displayed.
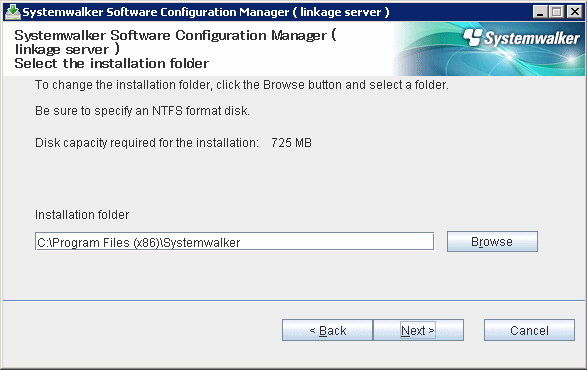
Specify the installation directory, and then click the Next button.
Note
Specify an NTFS format disk for the installation folder.
The maximum length of the path to the installation directory is 51 characters.
Be sure to specify a new folder.
Relative paths and paths that start with "\\" cannot be specified.
Only the following characters can be used for the folder name: alphanumeric characters, spaces, hyphens (-), and underscores (_).
A standard directory under "<System Drive>:\Program Files" or "<System Drive>:\Program Files (x86)" can also be specified.
The Admin server settings window will be displayed.
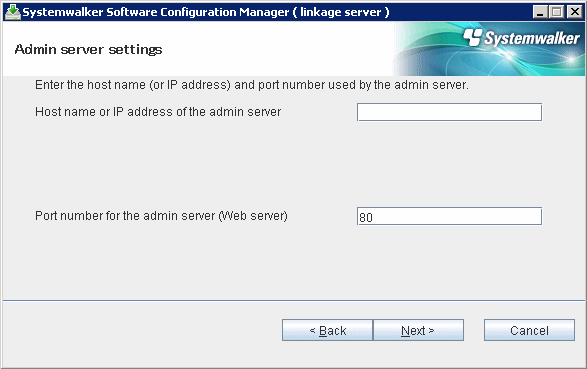
Enter the appropriate values for the following items and then click the Next button.
Host name or IP address of the admin server
Port number for the admin server (Web server)
The Confirm the installation settings window will be displayed.
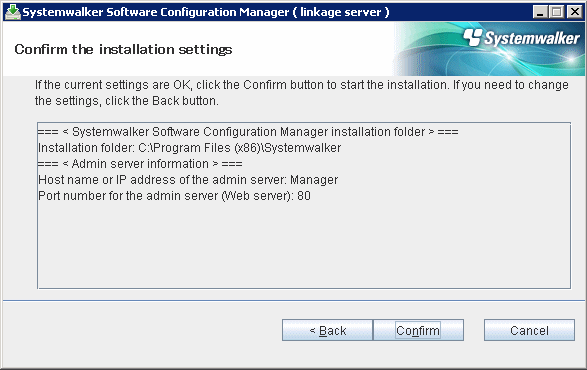
If there is no problem with the settings, click the Confirm button to start the installation.
When the installation completes, the following window will be displayed:

Click the Finish button.