This section explains the procedure for defining the Decision Table action.
Prerequisites:
You have created a Decision Table and defined your conditions, results, and decisions in it.
The process definition where the Decision Table action is defined contains required User Defined Attributes (UDAs).
To integrate a Decision Table:
Open the process definition that will contain your Decision Table by double clicking the .XPDL from the Process Definitions folder.
To associate your Action with an activity, select the Action Set option from Properties view.
Click Add in the corresponding Role Actions, Epilogue Actions, or Prologue Actions tabs, where you want to add the Java Action. The Action Type List dialog is displayed.
Expand Rules Actions and double click Decision Tables.
The Action editor - Set Rules dialog is displayed.
Type a descriptive name and notes for the Java Action in Action Name and Notes fields respectively.
Select the Rules Set to which your Decision Table belongs.
The Rules Set drop-down list displays all the available Rules Sets for the application.
Select the Decision Table that you want to use.
The Decision Table drop-down list displays all the Decision Tables in the selected Rules Set.
Figure 10.11 Integrating Decision Tables
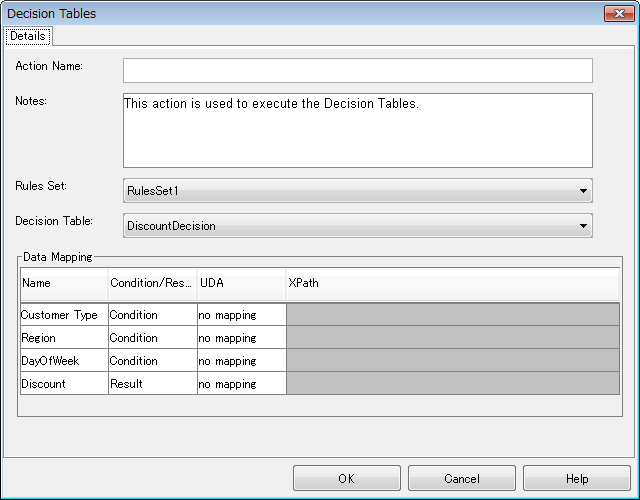
In the Data Mapping table, click in the UDA column and select UDAs that you want to assign to the conditions and results, from the drop-down list.
Note
By default, no mapping is displayed in the UDA column. When you click in it, drop-down list of the UDAs is displayed. XML UDAs are displayed in the drop-down list in UDA column irrespective of the type of the Condition or Result provided the process definition has XML UDAs. For example, if a Condition is of String type then the UDA drop-down list for that Condition will also display the XML UDAs even if the type of the Condition is String.
When you select a UDA in the UDA column of the Data Mapping table, you need to click inside any other field of the same table in order to confirm the selection of the UDA for assigning it to the respective condition and result.
Mapping UDAs to Conditions is mandatory but mapping UDAs to Results is optional. If you do not map UDAs to Conditions and click OK, an error message is displayed. If you do no map UDAs to Results and click OK, a warning message is displayed. You can click OK on the warning message and still assign Decision Tables to the Java Action.
If the UDA is of type XML then, click in the field in the XPath column and select the XPath expression for the UDA from the drop-down list.
Note
An error message is displayed if XPath is not provided for UDA of type XML.
The XPath expressions related to the selected XML UDA are displayed in the XPath drop-down list. When XML Schema is defined in selected UDA, the XPath list that can be used with this XML Schema is displayed. When Initial value is defined in selected UDA, the XPath list that can be used with this Initial value is displayed. When both are defined, Xpath list of XML Schema is displayed.
Optional: If you want to edit the XPath expression that you selected in the XPath drop-down list, click the ellipsis (...) button that is displayed next to the drop-down list. XPath Editor dialog is displayed with the selected XPath expression in its editor area. You can edit this XPath expression and click OK to use the edited XPath expression.
Note
The edited XPath expression is displayed as the latest XPath in the XPath drop-down list.
XPath Editor only validates the syntax of the XPath. It does not check if the edited XPath expression exists or not.
Click OK to close the Action editor dialog.
Note
It is not necessary to compensate this action using a compensation action, because changes made by this action are in Systemwalker Runbook Automation only and they will be rolled back after the process instance goes into error state. For information on compensation actions, refer to section 11.1.7 Dealing With Errors in Java Actions.