This section explains how to use the Scheduled Report View.
Starting the Scheduled Report View
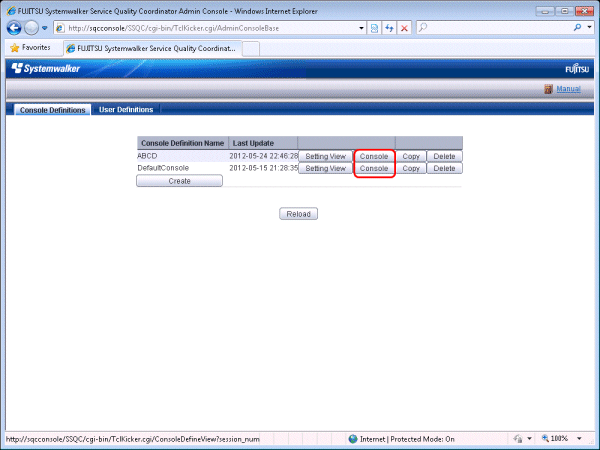
Open the Scheduled Report View by clicking the Console button on the Console Definitions tab of the Admin Console.
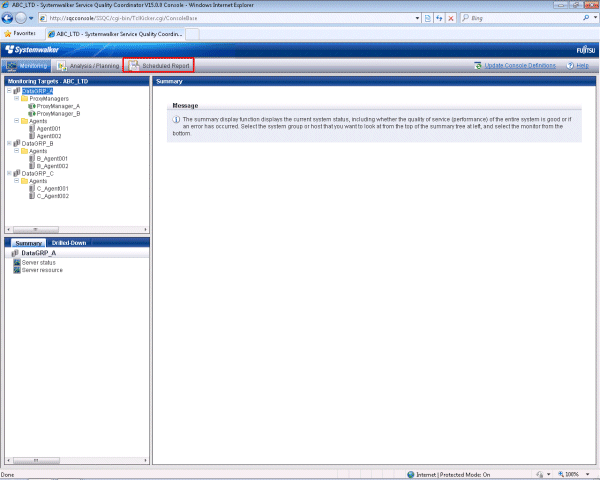
The Scheduled Report View is started by selecting Scheduled Report from the global navigation bar in the Console window.
Note
Do not perform operations in the Scheduled Report View using the pop-up context menu that appears when the right mouse button is clicked.
Window configuration
The Scheduled Report View window will appear as below.
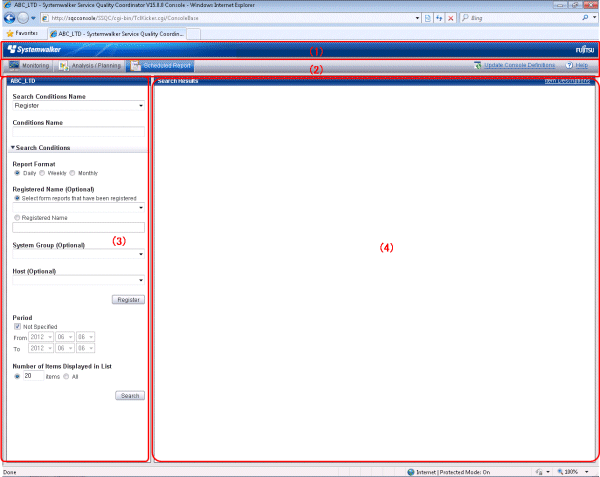
The Scheduled Report View is organized as shown in the following table.
Item No. | Component | Description |
|---|---|---|
(1) | Global header | The Systemwalker and Fujitsu logos are displayed. |
(2) | Global navigation bar | The menus are as follows:
|
(3) | Search conditions area | Set the search conditions to display the daily, weekly and monthly scheduled reports that were created in "5.3.1 sqcMakeReport(Scheduled Report Creation Command)". Search conditions can be registered. |
(4) | Scheduled reports list area | Scheduled reports are listed according to the search conditions specified in (3). |
Basic operation of the Scheduled Report view
It is possible to operate it on the Scheduled Report view as follows.
Operation | Description |
|---|---|
Scheduled report displayed | The scheduled report made by the sqcMakeReport command is displayed. Refer to "5.3.1 sqcMakeReport(Scheduled Report Creation Command)". |