This section explains the procedure for installing a Systemwalker Service Quality Coordinator Operation Management Client.
Note that the Operation Management Client is installed on a Windows machine.
Required privileges
The user must have the privileges of a member of the Administrators group.
Starting the Installer
Log onto the Windows machine and insert the product DVD-ROM into the DVD-ROM drive.
The installer will start automatically.
Point
The Installer may not start automatically depending on the settings of the machine where the product is to be installed. In this case, the Installer can be started manually as follows:
Select Run from the Start menu.
When the Run window appears, click the Browse button, select the following file, and then click the OK button:
Windows
DVD-ROM drive:\SwSetup.exe
UNIX
/mnt/cdrom/client/SwSetup.exe (*)
*: If necessary, change the mount point of the DVD-ROM device ("/mnt/cdrom" in the above example) to match the environment.
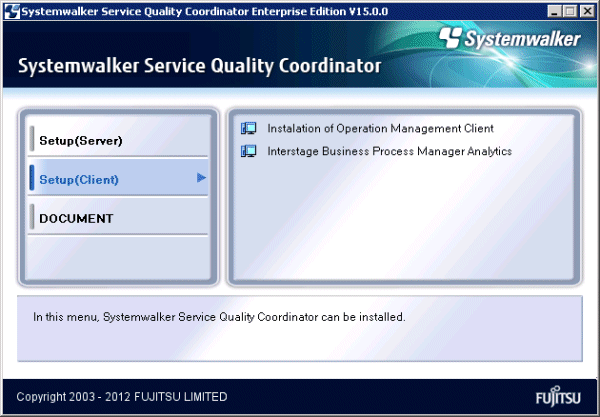
Select components
Click Setup (Client) and select Install Operation Management Client.
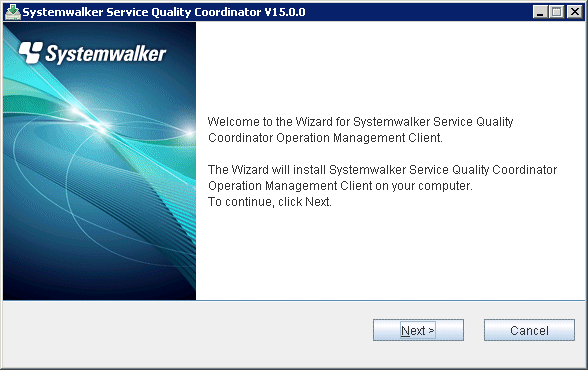
The Installation window (Welcome window) is displayed.
Select Next.
Select an installation directory
Enter the installation directory and then select Next.

Note
Specify the disk of the NTFS standard for the installation directory.
The path starts with "\\" or relative path cannot be specified.
The character which can be used for directory name is an alphanumeric character, "-"(hyphen), and "_" (underscore).
Enter the connection destination
Enter the host name or IP address of the Manager to be connected and then select Next.
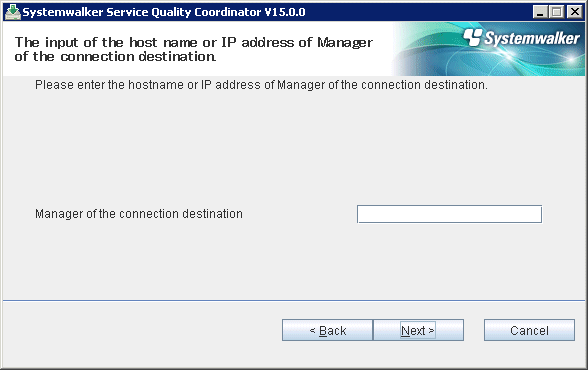
Note
Do not specify "local host" even if the Manager and the Operation Management Client are on the same machine. Enter the host name or IP address of the Manager to be connected is required.
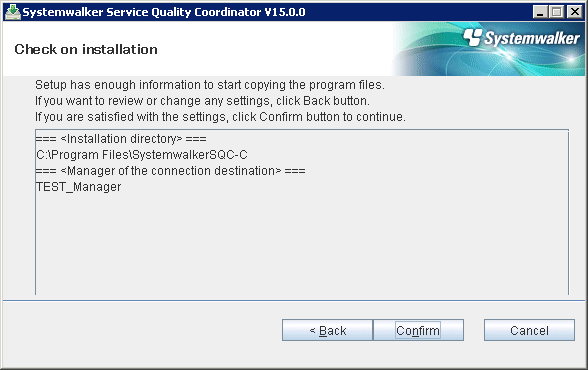
Check on installation
Confirm the settings are correct and then select Confirm.
Complete
When installation has completed, the following window will be displayed. Select Finish to complete the installation.
