This section explains the procedure for installing Systemwalker Service Quality Coordinator on a Windows server.
Required privileges
The user must have the privileges of a member of the Administrators group.
Starting the Installer
Log onto the Windows machine and insert the product DVD-ROM into the DVD-ROM drive.
The installer will start automatically.
Point
The Installer may not start automatically depending on the settings of the machine where the product is to be installed. In this case, the Installer can be started manually as follows:
Select Run from the Start menu.
When the Run window appears, click the Browse button, select the following file, and then click the OK button:
DVD-ROM drive \SwSetup.exe
Select components
Click Setup (Server) and select the components from the list to be installed.
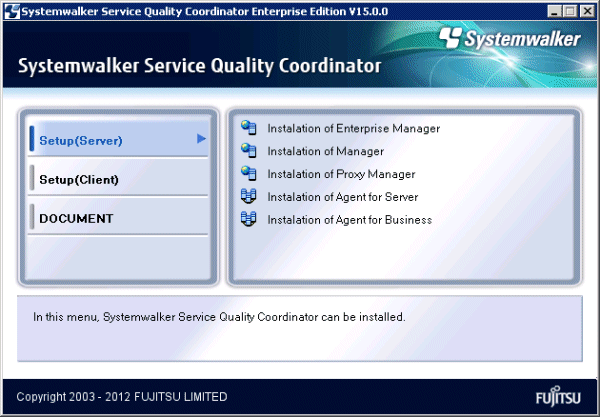
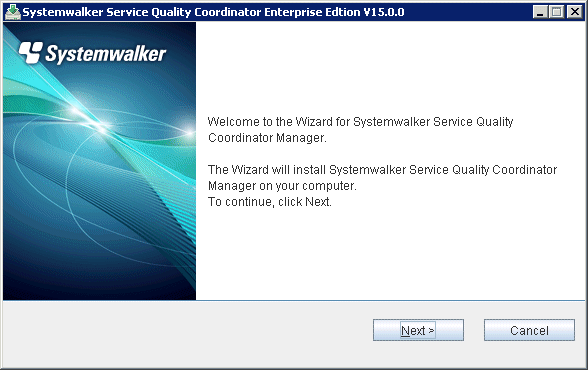
The Installation window (Welcome window) is displayed.
Select Next.
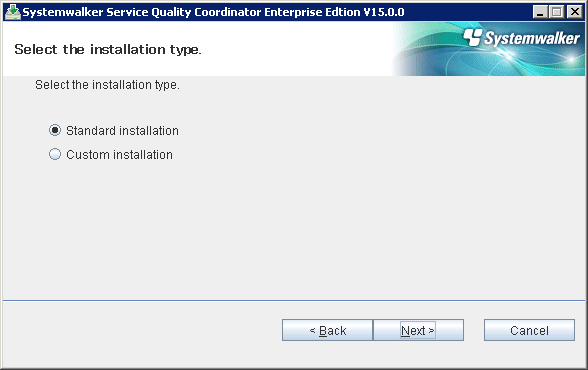
Select the installation type
Select Standard installation or Custom installation and then select Next.
Note
Specify the disk of the NTFS standard for the installation directory.
The path starts with "\\" or relative path cannot be specified.
The character which can be used for directory name is an alphanumeric character, "-"(hyphen), and "_" (underscore).
Typical installation
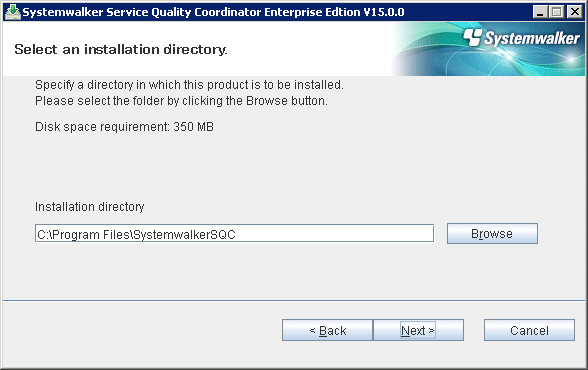
Select an installation directory
Enter the installation directory and then select Next.
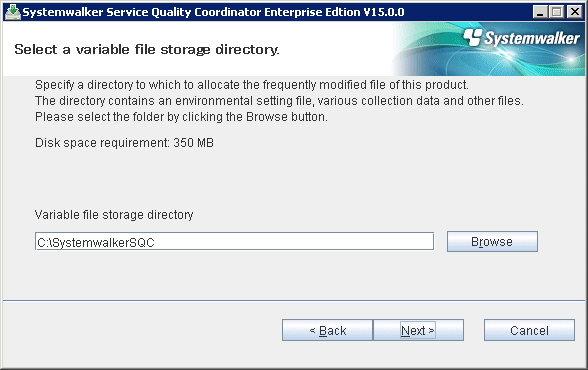
Select a variable file storage directory
Enter the variable file storage directory and then select Next.
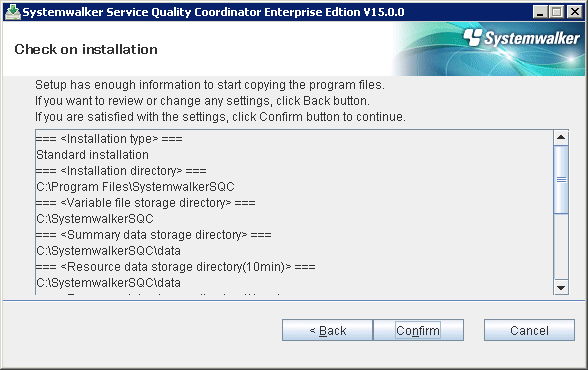
Check on installation
Confirm the settings are correct and then select Confirm.
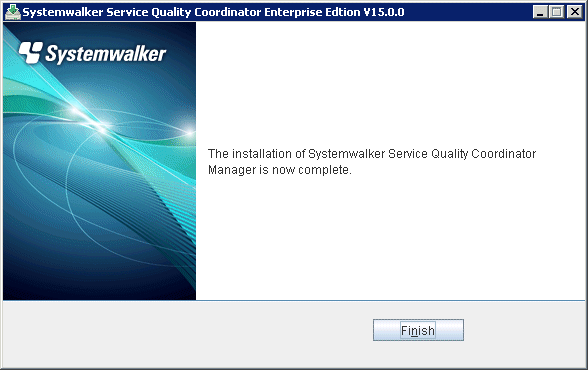
Complete
When installation has completed, the following window will be displayed. Select Finish to complete the installation.
Custom installation
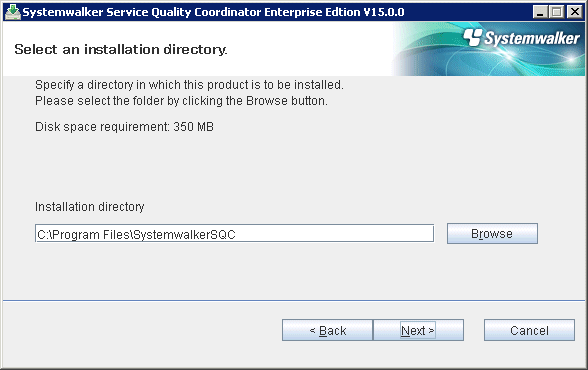
Select an installation directory
Enter the installation directory and then select Next.
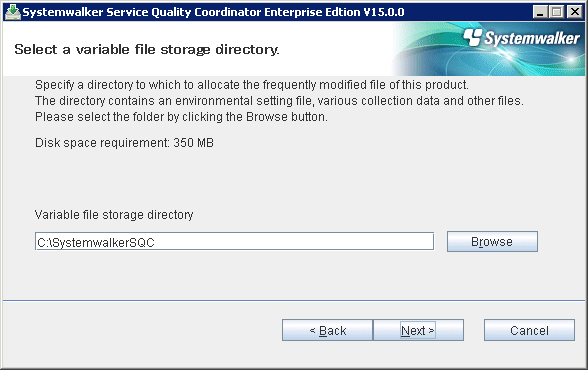
Select a variable file storage directory
Enter the variable file storage directory and then select Next.
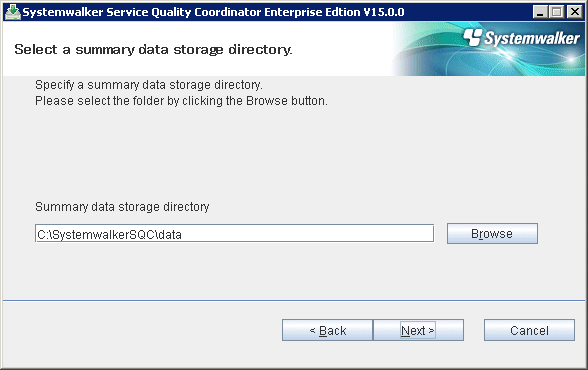
Select the storage directory of the performance database (summary data)
Enter the storage directory of the performance database and then select Next.
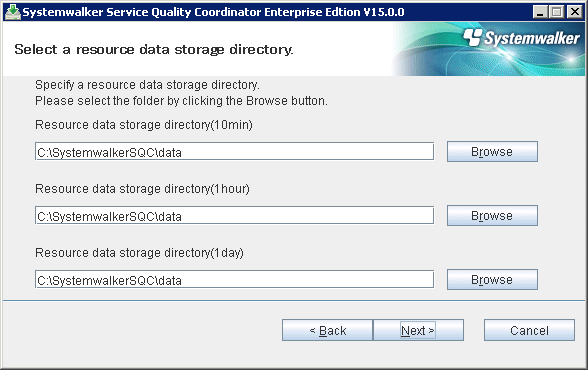
Select the storage directory of the performance database (resource data)
Enter the storage directory of the performance database and then select Next.
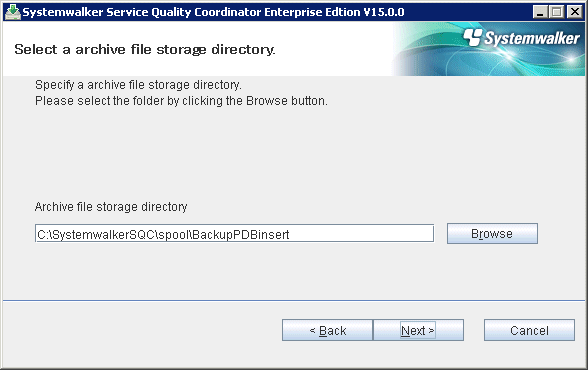
Select the storage directory of the archive files.
Enter the storage directory of the archive files and then select Next.
Point
By splitting the Manager physical disk into summary data, resource data and archive files, the number of Agents that can be managed by one Manager can be extended to approximately 300.
Refer to "Changing the PDB/Archive File Storage Location" in the Installation Guide for details on how to split the disk.
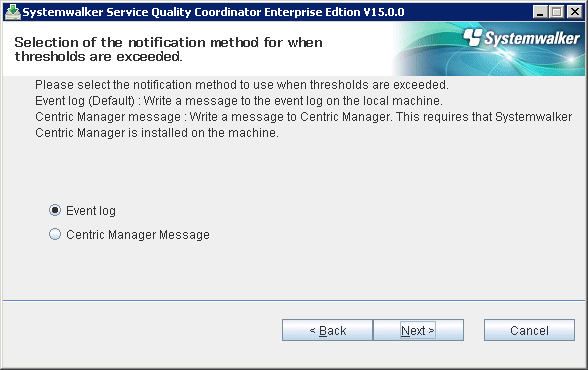
Select the threshold violation notification method
Select the notification method for when thresholds are exceeded and then select Next.
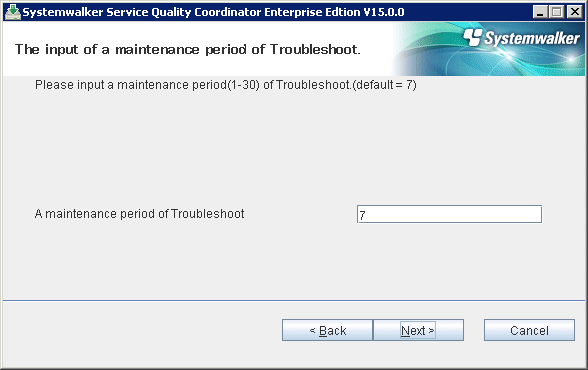
Enter the retention period for log data (Troubleshoot)
Enter the retention period for log data (Troubleshoot) and then select Next.
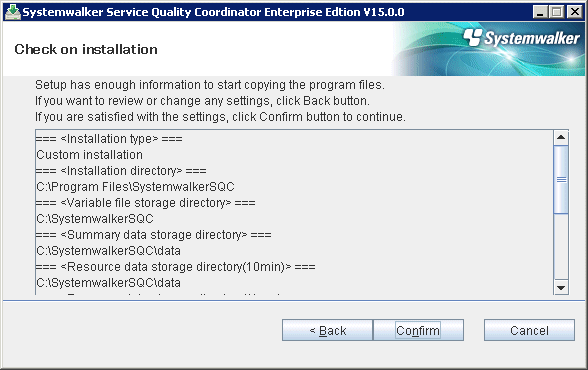
Check on installation
Confirm the settings are correct and then select Confirm.
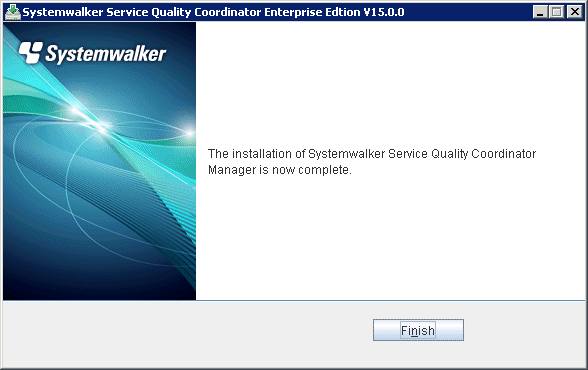
Complete
When installation has completed, the following window will be displayed. Select Finish to complete the installation.
This section explains the procedure for installing Systemwalker Service Quality Coordinator on a Linux/Solaris server.
Required privileges
The user must have the privileges of the system administrator (superuser).
Starting the Installer
Insert the Systemwalker Service Quality Coordinator DVD-ROM (Server) into the DVD-ROM drive of the UNIX machine.
Mount the DVD-ROM.
Point
The DVD-ROM may be mounted automatically by the volume management daemon, so check the mount status of the DVD-ROM. If it is not mounted, perform the following steps:
Solaris
# mkdir -p /cdrom/cdrom0 (*1)
# /usr/sbin/mount -F hsfs -o ro /dev/dsk/cntndnsn /cdrom/cdrom0 (*2)
#
*1: This operation is required only when /cdrom/cdrom0 does not exist.
*2: Change n to match the DVD-ROM drive of the machine where the product is being installed.
Linux
# mount -r -t iso9660 /dev/cdrom /mnt/cdrom (*)
*: If necessary, change the mount point of the DVD-ROM device ("/mnt/cdrom" in the above example) to match the environment.
Start the installation shell script.
An execution example is shown below. The drive mount point is /mnt/cdrom in this example.
/mnt/cdrom/swsetup
Note
If the DVD-ROM mounted automatically, the following message may appear due to permission being denied:
-bash: <mount point>/swsetup: /bin/sh: bad interpreter: Permission denied
If this occurs, unmount the DVD-ROM, and then start again at step 2 to remount it.
Start window
Press the Enter key.
==========================================================================
                Systemwalker Service Quality Coordinator Setup
                                     V15.0.0
 All Rights Reserved, Copyright(C) FUJITSU LIMITED && FUJITSU AUSTRALIA LIMITED
                                    2003-2012
==========================================================================

Welcome to Systemwalker Setup!!
This program installs Systemwalker Service Quality Coordinator on your system.

Press Enter.
Select components
Enter the numbers corresponding to the components to be installed and press the Enter key.
==========================================================================
                Systemwalker Service Quality Coordinator Setup
                                     V15.0.0
 All Rights Reserved, Copyright(C) FUJITSU LIMITED && FUJITSU AUSTRALIA LIMITED
                                    2003-2012
==========================================================================

<< Select Installation type >>

 1.Enterprise Manager
 2.Manager
 3.Proxy Manager
 4.Agent for Server
 5.Agent for Business

--------------------------------------------------------------------------
Please specify installation type. [?,q] ==> 2
Select the installation type
==========================================================================
                Systemwalker Service Quality Coordinator Setup
                                     V15.0.0
 All Rights Reserved, Copyright(C) FUJITSU LIMITED && FUJITSU AUSTRALIA LIMITED
                                    2003-2012
==========================================================================


Select installation type
	1.Standard installation
	2.Custom installation
Select installation type (default: 1)[1, 2, ?, q]
> 1
Select "1" for typical installation and select "2" for custom installation.
Typical installation
Confirm the installation directory
If the installation directory is correct, enter "n" and press the Enter key. If the installation directory needs to be changed, enter "y" and press the Enter key.
**********************************************************************
Default installation information is following:
	Program install directory        : /opt
	Fixed configuration directory    : /etc/opt
	Variable configuration directory : /var/opt
Do you want to change the above information? (default: n)[y, n, ?, q]
If "y" is entered, the following window will be displayed to allow the user to change the installation directory.
Please specify program install directory. (default: /opt)[?, q]
> /opt2
Please specify fixed configuration directory. (default: /etc/opt)[?, q]
> /etc/opt2
Please specify variable configuration directory. (default: /var/opt)[?, q]
> /var/opt2
Note
The following directory cannot be specified.
Installation directory
/opt/FJSVssqc
Definition file directory
/etc/opt/FJSVssqc
Variable file directory
/var/opt/FJSVssqc
Confirm installation
**********************************************************************
Current installation information is following:
	Program install directory         : /opt2
	Fixed configuration directory     : /etc/opt2
	Variable configuration directory  : /var/opt2
	Summary data location             : /var/opt2/FJSVssqc/PDB
	Resource data(10minutes) location : /var/opt2/FJSVssqc/PDB
	Resource data(1hour) location     : /var/opt2/FJSVssqc/PDB
	Resource data(1day) location      : /var/opt2/FJSVssqc/PDB
	Archive file location             : /var/opt2/FJSVssqc/BackupPDBinsert
	Alert action                      : syslog
	Troubleshoot Cycle                : 7
Do you want to continue with the installation of Systemwalker Service Quality Coordinator Manager [y,n]
> y
Enter "y" and press the Enter key to start the installation.
Complete
When installation has completed, the following message will be displayed.
The installation of Systemwalker Service Quality Coordinator Manager is now complete.
Custom installation
Confirm the installation directory
If the installation directory is correct, enter "n" and press the Enter key. If the installation directory needs to be changed, enter "y" and press the Enter key.
**********************************************************************
Default installation information is following:
	Program install directory        : /opt
	Fixed configuration directory    : /etc/opt
	Variable configuration directory : /var/opt
Do you want to change the above information? (default: n)[y, n, ?, q]
> y
If "y" is entered, the following window will be displayed to allow the user to change the installation directory.
Please specify program install directory. (default: /opt)[?, q]
> /opt2
Please specify fixed configuration directory. (default: /etc/opt)[?, q]
> /etc/opt2
Please specify variable configuration directory. (default: /var/opt)[?, q]
> /var/opt2
Note
The following directory cannot be specified.
Installation directory
/opt/FJSVssqc
Definition file directory
/etc/opt/FJSVssqc
Variable file directory
/var/opt/FJSVssqc
Confirm the performance database storage directory
If the performance database storage directory is correct, enter "n" and press the Enter key. If the performance database storage directory needs to be changed, enter "y" and press the Enter key.
**********************************************************************
Default PDB storage location is following:
	Summary data location             : /var/opt2/FJSVssqc/PDB
	Resource data(10minutes) location : /var/opt2/FJSVssqc/PDB
	Resource data(1hour) location     : /var/opt2/FJSVssqc/PDB
	Resource data(1day) location      : /var/opt2/FJSVssqc/PDB
Do you want to change the above information? (default: n)[y, n, ?, q]
> y
If "y" is entered, the following window will be displayed to allow the user to change the performance database storage directory.
Please specify summary data location. (default: /var/opt2/FJSVssqc/PDB)[?, q]
> /data1
Please specify resource data(10minutes) location. (default: /var/opt2/FJSVssqc/PDB)[?, q]
> /data2
Please specify resource data(1hour) location. (default: /var/opt2/FJSVssqc/PDB)[?, q]
> /data2
Please specify resource data(1day) location. (default: /var/opt2/FJSVssqc/PDB)[?, q]
> /data2
Confirm the archive storage directory
If the archive storage directory is correct, enter "n" and press the Enter key. If the archive storage directory needs to be changed, enter "y" and press the Enter key.
**********************************************************************
Default archive file location is following:
	Archive file location            : /var/opt2/FJSVssqc/BackupPDBinsert
Do you want to change the above information? (default: n)[y, n, ?, q]
> y
If "y" is entered, the following window will be displayed to allow the user to change the archive storage directory.
Please specify program install directory. (default: /var/opt2/FJSVssqc/BackupPDBinsert)[?, q]
> /data3
Confirm the threshold violation notification method
If the notification method is correct, enter "n" and press the Enter key. If the notification method needs to be changed, enter "y" and press the Enter key.
**********************************************************************
Default alert action is following:
	Alert action: syslog
Do you want to change the above environment? (default: n)[y, n, ?, q]
> y
If "y" is entered, the following window will be displayed to allow the user to change the threshold violation notification method.
Please specify alert action.
  centric:Message link operation with Centric Manager (default: syslog)[syslog, centric, ?, q]
> centric
Confirm the retention period for log data (Troubleshoot)
If the retention period for log data is correct, enter "n" and press the Enter key. If the retention period for log data needs to be changed, enter "y" and press the Enter key.
**********************************************************************
Default troubleshoot cycle is following:
	Troubleshoot Cycle: 7
Do you want to change the above environment? (default: n)[y, n, ?, q]
> y
If "y" is entered, the following window will be displayed to allow the user to change the retention period for log data.
Please specify Troubleshoot cycle.
 (default: 7)[1-30, ?, q]
> 10
Confirm installation
**********************************************************************
Current installation information is following:
	Program install directory         : /data3
	Fixed configuration directory     : /etc/opt2
	Variable configuration directory  : /var/opt2
	Summary data location             : /data1
	Resource data(10minutes) location : /data2
	Resource data(1hour) location     : /data2
	Resource data(1day) location      : /data2
	Archive file location             : /var/opt2/FJSVssqc/BackupPDBinsert
	Alert action                      : centric
	Troubleshoot Cycle                : 10
Do you want to continue with the installation of Systemwalker Service Quality Coordinator Manager [y,n]
> y
Enter "y" and press the Enter key to start the installation.
Complete
When installation has completed, the following message will be displayed.
The installation of Systemwalker Service Quality Coordinator Manager is now complete.