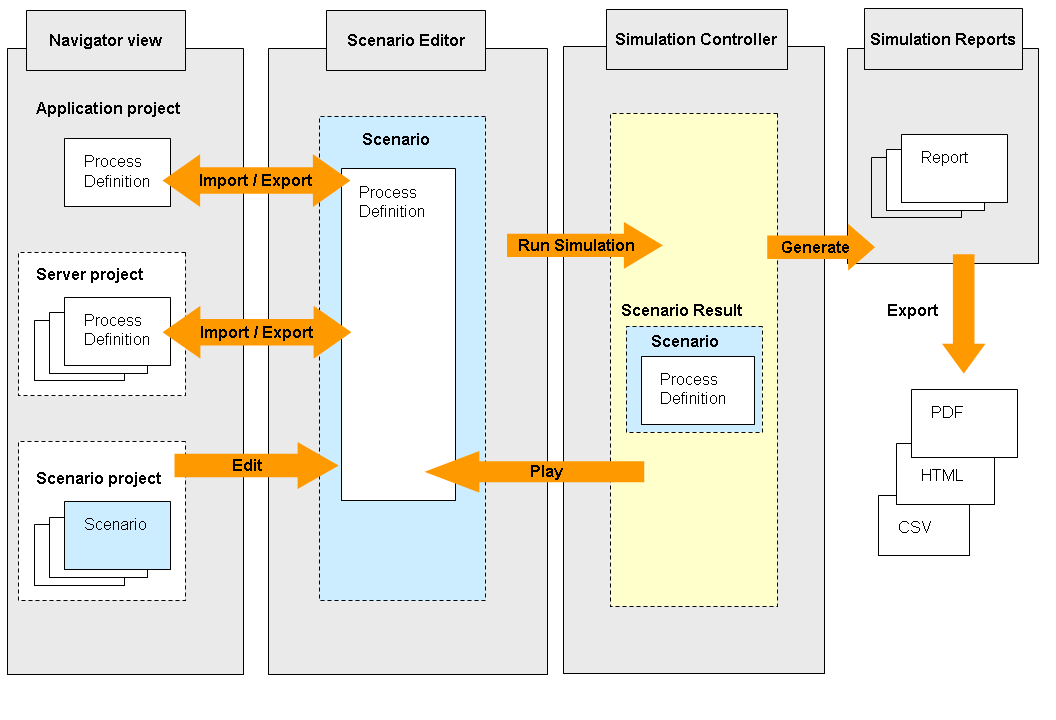
The simulation process consists of various major steps:
In the Navigator view, when you open a new workspace, a simulation scenario folder called Simulation is created, and also when you create a Workflow Application project, a Simulation folder is created in the project structure. This folder is initially empty. Here you start with the creation of a new scenario project.
In the Scenario editor, you define simulation properties for a scenario by editing the scenario. Every scenario must import a process definition from either a Workflow Application or a server project. The process definition used by a scenario can, in turn, be exported to a local or server project. In addition, for every activity defined in the process definition, simulation properties can be specified.
The scenario is calculated for preparing the simulation result by calling the Run Simulation command. The simulation results are automatically saved to the Scenario (.ssr) file and stored in the Simulation folder of your Workflow Application project. In addition, the Simulation Controller is displayed below the Scenario editor.
From the Simulation Controller, the execution of the process simulation is started, the imported process definition is displayed in the Scenario editor and shows the progress of simulation, and simulation reports can be generated for analysis purposes.
The figure below shows this process:
Figure 12.1 Simulation Process Overview