This explains how to create a project that accesses a Management Server:
Select File > New > Project >Server.
New Server Project dialog is displayed.
In New Server Project, in the Project name field, type in a name for your project.
The project that you create corresponds to a folder in the file system. As a default, the project is created in your workspace.
Figure 3.24 Creating a Server Project

To change the location of your project:
Clear the Use default location check box.
Click Browse. Select an existing folder, or create a new one. Click OK.
Click Next. The dialog box for typing in information on the location of the Management Server is opened.
The New Server Project dialog for server information, is displayed. Use this dialog to type in the required server information.
Figure 3.25 Providing server information
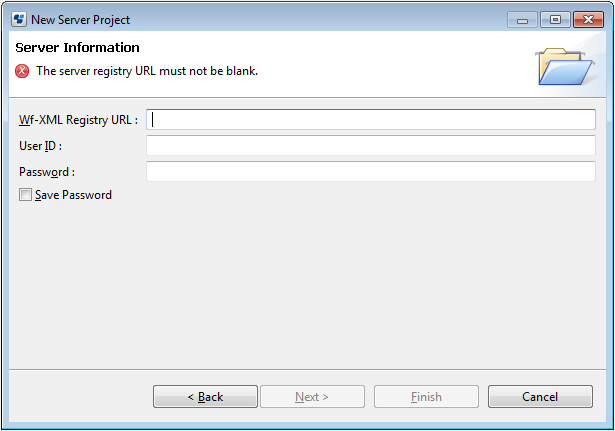
Enter the Wf-XML Registry URL. This URL is composed of the host name, port number. The sample URL is as given below:
http://<hostname>:<port>/<context>/_wfxml/Default/service/registry/
In the following URL, console is the context root for server connection, rbaserveri is the hostname and 80 is the port.
http://rbaserver:80/console/_wfxml/Default/service/registry/
Note
Through a Server Project, you can access only the System application in the Default tenant.
Enter the user ID used to authenticate with Systemwalker Runbook Automation in the User ID field, and enter the associated password in the Password field.
Optional: Check the Save Password check box if you want to save the specified password so that you do not need to provide it again when you log in to the Management Server.
Click Finish.
The new server project is listed in the Navigator view (MyFirstServerProject, in the example):
Figure 3.26 Displaying the new server project
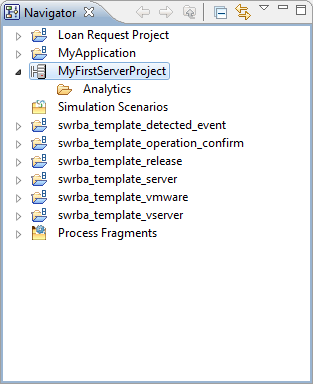
The default server project contains an empty Analytics folder that can be used as an access point for the Analytics application.
Note
Systemwalker Runbook Automation Studio does not use the Analytics function.
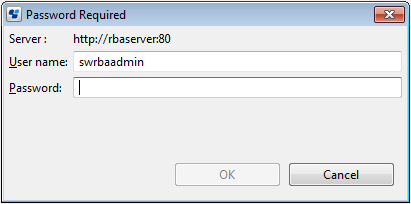
To actually list the process definitions on the server in the Navigator view, you need to login to the server: Right-click the new server project in the Navigator view and select Login. If you saved your password when you created the server project, you are instantly logged in and the process definitions are listed. Otherwise, a dialog is opened in which you must enter the password.
Figure 3.27 Entering a Server Password
To log off from the server again, right-click the server project and select Logoff.
Note
If your process definitions reference external files like forms, business calendars, cascading style sheets, Java classes, or rules files, ensure that these files are available on the computer on which Systemwalker Runbook Automation Studio is installed and that any file paths are adjusted. Refer to the following sections for details.
Note
If logging in to the Management Server fails, the following error message may be displayed:
Login failed. [Details]: Connection refused:connect
or
Login failed. [Details]: Connection timed out:connect
In this case:
Ensure that the connection information required to access the Management Server is correct (Host Name, Port Number and Base URL).
The connection information is displayed on the Server Info page in the Properties for server dialog. To open this dialog, right-click the server project in the Navigator view and select Properties from the pop-up menu.
Check whether the server is started.