This function is not available.
This section describes how to install the Citrix XenApp monitoring function of Systemwalker Desktop Keeper.
If the Citrix Presentation Server monitoring function of an old version has been installed, when installing the V14.2.0 Citrix XenApp monitoring function, please refer to “Chapter 4 Version Upgrade”.
Please refer to the “Port Number List” in “Systemwalker Desktop Keeper Reference Manual” to confirm the port number being used.
The steps to install the Citrix XenApp monitoring function in the Citrix XenApp Server are as follows. In addition, please refer to “Systemwalker Desktop Keeper User’s Guide” for the operating environment.
Log on to Windows with a user that belongs to the Administrators group or a user that belongs to the Domain Admins group. If other applications are being used, please close them.
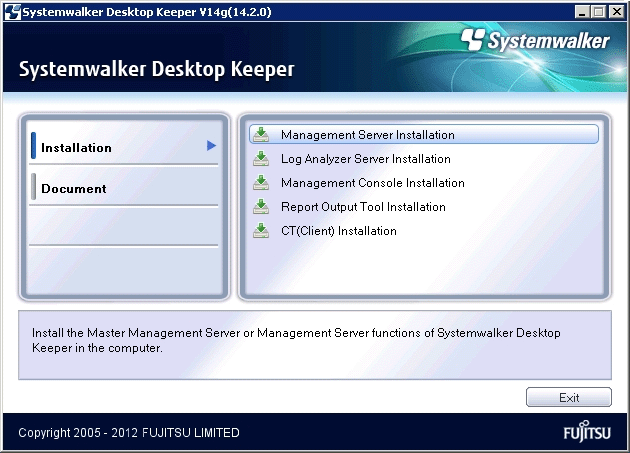
After inserting the CD-ROM of Systemwalker Desktop Keeper into the PC, the following window will be displayed.
Please select “Citrix XenApp Monitoring Installation”.
If the above installer is not started, please start “swsetup.exe” of the CD-ROM Drive.
After the “Welcome to Citrix XenApp Monitoring Setup” window is displayed, please click the [Next] button.
The “Select the installation target” window of Citrix XenApp monitoring function is displayed.
If the displayed installation target is not to be changed, click the [Next] button.
If the displayed installation target is to be changed, please click the [Browse] button of the folder expected to be changed, and click the [Next] button after the folder has been changed.
Note
Please exclude the compressed and encrypted targets
When the installation target folder of the Citrix XenApp monitoring function is taken as a compressed or encrypted target, the application may be affected, so please do not apply compression or encryption settings.
The “Select the installation target” window of log saving target set is displayed.
When the displayed saving target is not to be changed, click the [Next] button.
When the displayed saving target is to be changed, please click the [Browse] button of the folder expected to be changed, and click the [Next] button after the folder has been changed.
Please set the folder under Windows system disk in the folder path for saving log files. (When the OS is installed to the C Drive, the C Drive will be the system disk.)
Note
Please do not specify export prohibited drive
Because logs may be lost, please do not specify the drive with export prohibition in the saving target of log file.
The “Enter the server information” window is displayed. Set the information of server to be connected and click the [Next] button.
[IP Address of Connected (Master) Management Server]: Enter the IP address of the (Master) Management Server to be connected.
When the Citrix XenApp Server is used in multiple computers, please unify [IP Address of Connected (Master) Management Server] in all Citrix XenApp Servers.
[IP Address of Backup Management Server]: When the connected (Master) Management Server is abnormal, enter the IP address of the backup Management Server for inquiring user policy.
The IP address of the backup Management Server can be omitted. In addition, the function is effective when all the following conditions are satisfied.
The Management server is in a 3-level structure
Users are managed collectively
Action of the client (CT) is controlled by user policy.
[Used Port Number (for Receiving)]: Enter the port number used for communication between Citrix XenApp monitoring and server service (for receiving Citrix XenApp monitoring).
[Used Port Number (for Sending)]: Enter the port number used for communication between Citrix XenApp monitoring and server service (for sending the information of Citrix XenApp monitoring function).
[Used Port Number (for Sending 2)]: Enter the port number used for communication between Citrix XenApp monitoring and server service (for collective sending of logs of Citrix XenApp monitoring).
The [Set Printing Monitoring Mode] window will be displayed. Select [Monitoring Printing of All Printers Set in This Terminal (Recommended)] and click the [Next] button.
Note
Setting at installation of printer server on Non-Server OS
If the non-server OS (Windows Server® 2003 or Windows Server® 2008) is taken as the printer server and set to [Monitoring the printing of all printers set in this terminal (Recommended)], the printer server will not be able to connect more than 10 clients for printing. At this time, please set to [Monitoring Monitoring the printing of local printer only]. When setting [Monitoring the printing of local printer only], please refer to the Step 10 of “2.5.1.1 Wizard-style Installation”.
When the “Enter Password” window is displayed, please set the password of the tool that displays and changes the status of the client, and click the [Next] button.
In addition, the password set here is required when executing the uninstallation and maintenance commands of the Citrix XenApp monitoring function. The conditions for contents to be entered are as follows:
Up to 32 bytes of single-byte alphanumeric characters and contents apart from the following symbols can be entered.
Symbols that cannot be entered are: “&”“<”“>”“|”“\”“"”“~”“'”“?”“:”“^”.
Double-byte or single-byte space is not allowed.
Single-byte Kana is not allowed.
Note
Please do not forget password
This password is required when executing the uninstallation and maintenance commands of the Citrix XenApp monitoring function. Please be aware that if the password is forgotten, the uninstallation and maintenance commands will not be executed.
The “The installation preparation is completed.” window will be displayed.
When starting installation, please click the [Install] button to start the installation.
When expected to confirm or change the setting, please click the [Return] button to reset.
After normal completion, the “Installation is completed.” window is displayed.
It is required to restart the system to use the application. Select one of the following items and click the [Finish] button.
[Yes, restart the computer immediately.]
[No, restart the computer later.]