Procedure to install the Manager is described below.
The CD-ROM "ETERNUS SF Storage Cruiser 14.2 Manager/Agent (Windows)" is used for installing the Manager.
Before installing ETERNUS SF Storage Cruiser, please refer to "4.3.1.2.3 Exclusive software", and check whether or not exclusive software is installed.
Open the window that can add or remove programs, and check that exclusive software and ETERNUS SF Storage Cruiser Manager are not displayed.
The name of window that can add or remove programs and the method to open its window are as follows.
OS | Name of window | Method to open window |
|---|---|---|
Windows Server 2003 | Add or Remove Programs |
|
Windows Server 2008 | Programs and Features |
|
The following is "Add or Remove Programs" window.

In the event that software information is displayed as a result of the above operation, this is because the software is already installed. Please uninstall it as outlined below.
When required basic software is not installed
Install the basic software.
When exclusive software is installed
Uninstall the exclusive software.
When ETERNUS SF Storage Cruiser Manager is displayed
Refer to "9.3 [Windows] Manager uninstallation" to uninstall the software.
Installation time for this software is around 10 minutes.
Log on to the Manager installation target system.
Please log on as the OS administrator (Administrator) of the terminal.
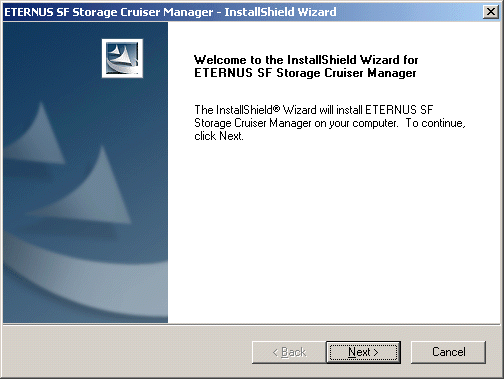
Insert the CD-ROM "ETERNUS SF Storage Cruiser 14.2 Manager/Agent (Windows)" into the CD-ROM drive, open the CD-ROM_drive:\manager\Windows\I32 directory using Explorer or another tool, and execute setup.exe. The following window will be displayed.
Information
For using Windows Server 2008:
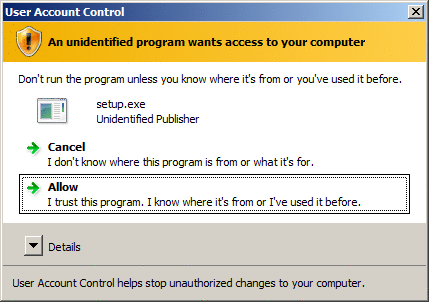
The following warning dialog may be displayed when the setup.exe is executed. In this case, click "Allow".
When the InstallShield window appears, confirm the contents and click <Next> button.
Note
The dialog message below is displayed if a Manager is already installed in the environment, but do not execute the upgrade. Temporarily stop the installation and uninstall the Manager that was already installed.
This setup will perform upgrade of 'ETERNUS SF Storage Cruiser Manager'. Do you want to continue?
When the window of Install Shield is minimized, please maximize it by using the task manager. The procedure is as follows.
Push the [Ctrl] + [Alt] + [Del] key and start the task manager.
Select task manager's [Applications] tag.
Select this installer application from the list of the task, and click [Switch To] button.
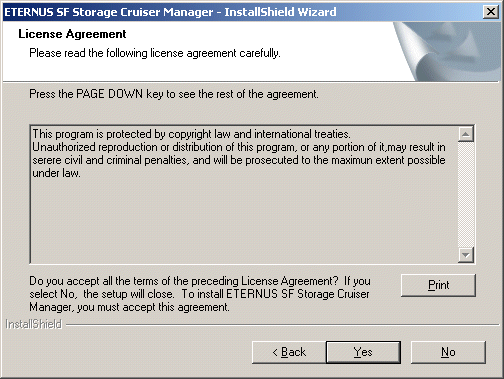
On the License Agreement window, accept the agreement.
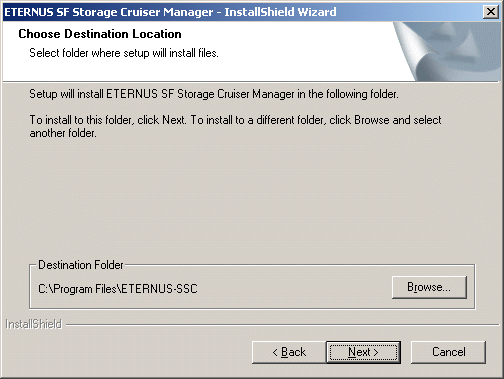
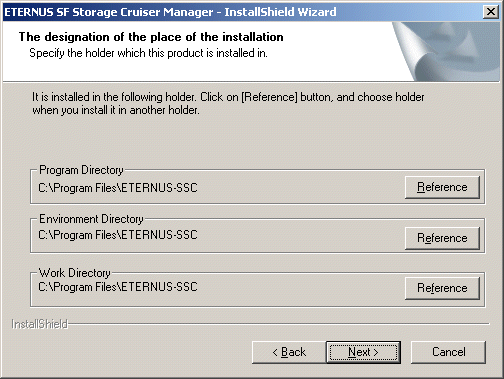
Select the installation directory for ETERNUS SF Storage Cruiser.
In the event that installation is to be performed to a directory other than the default, click <Browse> button and select the directory to install to. When directory specification is completed, click <Next> button.
Note
You can specify installation directory names using any printable ASCII characters other than the following symbols.
" | : * ? / . < > , % & ^ = ! ;
To install in a directory other than the default given in step 5, change the default directory by clicking <Browse> button and select another directory. When all directory specifications are completed, if there are no errors in the configuration details, click <Next> button. To change the settings, click <Back> button.
Note
You can specify installation directory names using any printable ASCII characters other than the following symbols.
" | : * ? / . < > , % & ^ = ! ;
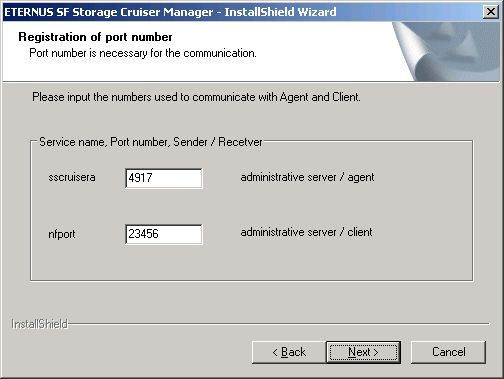
Input the port numbers which are necessary for transmissions with manager, clients, and agents.
The explanation of each tab is as follows:
Set the port numbers which are necessary for transmissions with Manager, and Agent. Please input the same port number when you install Agent. The default port number is "4917".
If default port number is already being used for other purposes, specify an available port number. If the port number was changed, the port number for the same service name set on the other server must also be set to the same value.
Set the port numbers which are necessary for transmissions with Manager, and Client. Please input the same port number when you install Client. The default port number is "23456".
Please choose an available port number in case that default port is already used by other application.
Information
Please confirm the current service file that the port number described above is vacant.
The services file is located in %SystemRoot%\system32\drivers\etc directory. The %SystemRoot% is the directory where the Windows operating system is installed.
OS | Full path name of services file (default) |
|---|---|
Windows Server 2003 | C:\Windows\system32\drivers\etc\services |
Before copy process starts, confirm all the specified content.

Copy process starts.
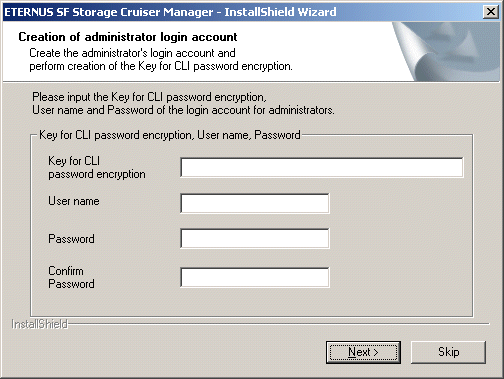
Create the administrator's login account and a CLI encryption key in the following window.
The explanation of each tab is as follows:
Please enter the CLI encryption key to be used (between 4 and 56 characters).
Single-byte alphanumerical characters and symbols can be used.
Notice that CLI encryption is required for ETERNUS SF Storage Cruiser internal use only, and users don't have to remember the key.
Enter the user name of the login account for administrators (between 1 and 16 characters).
The name must start with an alphabetic character, and alphanumerical characters (including underscores, "_", periods, ".", and hyphens, "-") can be used.
Enter the password of the login account for administrators (between 1 and 16 characters).
The password is a string of alphanumerical characters and symbols, but can not start with "{".
For password confirmation, enter the password of the administrator again.
Information
The following message will be displayed, if <Skip> is clicked on the above window.
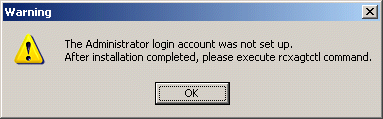
In this case, create the administrator's login account by referring to "12.3.1.1 Administrator login account creation (rcxcert)" in ETERNUS SF Storage Cruiser User's Guide.
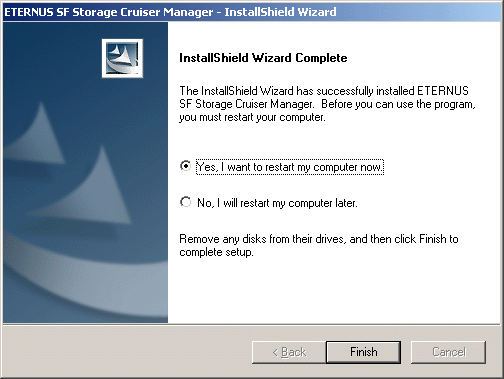
After the copy process is complete, the installation will finish. After completing installation, click <Finish> button, and restart the computer.
The installation is completed. Continuously, execute the post-installation setup by referring to "4.3.4 Post-installation setup".