
| Interstage Shunsaku Data Manager Management Console Guide - Microsoft(R) Windows(R) 2000/ Microsoft(R) Windows Server(TM) 2003 - |
Contents
Index
 
|
| Chapter 1 Operation |
This section describes how to start the Management Console and log in.

Follow the procedure below to start the Management Console.
http://host_name:port_number/IsAdmin/ |
|
Host name |
: |
Specify the host name or IP address of the Admin Server. |
|
Port number |
: |
Specify the port number that is used for the Management Console. If the port number has not been changed, its initial value is "12000". |

In an environment in which Interstage Application Server is installed, users can also start the Management Console from the Windows Start menu by selecting [Programs]-[Interstage]-[Application Server]-[Interstage Management Console].
Specify the following information to log in:

For the user name, specify a user ID that is registered in the operating system of the Admin Server. Log in to the Interstage Management Console as a user who belongs to the "Administrators" group.
Refer to 2.3.2 Setting the Backup Destination for the Environment File for more information on how to set the backup destination for environment files.
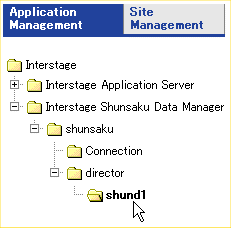
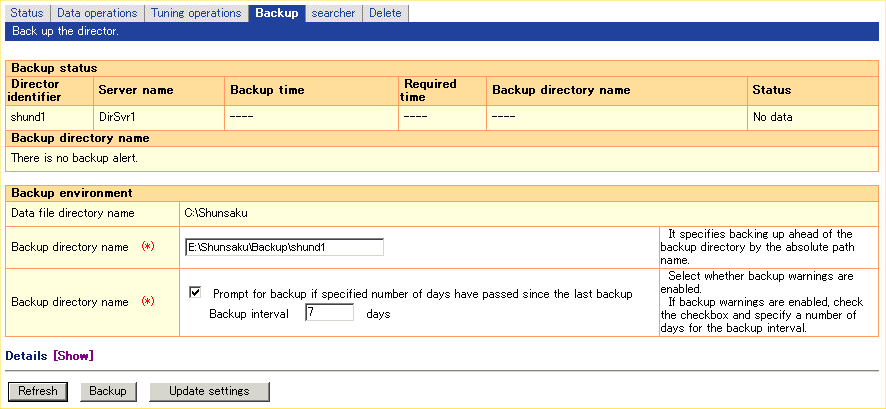
Use the following procedure to set the director data backup destination:

Specify the Backup directory name, then click the Update settings button.

Contents
Index
 
|