

| PRIMECLUSTER Global Disk Services Configuration and Administration Guide 4.1 (Solaris(TM) Operating System) |
|
Contents
|
| Chapter 5 Operation | > 5.3 Operation in Use |
When a disk unit abnormality occurs, contact your local customer support to swap the disk units.
When using GDS, the following procedures are necessary before and after the disk swap:
swap physical disk
restore physical disk
 Identifying a Failed Disk Unit
You should pinpoint a hardware error on a disk unit based on, for example, log messages for the disk driver output in the /var/adm/messages file. For details, see "Disk Unit Error."
Swapping FC-AL Internal Disks
FC-AL internal disks cannot be swapped through these procedures.
For details, see "Swapping FC-AL Internal Disks."
Notes on Physical Disk Swapping
See "Swapping Physical Disks."
In order to swap the disk units, you must take the physical disk offline.
The procedures are explained below.
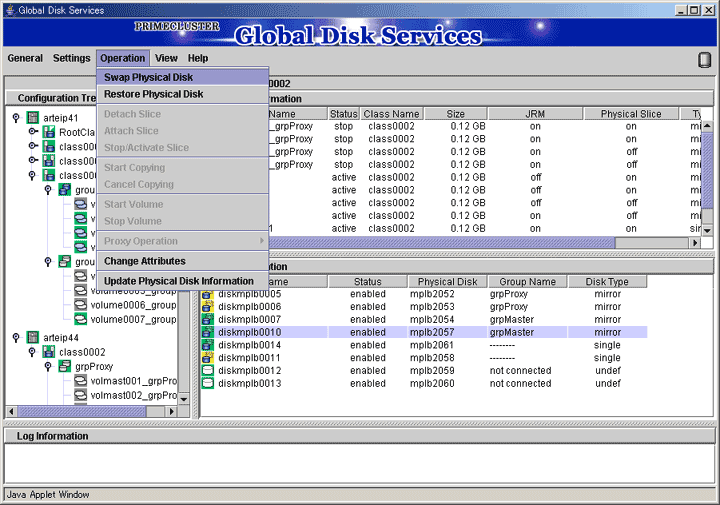
Displaying the status of physical disk
In the Main screen, display the physical disk to be swapped. Click the icon and select the physical disk.
Selecting [Swap Physical Disk]
In the Main screen [Operation] menu, select [Swap Physical Disk].
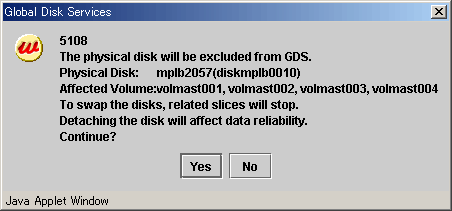
The confirmation screen shown below appears.
To continue the process, click <Yes>. Clicking <No> cancels the physical disk swapping process.
Requesting the swap of physical disks
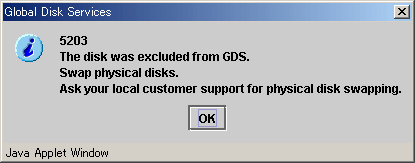
Click <Yes>, and a message notifying the offline status appears.
Click <OK>, and request your local customer support to swap the disk unit.
To swap with a brand-new disk
It is necessary to label the new disk using the format(1M) command before performing the procedure described in "Restore Physical Disk."
After swapping the disk units, you must put the swapped physical disk back online.
The procedures are explained below.
Selecting the physical disk to restore
Select the physical disk you want to restore.
Selecting [Restore Physical Disk] menu
In the Main screen [Operation] menu, select [Restore Physical Disk].

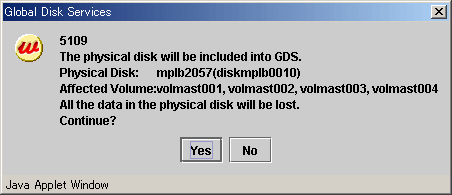
The confirmation screen shown below appears.
To continue the process, click <Yes>. Clicking <No> cancels the physical disk restore process.
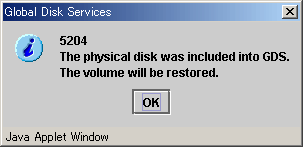
Notifying online status
Click <OK>, and a message notifying the online status appears.
In Cluster Systems
When physical disks for which disk resources are registered with the PRIMECLUSTER resource database are swapped, after recovering the physical disks, conduct automatic resource registration regardless of the class types. It is required to change VTOC volume names of original disks to those of the replacing disks, which are registered with the PRIMECLUSTER resource database. If automatic resource registration is not performed, a message indicating a disk unit connection error may be output, or failover may occur when nodes are started. For details on automatic resource registration, see "PRIMECLUSTER Cluster Foundation (CF) Configuration and Administration Guide Configuration and Administration Guide."
|
Contents
|