

| PRIMECLUSTER Global Disk Services Configuration and Administration Guide 4.1 (Solaris(TM) Operating System) |
Contents
 
|
| Chapter 5 Operation | > 5.3 Operation in Use | > 5.3.2 Backup |
This section describes the procedure for creating backup of a mirror volume making use of a snapshot by detaching a slice. This method requires the following "slice operations."
Detach Slice
Attach Slice
 Use Conditions on Snapshot by Slice Detachment
Slices can be detached only from mirror volumes with physical slices. In other words, if disks are not connected directly to mirror groups, creation of snapshots by slice detachment is impossible.
 Restore
When data is restored back to a volume using data backed up in this procedure, data is restored for the access path to that volume, /dev/sfdsk/class_name/rdsk/volume_name. For details, see "Restore."
In order to create a backup, you must temporarily exclude one of the slices from volume, and make it accessible as a separate volume.
The procedures are explained below.
Displaying the volume status including the slice
In the Main screen, display the volume containing the slice for which you want to create a backup. Click the icon and [Slice Information] appears.
Selecting the slice to detach
In the Slice List, select the slice you want to detach by clicking its icon.
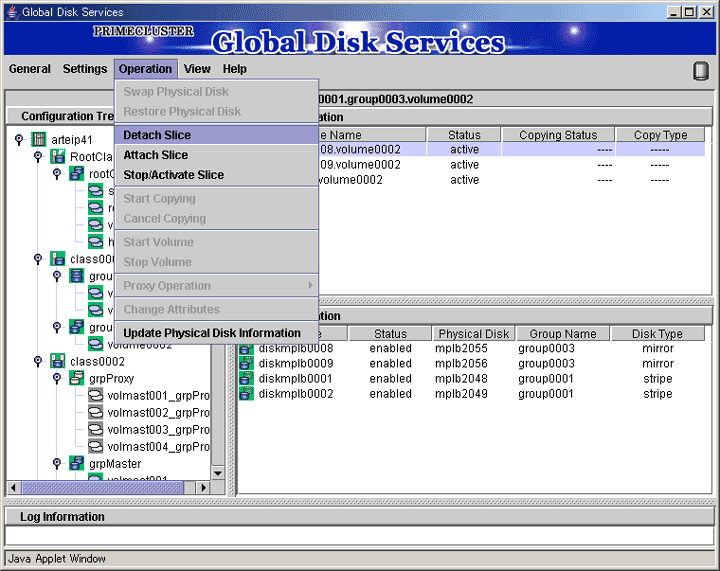
Selecting [Detach Slice] menu
In the Main screen [Operation] menu, select [Detach Slice].
Setting the environment of the detaching slice
We will set the environment of the detaching slice.
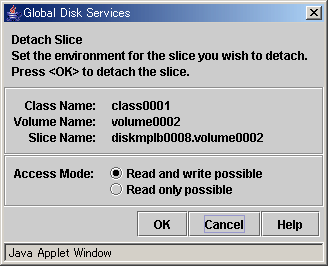
Access Mode
Set the access mode of the detached slice.
The initial value is "Read and write possible."
When you specify "Read only possible," the detached mirror slice will be available for read only. Opening a read-only slice in write mode will result in an error.
Click <OK> after setting the environment. If you click <Cancel>, the detaching of the slice will be cancelled.
 Slice status available for [Detach Slice]
You can only perform [Detach Slice] operation to slices that are in either "active" or "stop" status.
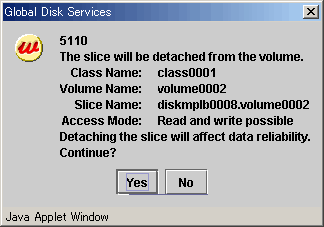
The confirmation screen shown below appears.
To continue the process, click <Yes>. Clicking <No> cancels the slice detachment process.
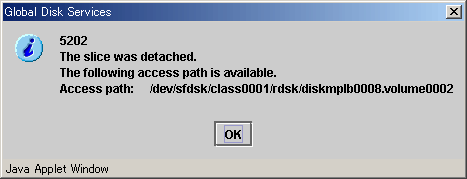
Backup Using Access Path
Click <Yes>, and message notifying the completion of detach slice appears.
Use the access path specified in the message to proceed with backup.
After the backup is complete, the slice that was temporarily detached will be attached to the volume again.
If the volume is activated, synchronization copying will begin.
The procedures are explained below.
Selecting the slice to attach
In the Slice Information field, select the mirror slice you want to attach by clicking its icon.
Selecting [Attach Slice] menu
In the Main screen [Operation] menu, select [Attach Slice].
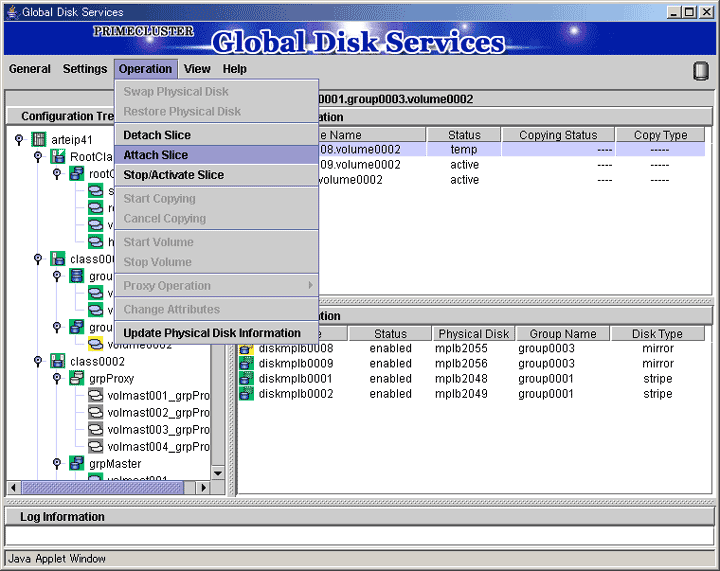
The confirmation screen shown below appears.
To continue the process, click <Yes>. Clicking <No> cancels the slice attachment process.
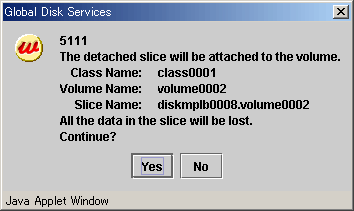
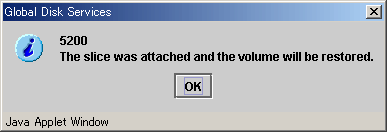
Notifying the completion of Attach Slice
Click <OK>, and a message notifying the completion of Attach Slice appears.
Although the procedure above allows you to use the volume as it is after preparing backup, reliability is affected since one of the slices is excluded.
To ensure reliability, temporarily add a backup disk and perform synchronization copying. After its completion, exclude the slice.
For safe and reliable backup, follow the procedures below.
Register backup disk with class.
Connect backup disk to group.
After completing synchronization copying, stop service.
Detach slice.
Resume service.
Perform backup using access path for backup.
Attach slice.
Disconnect backup disk from group.
Remove backup disk from class.
Completing procedures 1 and 2 in advance will save the waiting time for synchronization copying in procedure 3, therefore reducing the time required for backup.
 Perform [Detach Slice] after Stopping Services
To ensure integrity of backup data, always stop service before excluding the slice.
You may resume service once [Detach Slice] is complete. You do not have to suspend service during the actual backup process.
When excluding the slice without stopping service, run host programs such as fsck (in case of file system) as necessary.
In order to protect data of the slice which has been detached to prepare for backup, a slice with "temp" status will temporarily become inaccessible.
Selecting the slice to stop
In the Slice Information Field, select the slice you want to stop by clicking the "temp" status slice icon.
Selecting [Stop/Activate Slice] menu
In the Main screen [Operation] menu, select [Stop/Activate Slice].
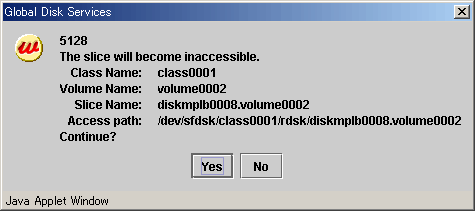
To continue the process, click <Yes>. Clicking <No> cancels the slice stop process.
Reactivate the slice that has become inaccessible ("temp-stop" status) as a result of performing [Stop Slice] operation or switching of the nodes, and make it accessible.
Selecting the slice to activate
In the Slice Information Field, select the slice you want to reactivate by clicking the "temp-stop" status slice icon.
Selecting [Stop/Activate Slice] menu
In the Main screen [Operation] menu, select [Stop/Activate Slice].
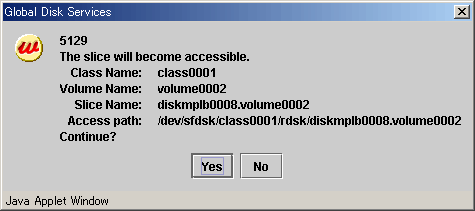
To continue the process, click <Yes>. Clicking <No> cancels the slice activation process.
Contents
 
|