
| PRIMECLUSTER Web-Based Admin View Operation Guide |
Contents
Index
 
|
| Part 2 Web-Based Admin View GUI screen | > Chapter 3 Web-Based Admin View screen startup | > 3.1 Prerequisite for screen startup | > 3.1.3 Web environment |
You need to set up the Web browser environment for the client.
As the supported OS and Web browser varies depending on each operation management product, be sure to check the documentation first.
For the basic browser supported for Web-Based Admin View, refer to "Prerequisite client environment."
For the installation method and environment configuration, follow the instructions for each browser.
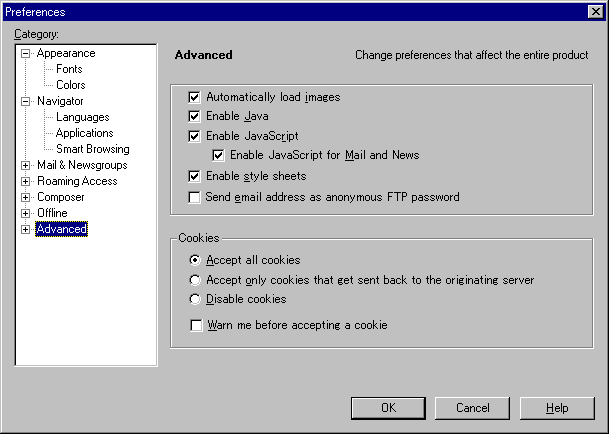
Web-Based Admin View uses a Web browser cookie to identify the client.
For the method of setup to handle cookies, follow the instructions for each browser.
 Cookie setting
The following explains the settings on Netscape Navigator:
 Setup method on Netscape Navigator
This completes the setup.
Perform the following confirmation work.
 Proxy setting
 Setup method on Netscape Communicator
 Setup method on Internet Explorer
Contents
Index
 
|